Smalti con effetto metallico Milton bridge — Metallic effect enamels by Milton Bridge
Negli ultimi mesi ho esplorato i nuovi smalti Metallic Effect di Milton Bridge. Dopo molti test e tentativi, ho realizzato questo articolo per condividere tutto ciò che ho imparato. È pieno di suggerimenti e consigli utili su come sfruttare al meglio questi smalti. Scarica subito gratuitamente il PDF, o scorri più in basso per leggere l’articolo, e scopri tutti gli approfondimenti!
Over the past few months, I've been exploring Milton Bridge's new Metallic Effect enamels. After lots of testing and tinkering, I've written this article to share all I've learned. It's filled with helpful tips and advice on making the most of these enamels. Download the PDF for free, or scroll below to read the article, and uncover all the insights!
Introduction
The release of metallic effect vitreous enamels by Milton Bridge provides new creative possibilities to artists who love experimenting with enamels. Their palette offers 45 different colors (Figures 2 and 3). Of these enamels, 15 are opaque (Table 1), and 30 are transparent (Table 2).
These enamels can be categorized into two groups: shimmer enamels, with a more glittery effect, and metallic enamels, characterized by a surface that looks like metal, even if they are mere glass. The dynamism of these enamels, when harnessed through strategic firings and overlays, unlocks a spectrum of colors and effects, providing enamellers with a vast and uncharted terrain to craft truly unique and inimitable works.
These enamels balance a vitreous enamel base with an element that imparts the metallic or shimmer effect. This equilibrium ensures a stable outcome on various metals. They can be applied on copper, silver, gold, and their derivative alloys. Furthermore, these enamels exhibit exceptional compatibility with both leadfree and leaded enamels. The vitreous enamel base constitutes the undertone color of these enamels. The interplay of light and shadow creates a visual symphony where the metallic and shimmer emerge when touched by light, forming the overtone. Conversely, in subdued lighting, the undertone color emerges, adding depth and complexity to the overall composition. This undertone color intensifies when subjected to overfiring, offering enamellers an additional dimension to explore (Figure 4).
Figure 1: Example of transparent color (No. 25) applied on different bases. From left: on copper, on gold leaf, on silver leaf, on white, on black. Photo taken from the front.
The enamels with light-colored undertones exhibit a heightened sensitivity to the underlying base. They give their best when applied over a dark base such as a black opaque enamel. In contrast, enamels with dark undertones display a greater resilience to the influence of the base, providing artists with a more stable and consistent palette. Figure 1 shows an example of No. 25 applied on different bases.
The colors presented in this report contain lead. However, Milton Bridge assures that leadfree variants will join the palette in the future. These enamels have good wear resistance, comparable to an enamel miniature, and good acid resistance. Still, it is not recommended to leave them in the pickling process longer than necessary to clean the metal.
For a visual exploration of these captivating possibilities, the accompanying color chart (Figures 2 and 3) unveils the enamels applied directly on copper (right half of the circle) and on opaque black enamel (left half of the circle). This color chart highlights the metallic or shimmer effect of each enamel. Scroll below to continue reading.

Figure 2: On the left side, the color is applied over the black base. On the right side, the color is applied on copper. The undertone is not clearly visible. Consult Figure 4 to find out the undertones of individual enamels.
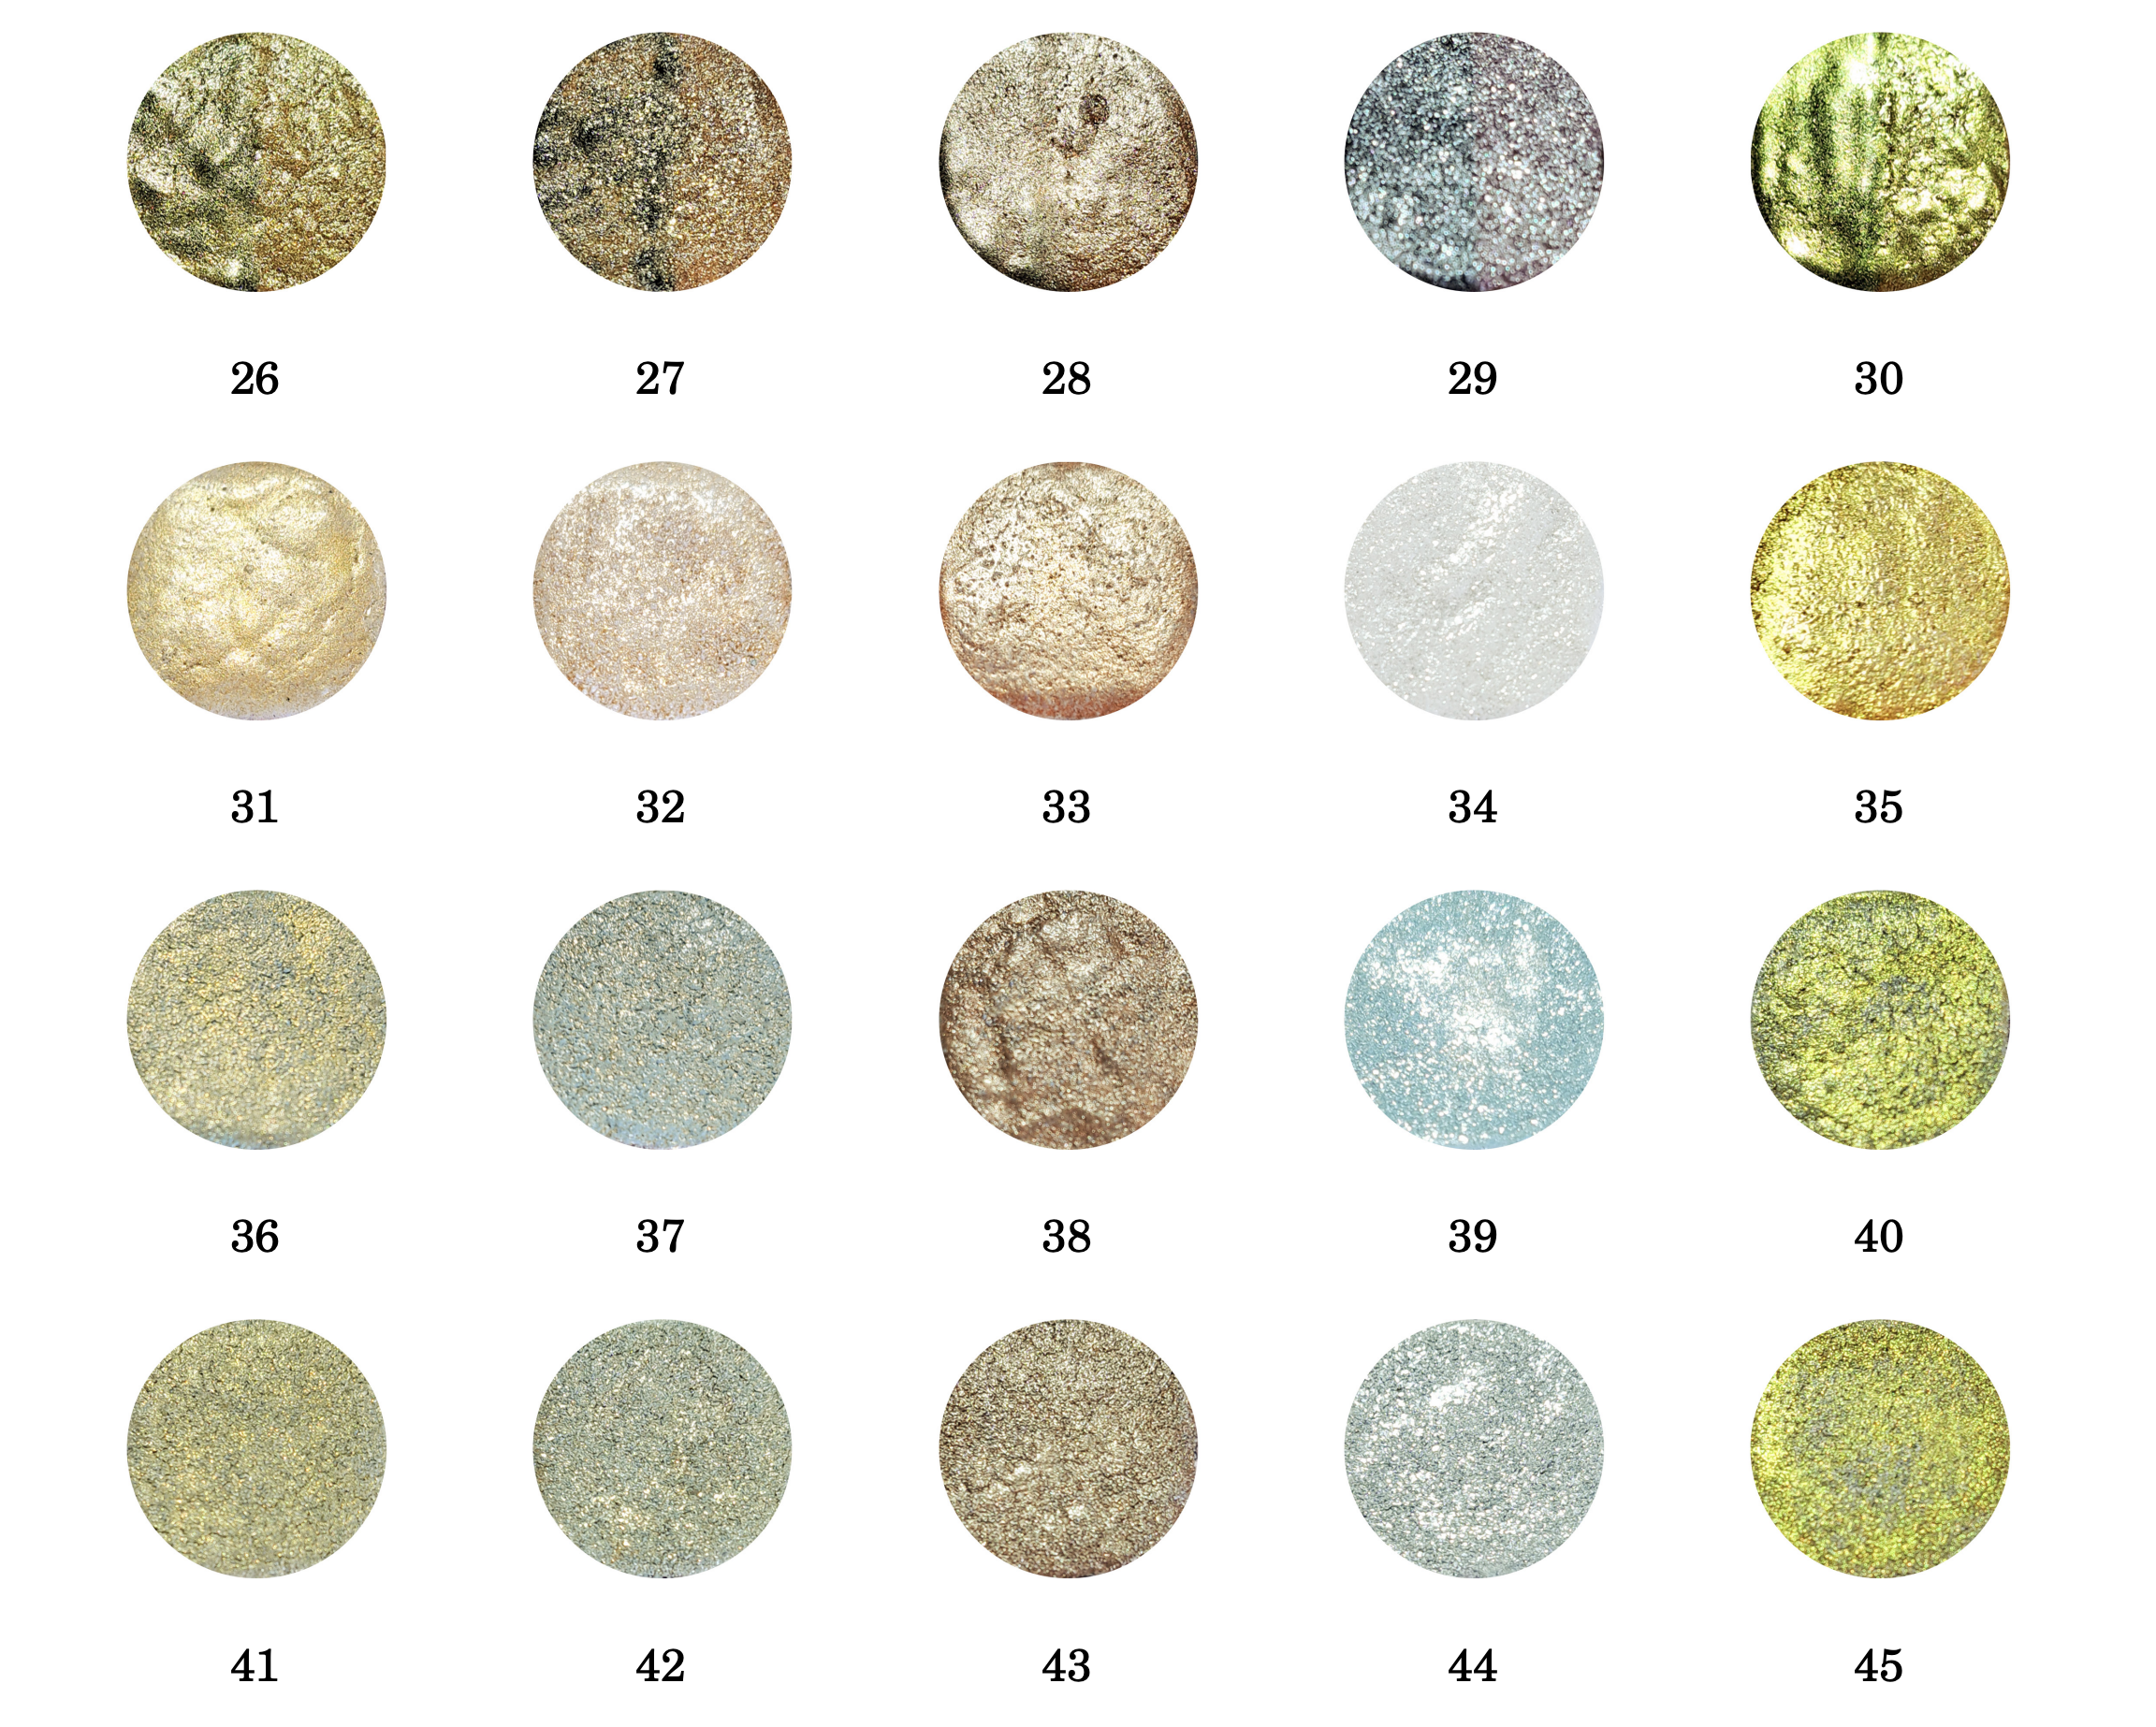
Figure 3: On the left side, the color is applied over the black base. On the right side, the color is applied on copper. Colors from 31 to 45 are opaque. The photos were taken by slightly tilting the piece to show the characteristic effect of each enamel. The undertone is not clearly visible. Consult Figure 4 to find out the undertones of individual enamels.
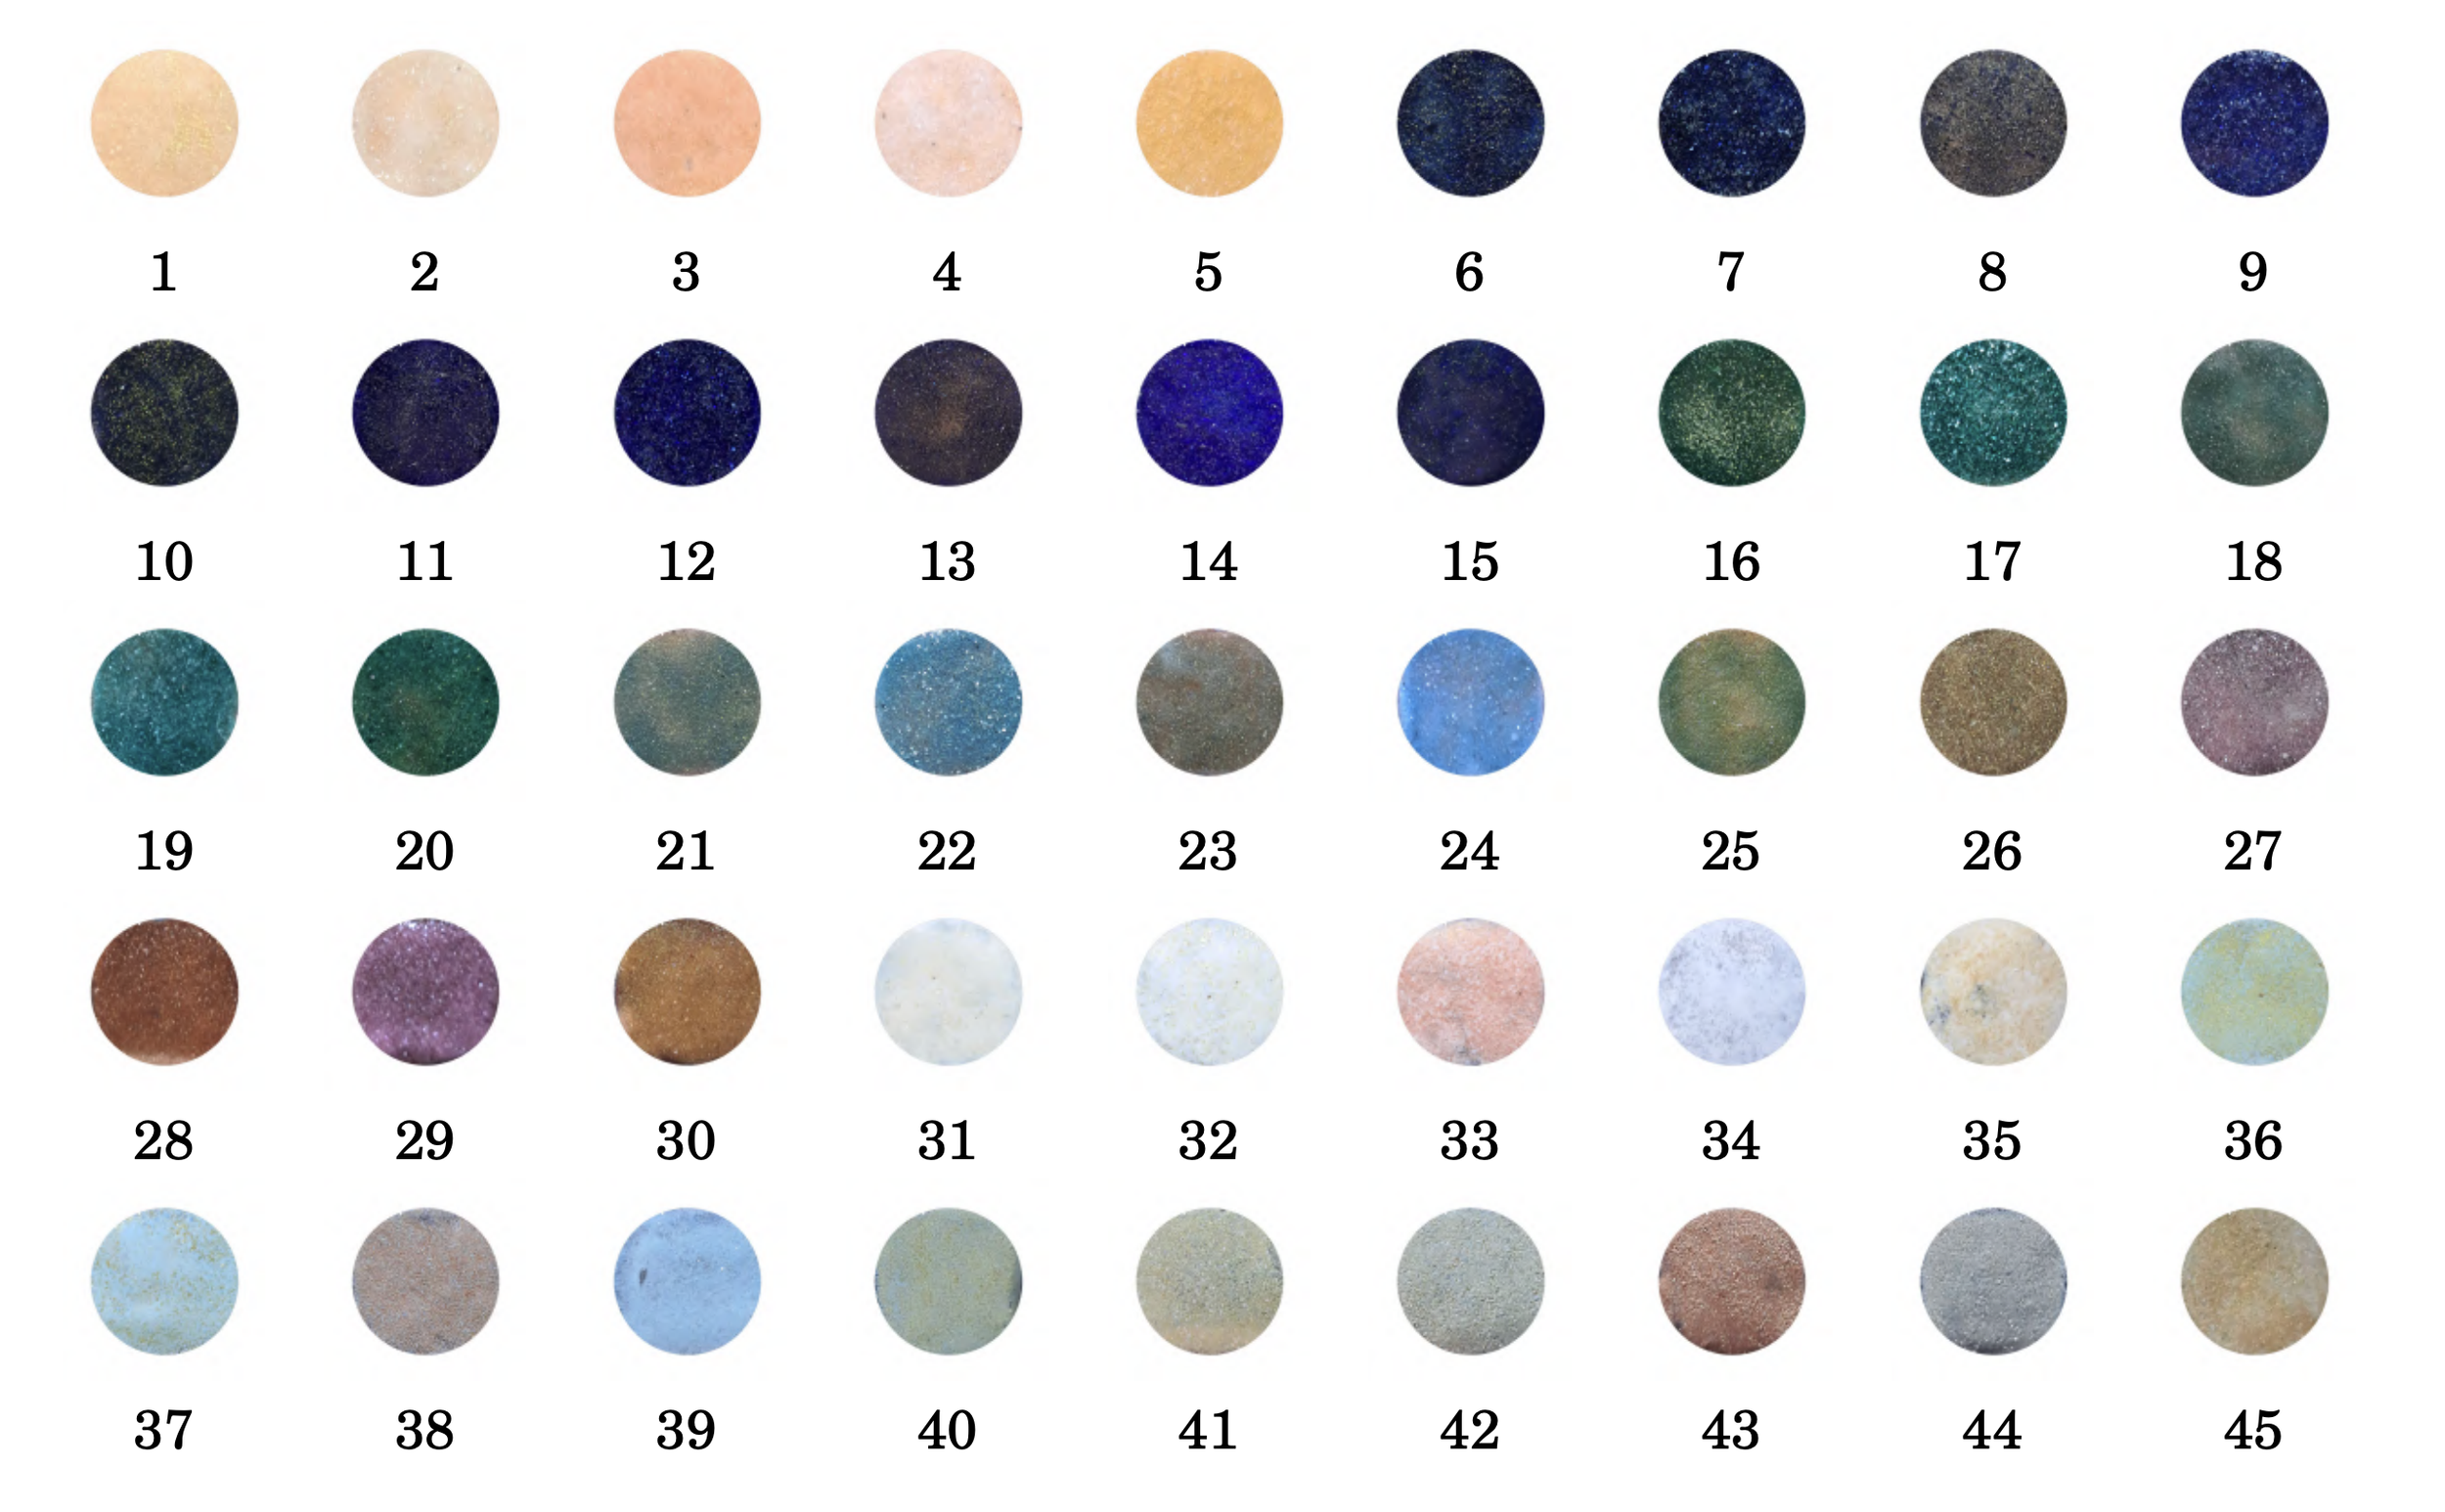
Figure 4: This chart shows the undertone of each enamel. To highlight the undertone, they were overfired and photographed from the front. The samples are made directly on copper.
Application
The application of these enamels unfolds different possibilities: one can apply them both wet and dry, directly over metal or over already fired enamels. However, in contrast to conventional enamels, a unique set of precautions must be observed. Almost all of these enamels feature a fine mesh and, in their dry powder state, they may not exhibit any glittery allure. Only upon contact with water, do these enamels unfurl their dazzling potential.
When opting for the wet application method, utilizing a synthetic brush with long bristles is recommended. However, washing the enamel is discouraged, as it risks removing the very glittery essence that distinguishes them. Instead, a meticulous approach is advised: extract only the quantity intended for immediate use, wetting it gradually with distilled water to achieve the desired consistency.
Excessive water poses a risk, potentially causing the glitter component to separate from the glass due to the different specific weights, complicating the application process. In the event of water oversaturation, rather than removing it hastily, allowing evaporation is preferred to preserve the integrity of the enamel. Pour off the excess water or dry it with tissue will remove some of the glitter and we definitely do not want that.
Application instructions extend to the drying process. Once the enamel has served its artistic purpose, allowing it to air-dry with the container slightly open before closing it again is recommended. A cardinal rule emerges: refrain from returning previously wet enamel to the original container, as moisture transference could spoil the entire batch.
For those inclined towards the dry application method using a sieve, the selection of a 100 mesh sieve is advised due to the fine nature of these enamels. The 80 mesh one appears to be a little too large for me. The only colors that have some larger particles that could be used with the 80 mesh sieve are No. 33 and No. 35. However, my preference is to use a 100-mesh sieve for these colors too, allowing retention of the few larger particles that do not pass through. Do not forget to wear an appropriate mask before sifting the powder. Pre-wetting the surface on which the enamel is to be applied with a wet brush or misting the water with a spray. If you want a greater hold or if you want to work on three-dimensional surfaces, add a few drops of tragacanth glue. After applying a very thin layer of powder with the sieve, spray the surface with a little water and finish the application with a second thin layer over the entire surface. Meticulous control over water quantity during application is crucial to prevent uneven distribution of the glitter component. I suggest staying at least 5 cm from the piece when sifting. However, stay no farther than 10 cm: the fine mesh of these enamels and the lightness of the glitter will make them fly around easily.
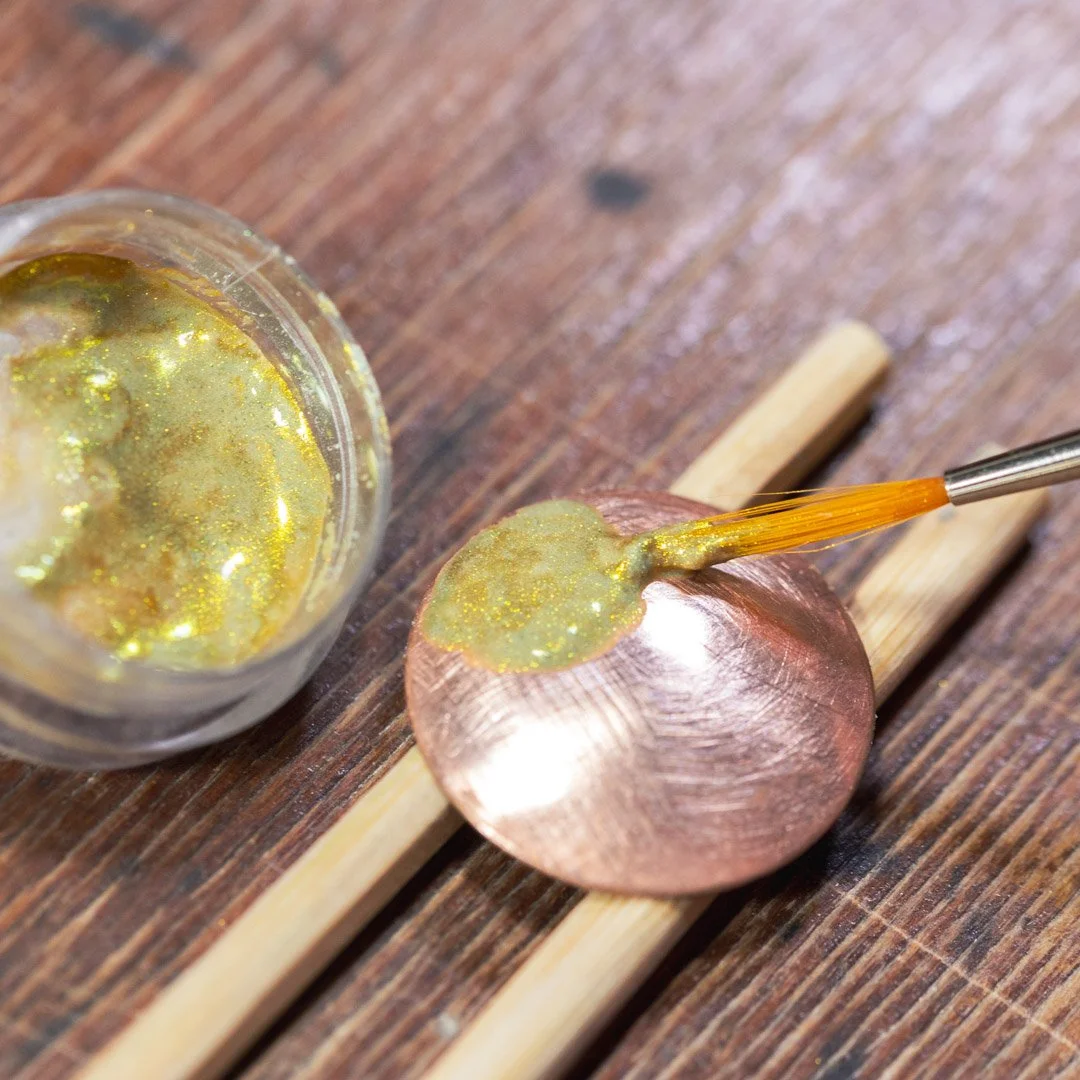
Figure 5: Wet packing a thin layer of enamel.
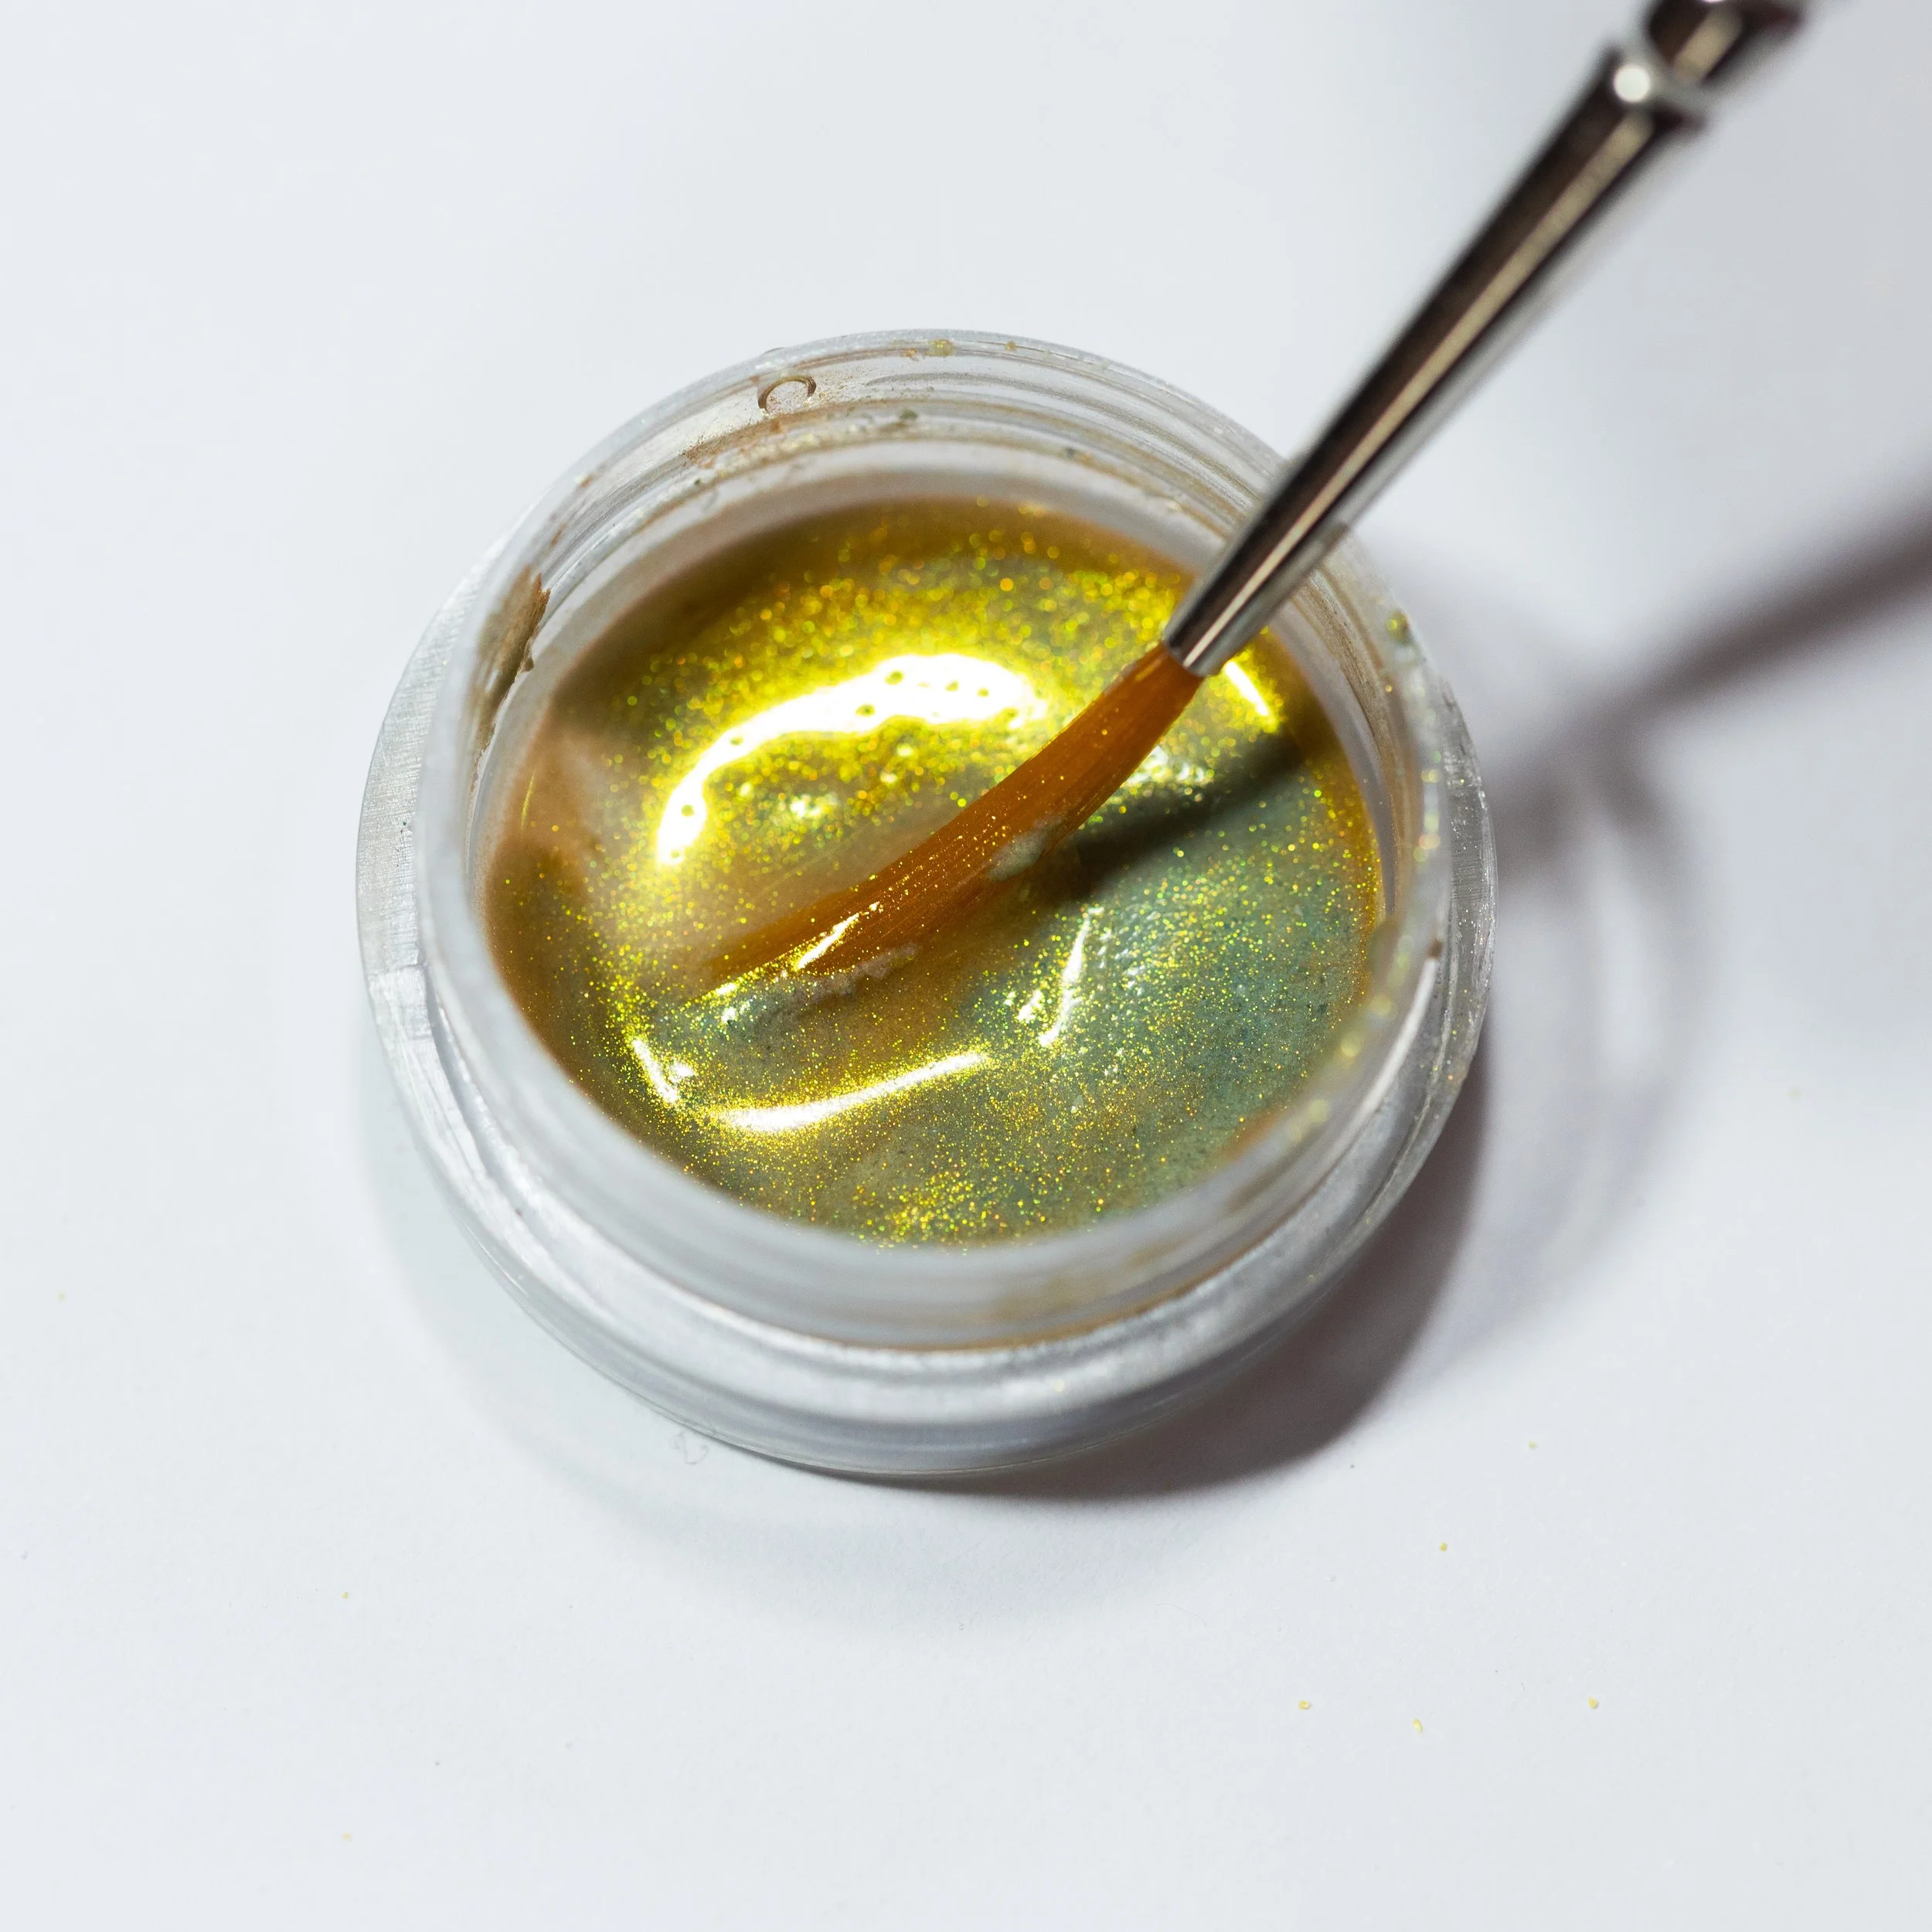
Figure 6: Enamel with too much water.
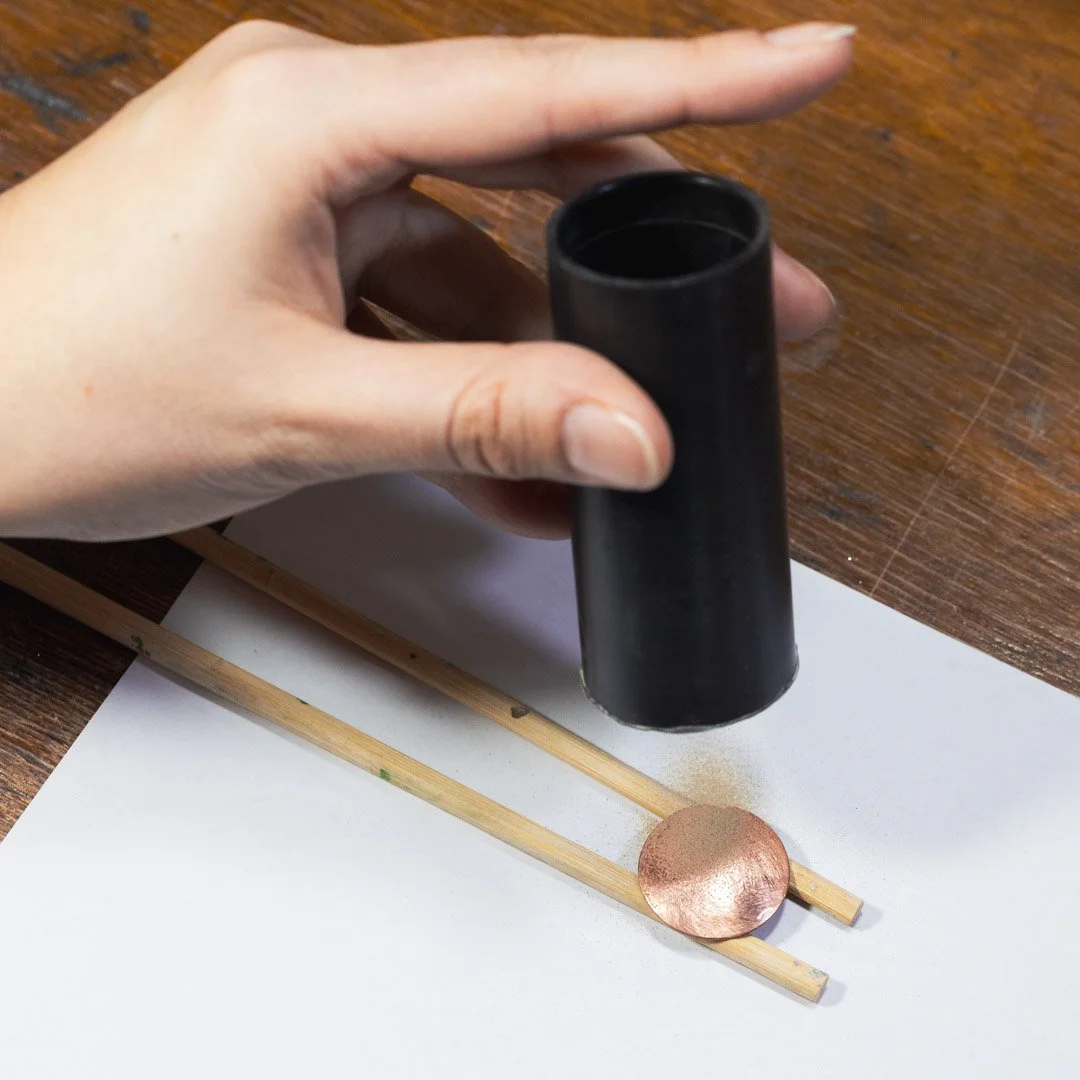
Figure 7: Application of dry enamel.
Firing
Regardless of the chosen application method, thorough drying precedes the crucial firing stage. Direct application on metal invites a two-layer approach, each firing serving a distinct purpose: I suggest a strong initial firing to obtain a smooth surface and a second short one for a pronounced metallic or shimmer effect. Sugar firing can intensify the glittery effect, particularly enhancing shimmer and opaque enamels.
While the enamels bear a suggested firing temperature range of 780 °C to 830 °C, their versatility shines through variations achieved by altering firing times. Notably, opaque enamels generally exhibit greater hardness compared to transparent counterparts, with specific exceptions noted. No. 39 and No 32, despite being opaque, manifest a relatively low melting point. The firing process accentuates the transformative potential of these enamels. The magic lies in the ability to modulate the shimmer and metallic effects by tinkering with the firing times.
Figure 8 presents the profound impact of firing times on the enamel’s outcome. A single color undergoes a mesmerizing transformation. From a brief 35-second firing at 810 °C (Figure 8a) to a more elongated 90-second process (Figure 8d), the enamel changes in color and surface texture. The dimensions of the piece are 20 mm in diameter and 0.5 mm thick, with counter-enamel. It is fired on a small mica piece of similar size, situated on a 40 x 65 mm mesh.
Acknowledging the variability in firing times due to factors such as room temperature, support dimensions, and piece size, I offer guidelines as a starting point. However, the true alchemy lies in conducting personal tests, fostering confidence, and fine-tuning the process to achieve the desired artistic outcome.
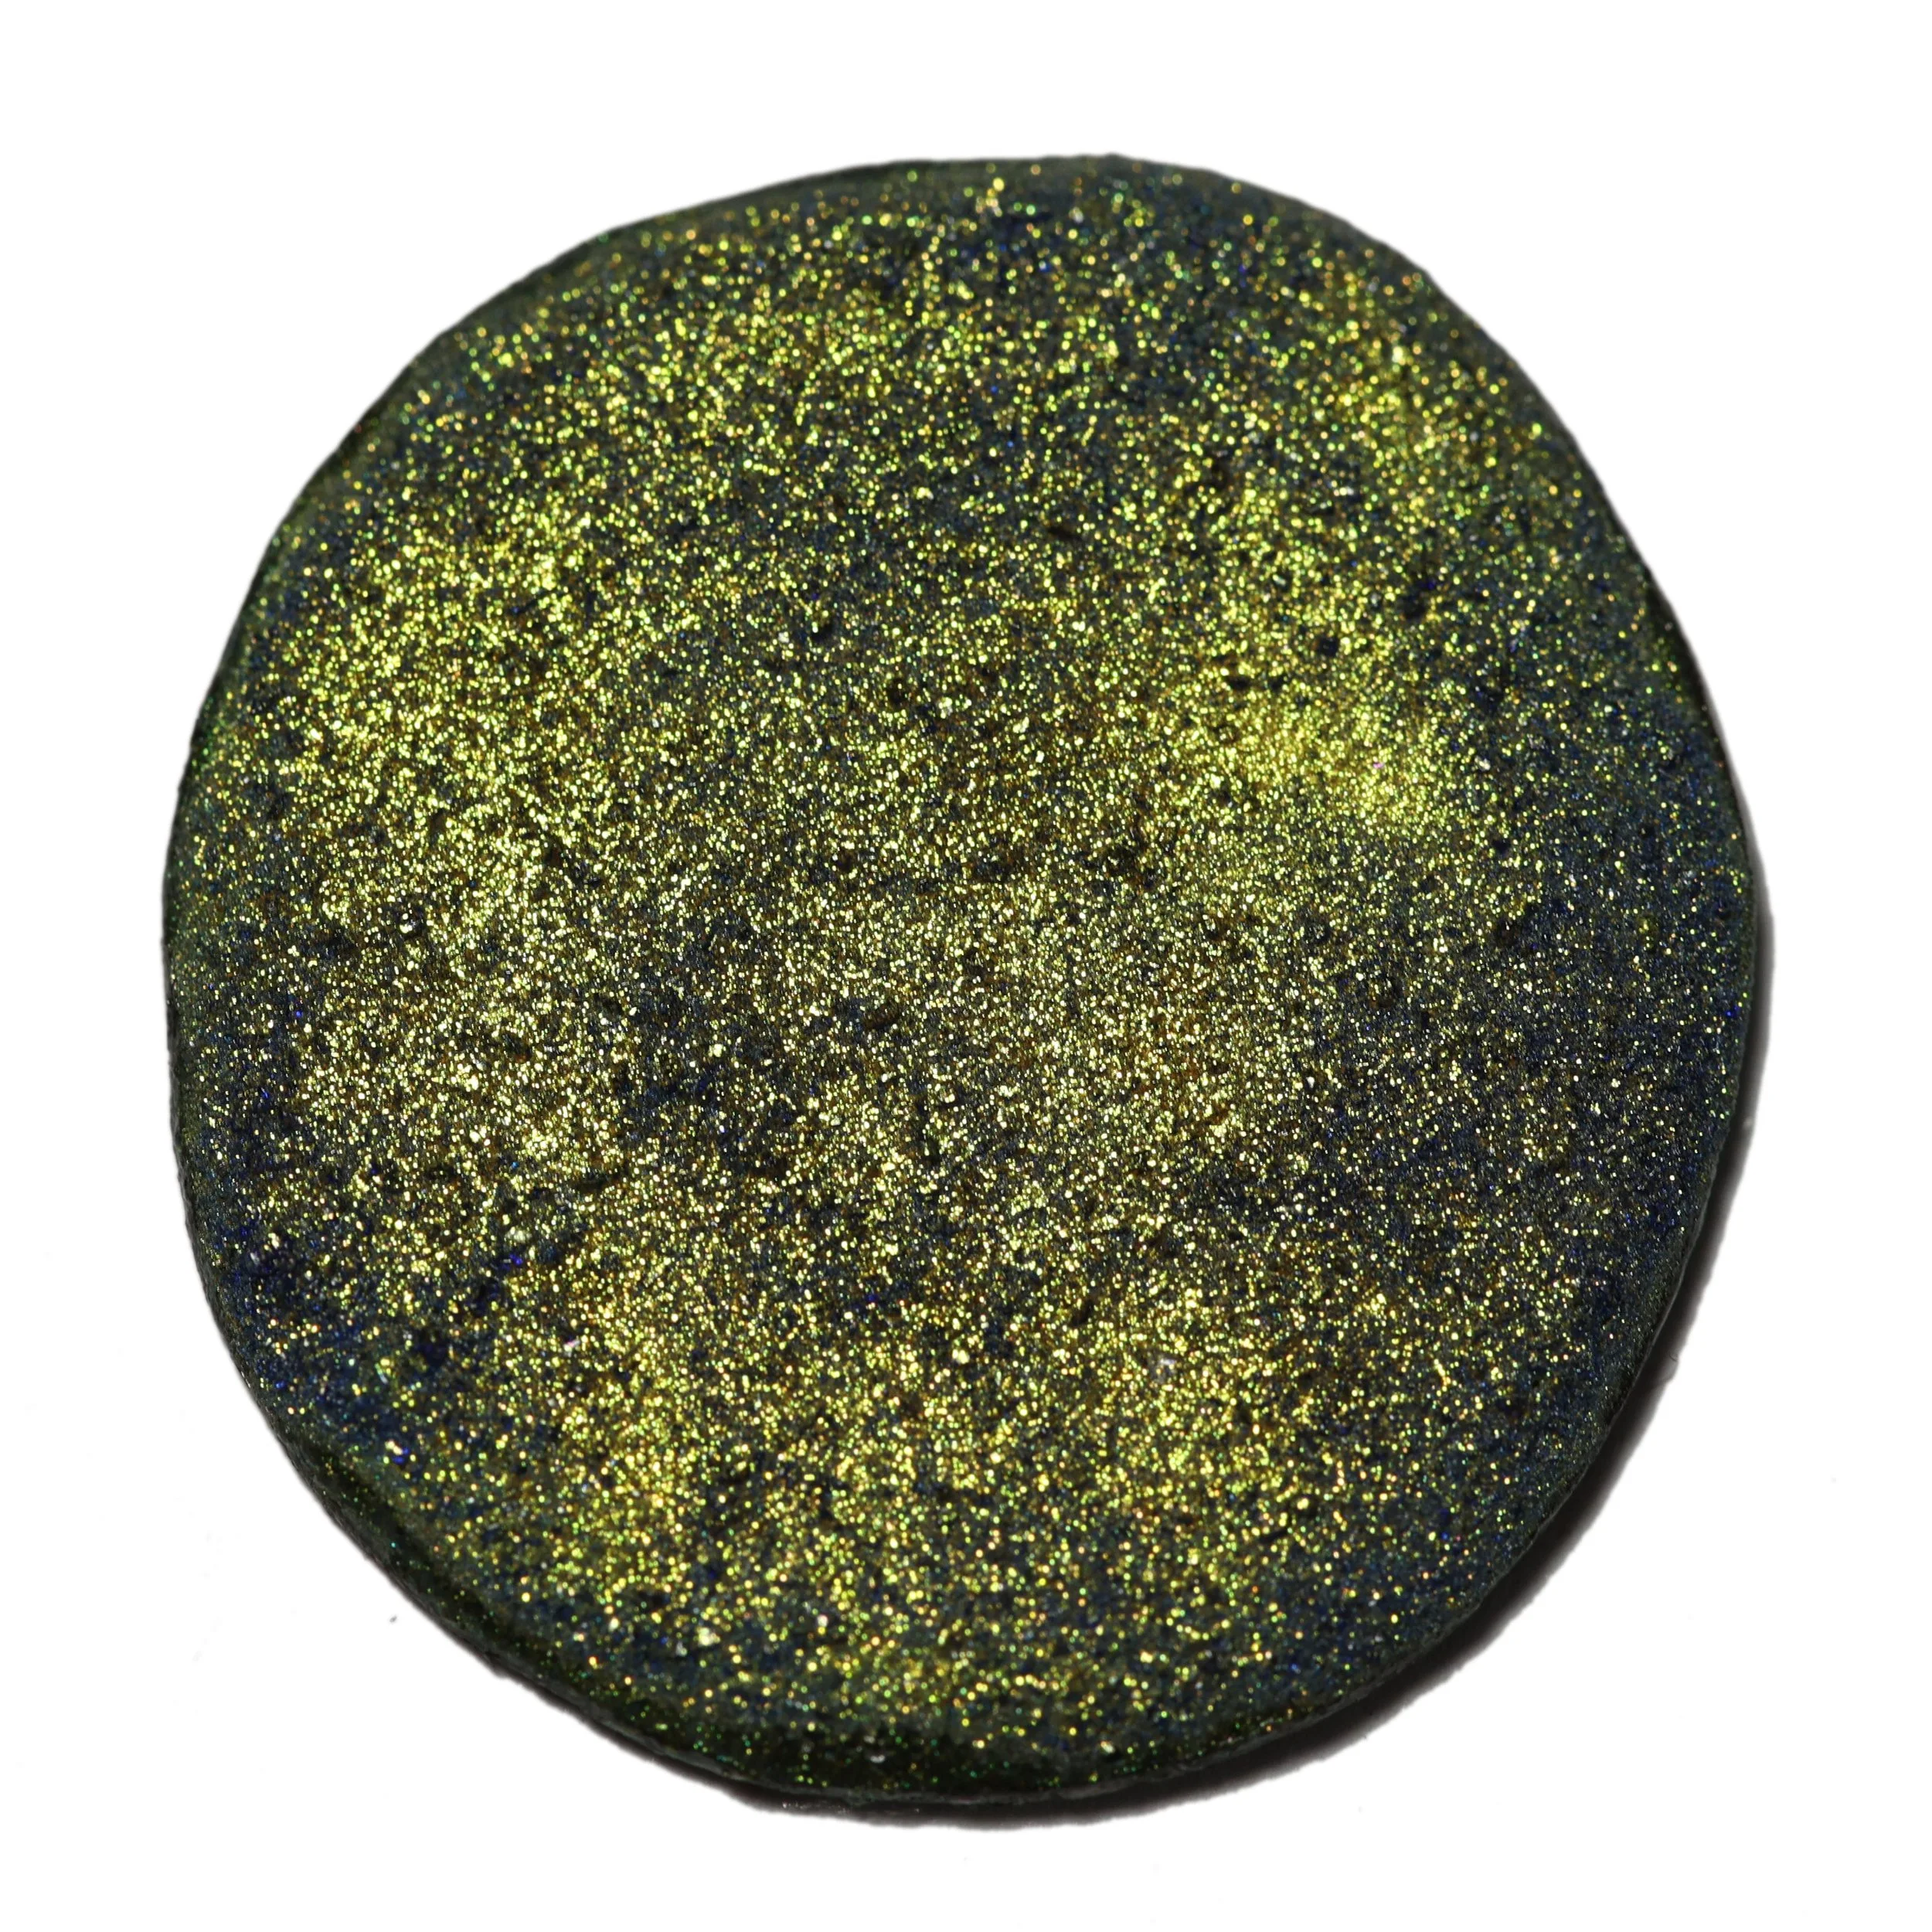
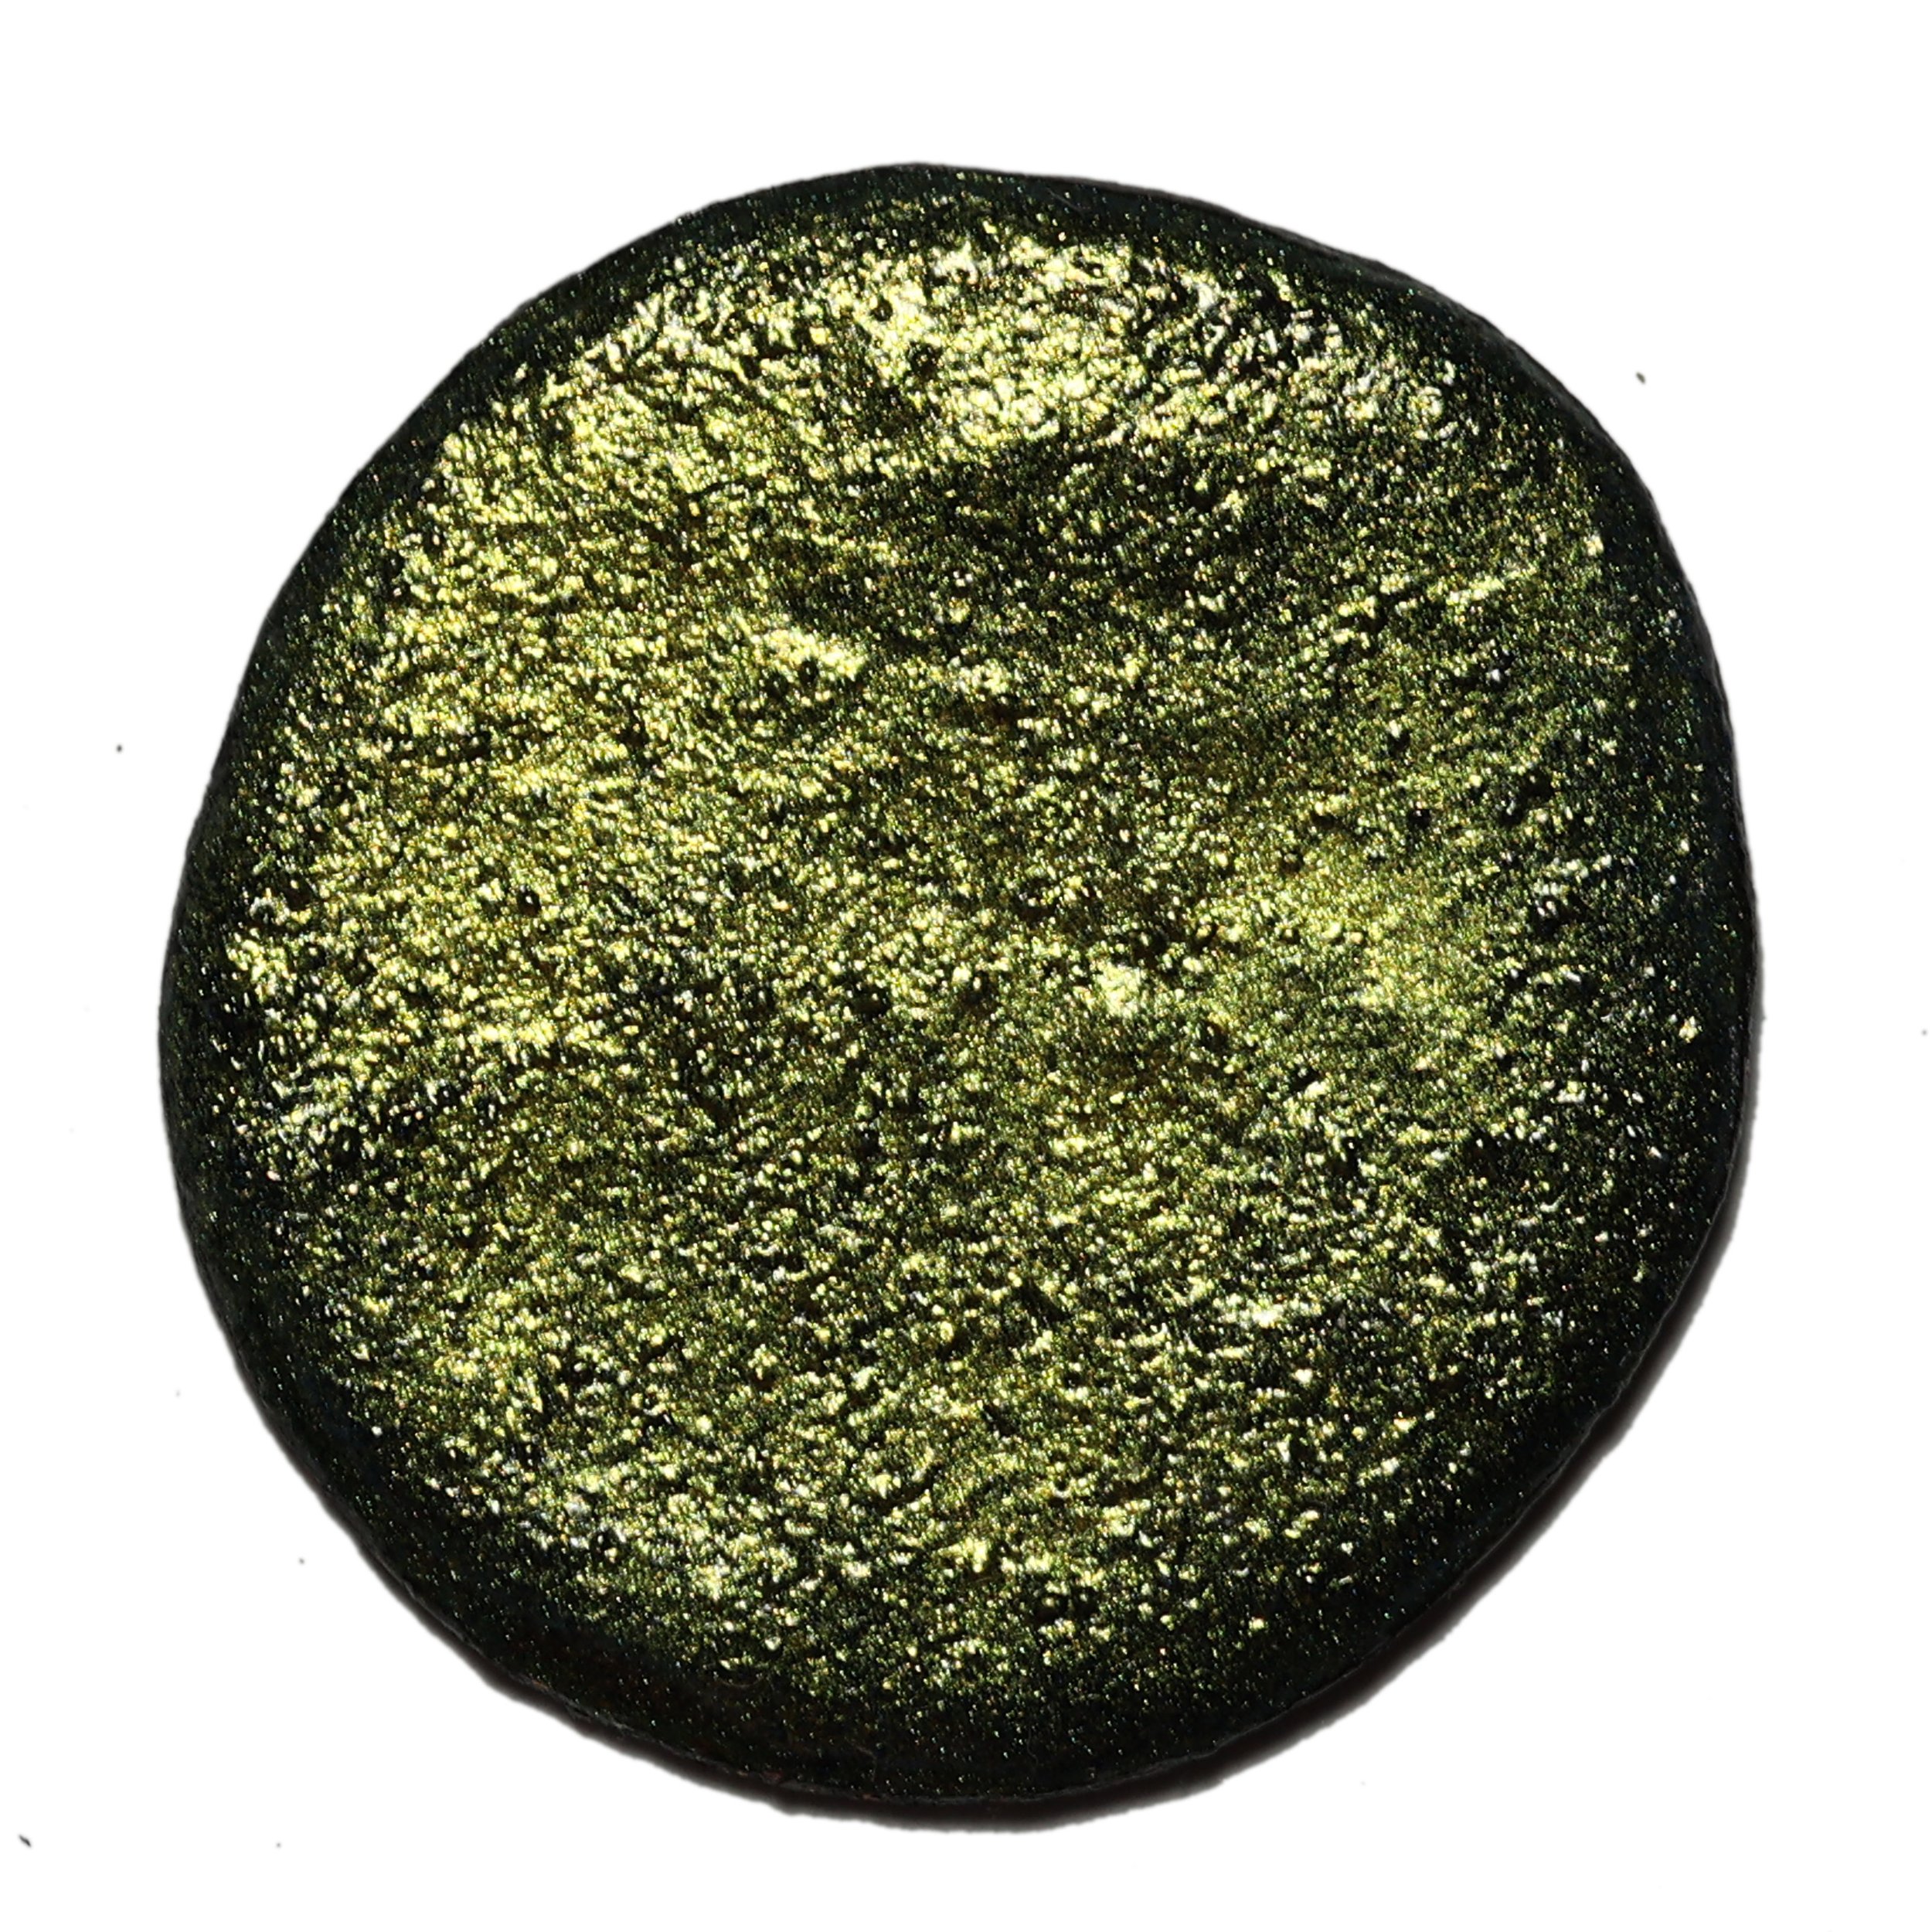
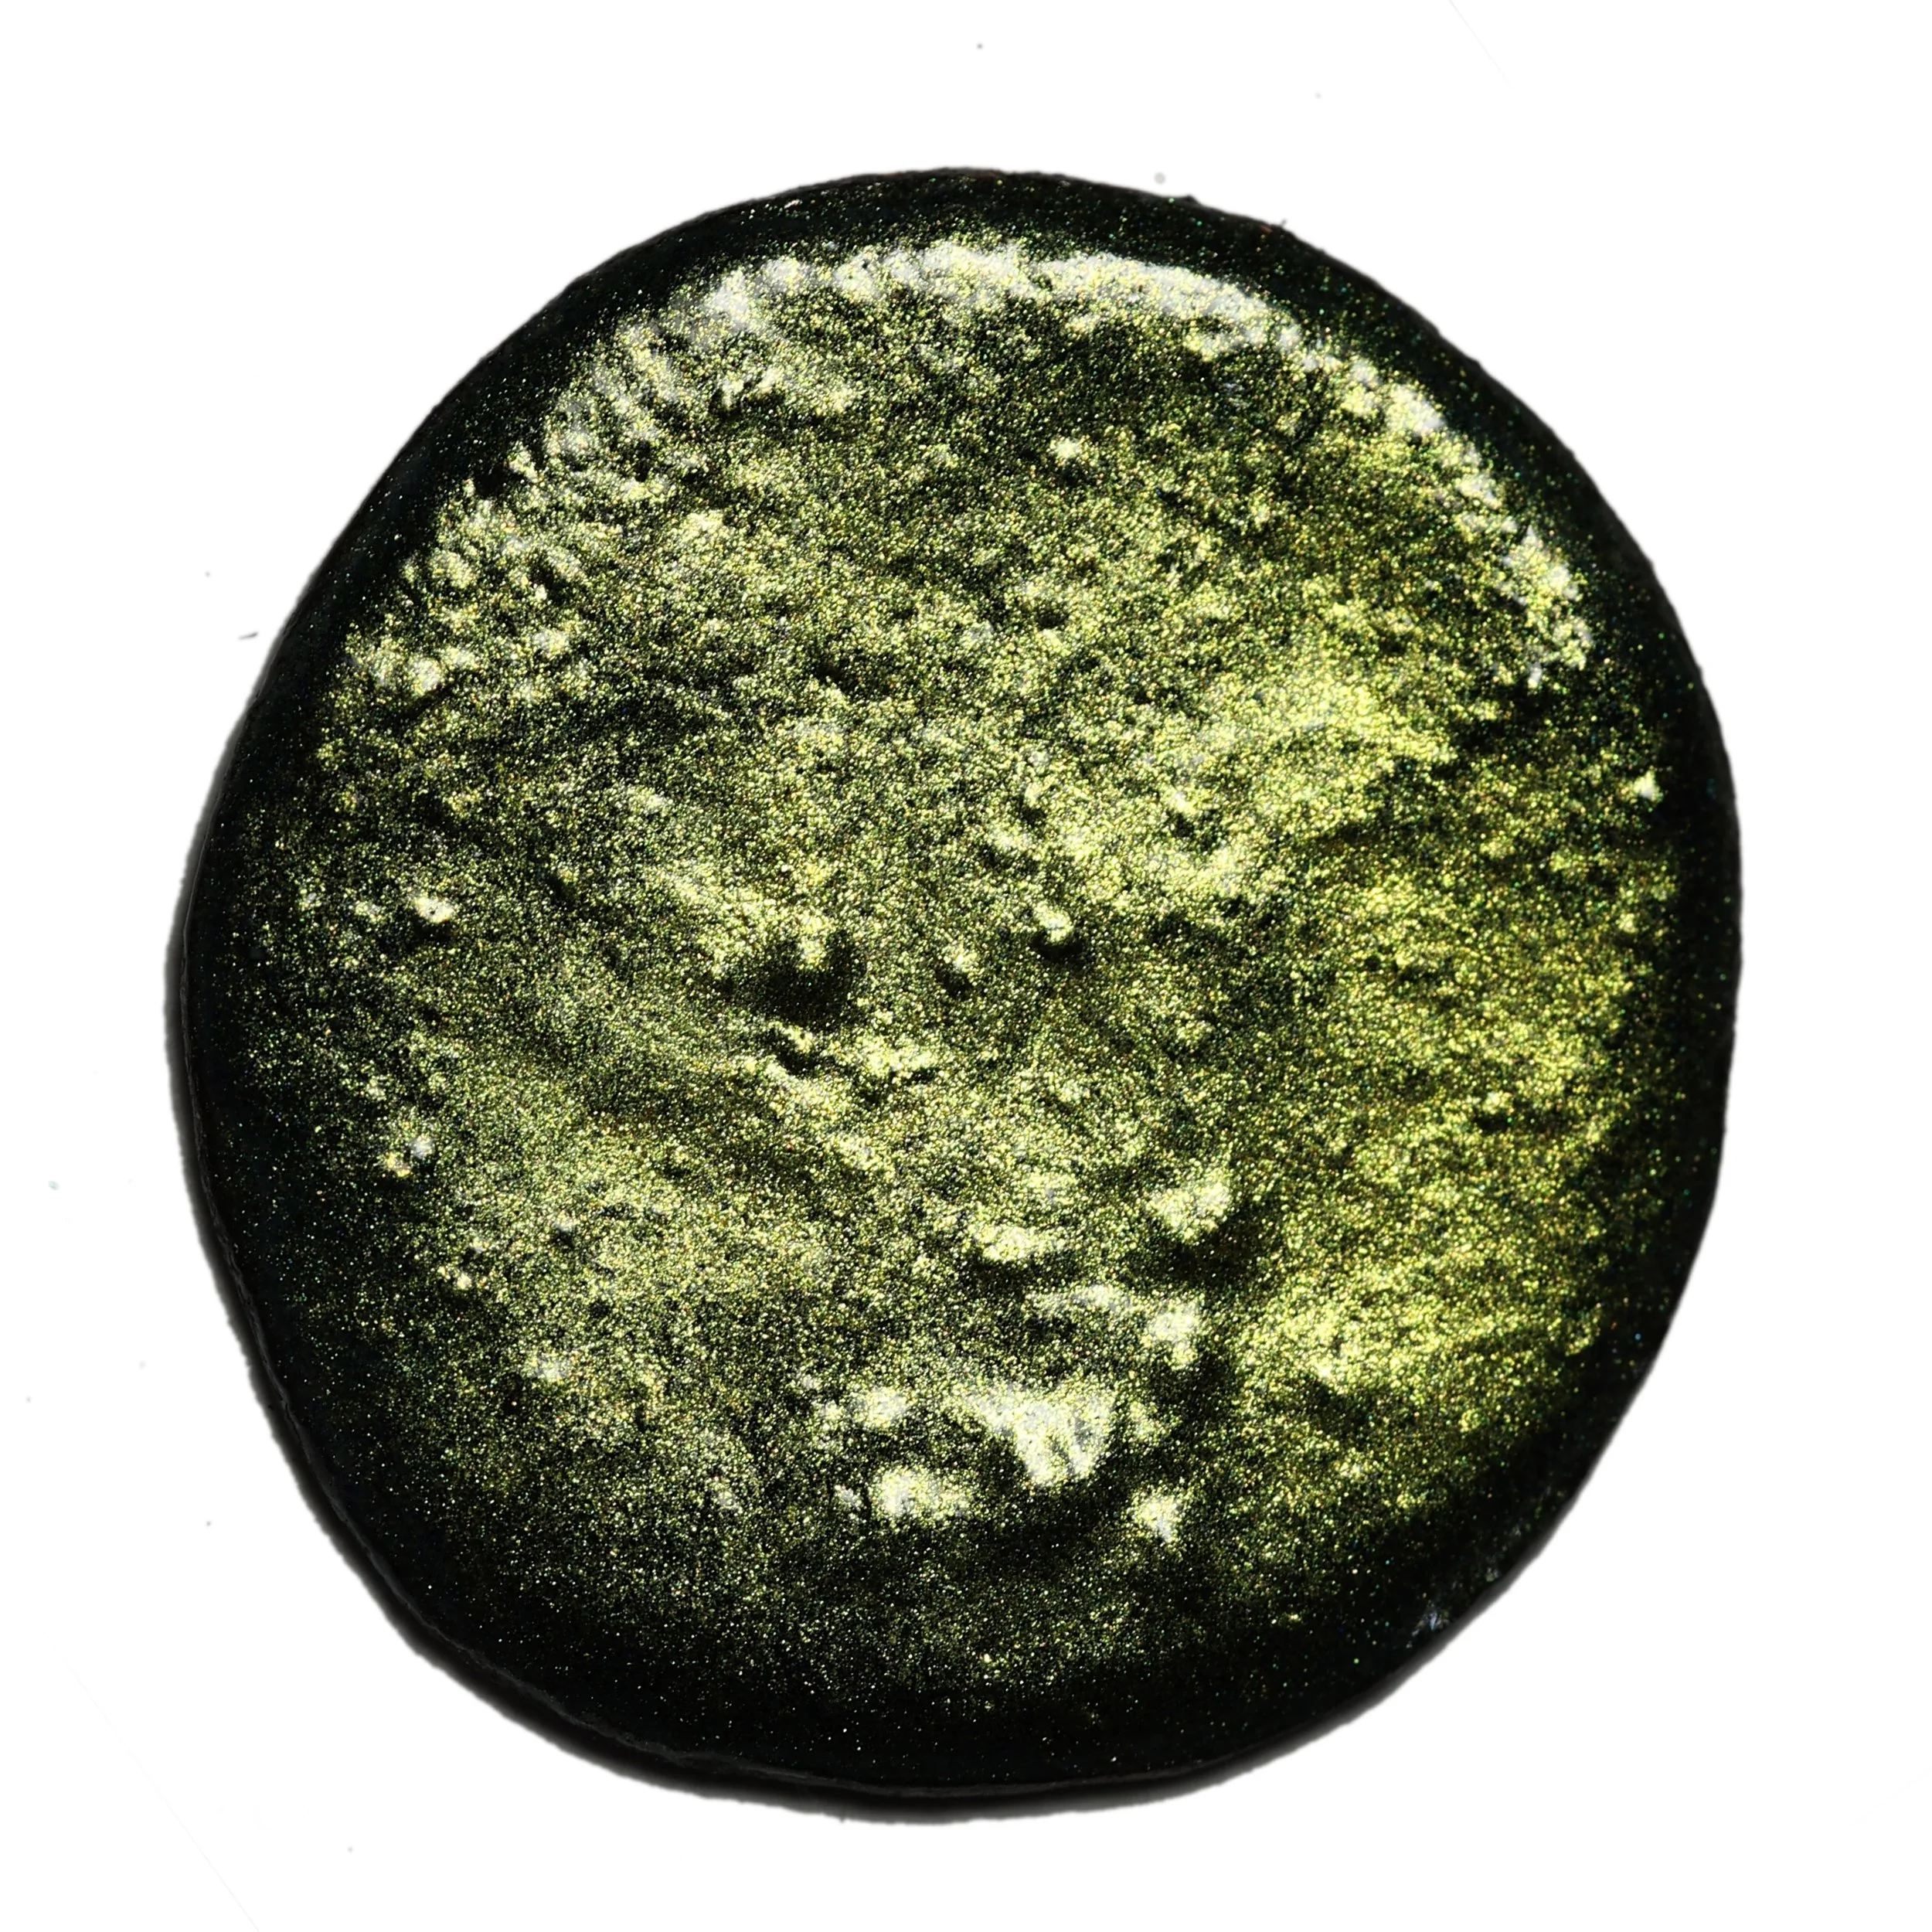
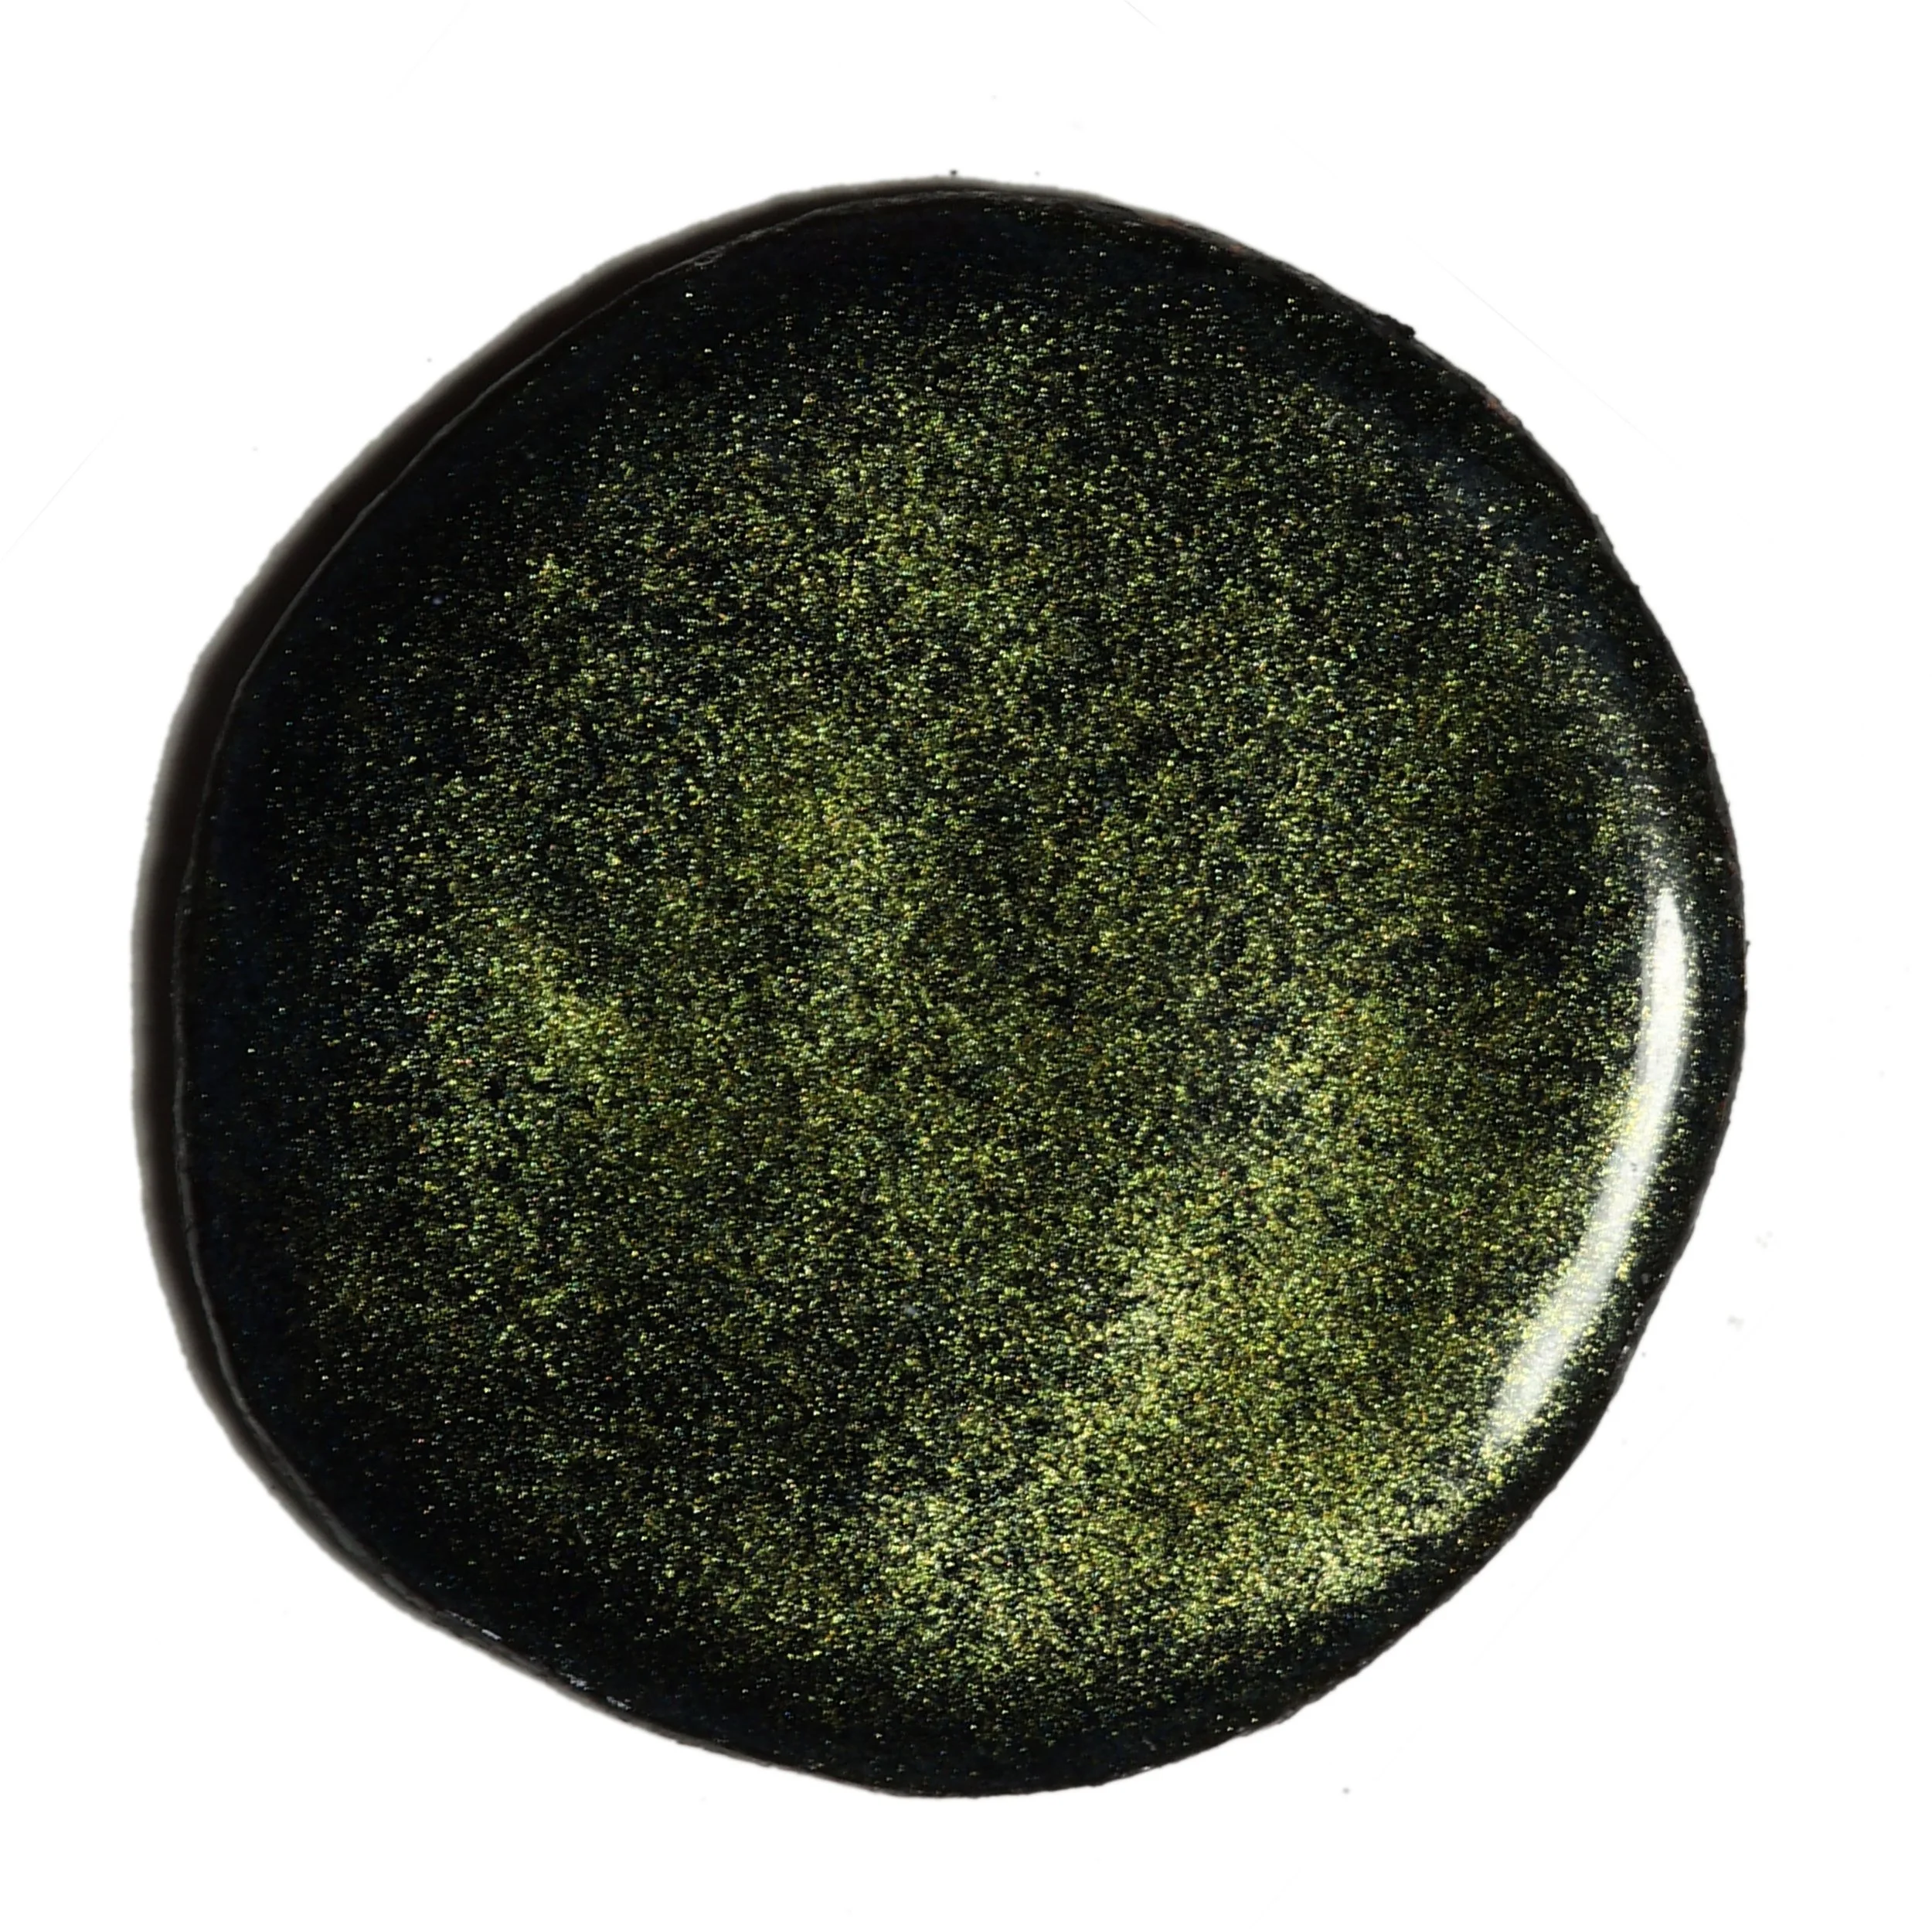
Figure 8: Samples of how different firing times effect enamel No. 25.
Defects when firing
A potential challenge, especially prevalent in opaque colors applied directly to metal, manifests as a fragmented surface akin to dry mud, appearing post-firing (Figure 9). This occurrence stems from an excessively thick layer or insufficient firing temperature and duration. Fear not, for the solution is elegantly simple — applying a second, thin layer of color and repeating the firing process (Figure 10). In cases of pronounced defects, a strategic approach involves a more extended firing for the second layer, followed by a third layer to be fired for the duration corresponding to the desired effect.
Figure 9: Sample of the defect that can appear during firing.
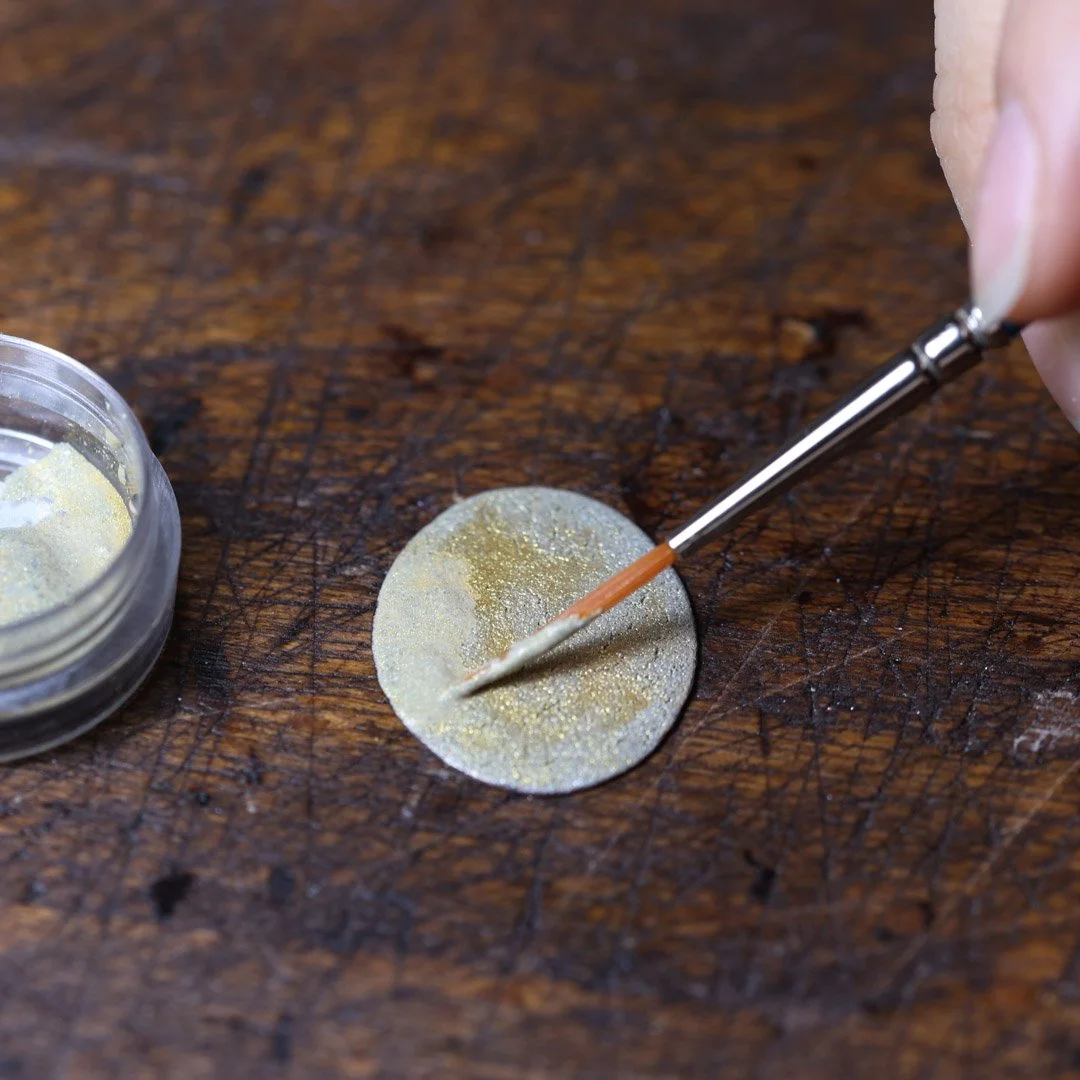
Figure 10: Application of a thin layer of enamel, everywhere.
Layering
As I experimented more with these enamels, the notion of layering additional enamels on top without compromising their distinctive effects seemed initially improbable. To my delight, the outcome proved quite the opposite. Surprisingly, one can apply one or two layers of transparent enamel atop an already fired metallic effect enamel, opening up more creative possibilities. Among the transparent enamels, the flux stands out as the one that least alters the original effect of the base enamel. I recommend using a soft flux, such as a finishing flux. My top choice is Milton Bridge’s T600 due to its consistently impeccable results. If you steer towards incorporating colored transparent enamels instead of flux, the results can be nothing short of surprising, offering a unique avenue unattainable through conventional techniques. Optimal outcomes are often achieved with lighter enamel colors, ensuring the sparkle remains distinctly visible. However, do not discount the allure of experimenting with darker transparent hues, for certain color combinations can yield truly remarkable and unexpected results.
It is important to note that not all metallic effect enamels deliver impactful results when layered beneath other transparent enamels. For example, enamel No. 34 may not produce a particularly striking effect in this context. This underscores the need for thoughtful consideration of enamel choices to achieve the desired effects.
Mixing
Beyond the layering possibility with other transparent enamels, metallic effect enamels offers an exciting avenue for creativity by allowing themselves to be intermixed. This is possible thanks to the excellent compatibility that these enamels have with each other. Here a world dominated by experimentation and testing opens up before your eyes. Once again, metallic effect enamels prove to be a rich source of artistic potential!
To guide the reader in this exploration without compromising the stability of the enamels, I offer a couple of tips. When mixing enamel A with enamel B, the precise percentage may not be crucial, yet a balanced approach is recommended. Aim for proportions around 40- 60 percent or 50-50 percent for a well-rounded mixture. However, the critical aspect lies in the method of mixing. It is paramount, indeed fundamental, to take the dry powder of both enamels with a spoon and place them in the same container. Once sealed, shake the container thoroughly. This meticulous process ensures two vital outcomes: first, an even distribution of the two enamels, and second, and most importantly, avoiding the risk of inadvertently capturing more glitter than glassy components. That can happen when taking them with a spoon or a brush from the container where they are already wet because there is the risk of taking the most superficial part of them where most of the glitter tends to collect. This precaution guards against creating an imbalanced mixture with insufficient glass and too much glitter, potentially compromising its stability on the metal base.
While their great compatibility allows for the fusion of two or even three enamels together, it demands thoughtful consideration rather than haphazard blending. Whenever uncertainties arise, conducting some preliminary testing is the wisest course of action, ensuring that the resulting mixture meets both aesthetic and structural requirements.
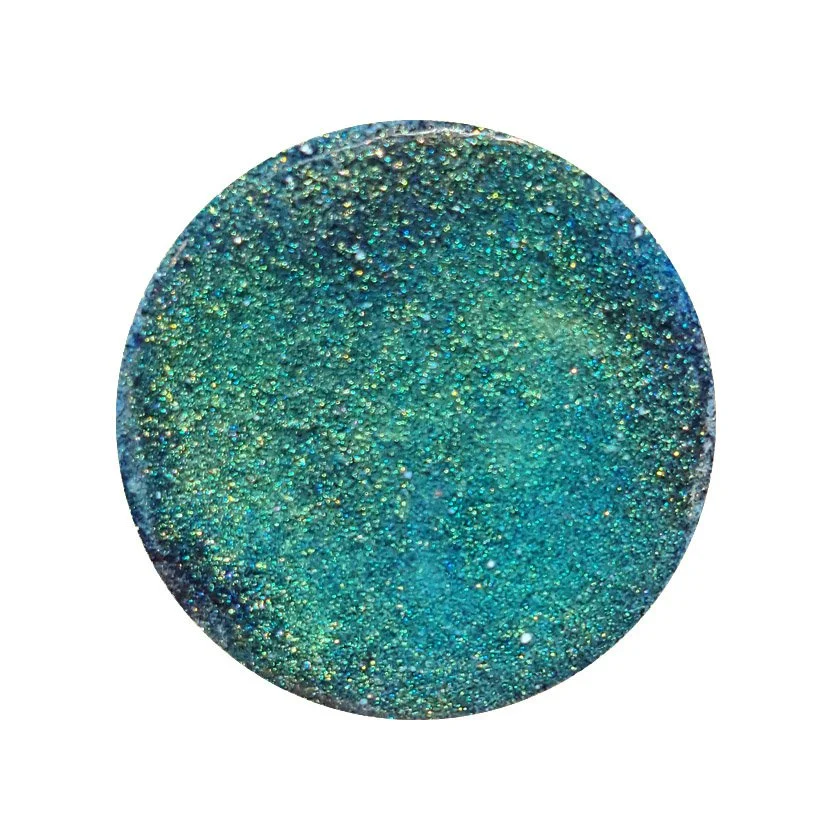
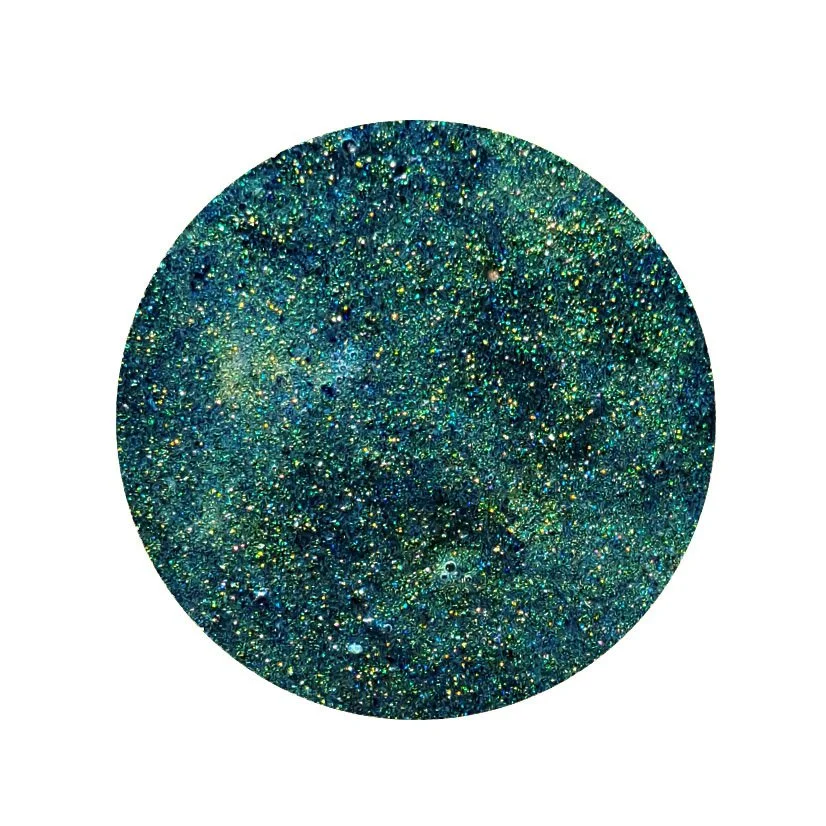
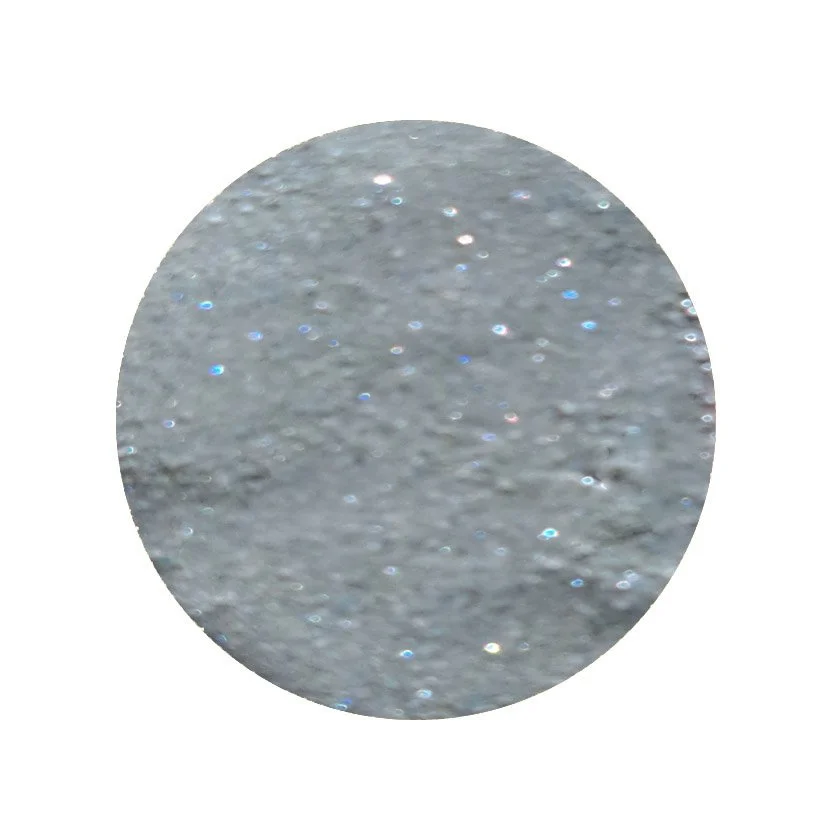
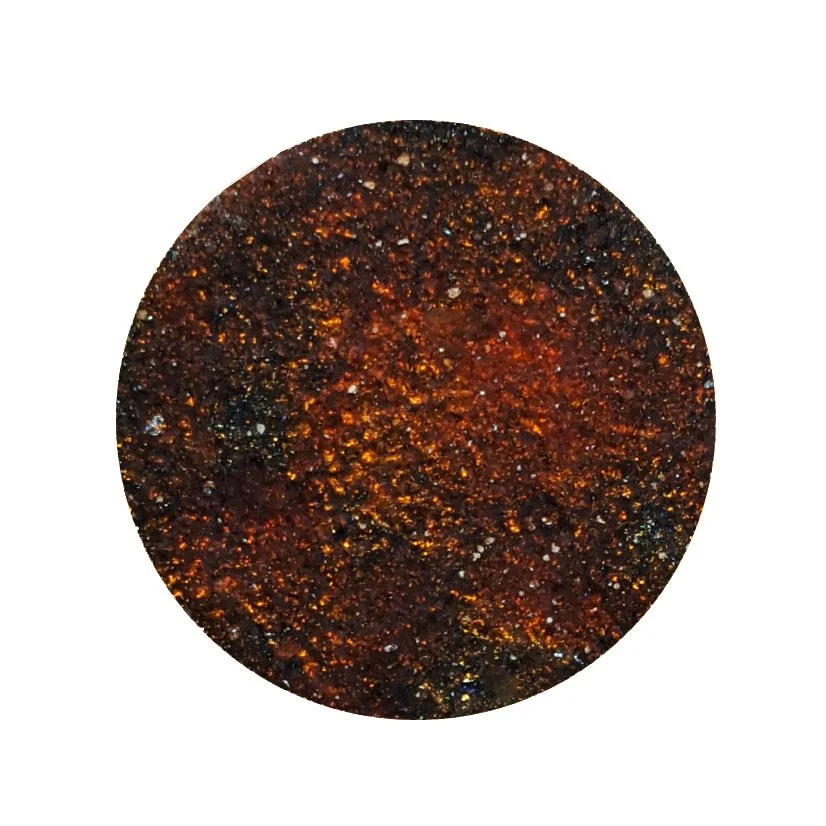
Figure 11: Samples of metallic effect enamels fired on the copper base then covered with another layer of a different enamel. All the pieces are counter-enameled. Photos from the front.

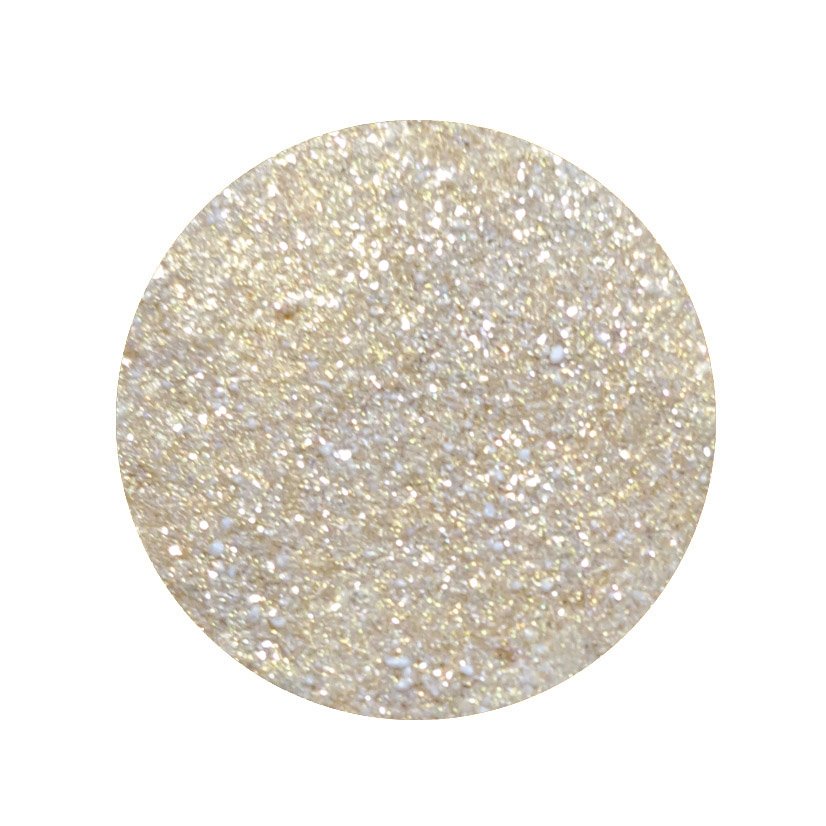
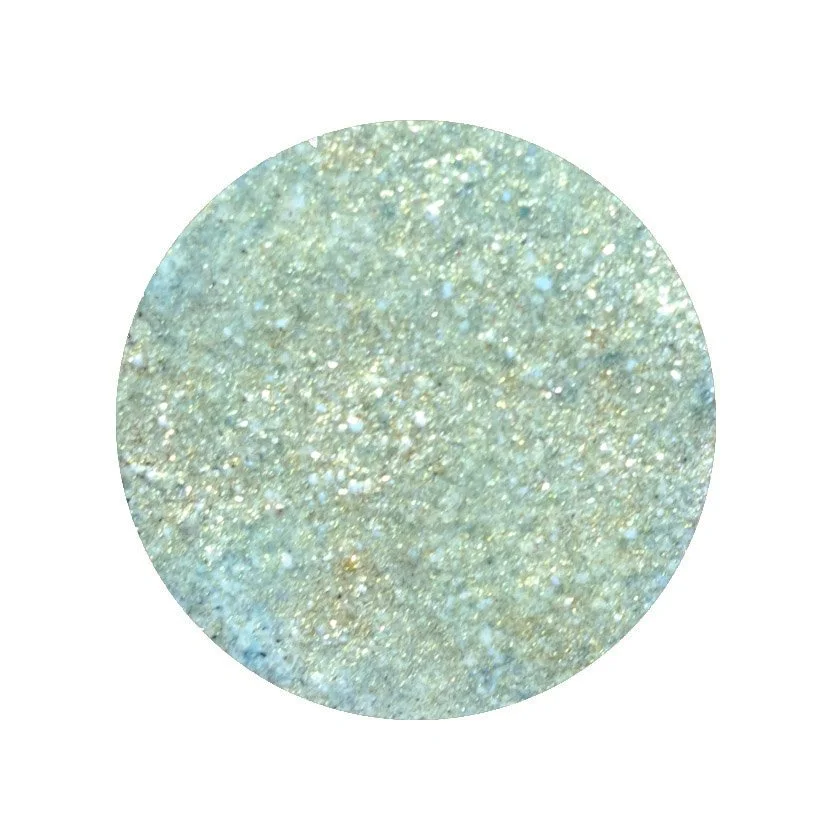
Figure 12: Sample of mixing two enamels together. All pieces are counter-enameled. Photos taken from the front.
Working with other techniques
Incorporating the metallic effect enamels by Milton Bridge into your artistic repertoire demands a strategic approach. This is especially the case when considering their integration into techniques such as painted enamel (émail peint) or polychrome pieces. Knowing when and how to apply these enamels is fundamental for achieving optimal results.
When contemplating the use of Milton Bridge’s metallic effect enamels alongside other enameling techniques, particularly on an already fired enamel surface, a sequential method is advisable. Initiate the process by applying and firing classic enamels such as opaque, transparent, and opal. This initial phase allows you to craft a foundation with the desired shades, employing the necessary layers and firings. Reserve the application of metallic effect enamels for the final stage, introducing them during the last firing to capture their unique allure.
In scenarios where you aim to incorporate these enamels on metal alongside other enamel types, a different approach is recommended. Apply them concurrently with the other enamels. If you apply them with a wet packing method be careful not to add too much water or the glitter will migrate to other areas of your work. During the first firings, prioritize the overall aesthetics of the piece without immediate concern for achieving the special effect that characterizes the enamel you are using. Address the other enamels, focusing on their layers and visual appeal. When you achieve the result you want with the other enamels, apply an additional layer of Milton Bridge’s metallic effect enamels during the final stage. Dedicate a firing exclusively to these enamels to ensure the realization of the desired effect.
Timing plays a pivotal role in obtaining the best possible outcome. Applying the metallic effect enamels at the opportune moment is crucial for maximizing their visual impact. This strategic approach ensures that the unique qualities of Milton Bridge’s enamels harmonize seamlessly with the overall composition, contributing to the creation of visually captivating and harmonious enamel artworks.

Figure 13: Wet packing opaque black enamel.
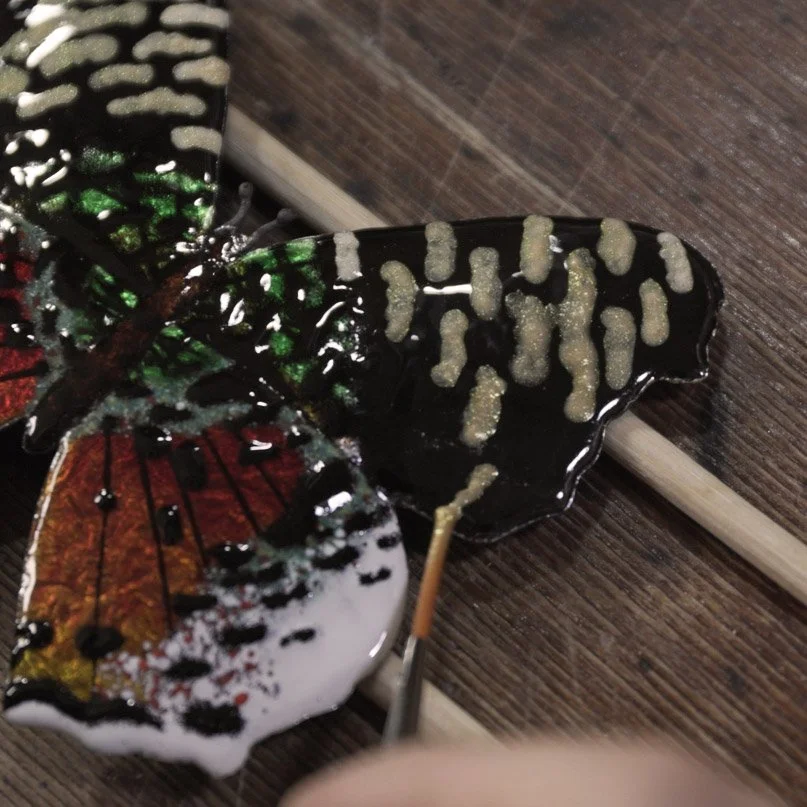
Figure 14: Wet packing No. 5.

Figure 15: Finished piece made with transparent, opaque and metallic effect enamels over silver foil on copper base.
Cloisonné and champlevé
A possible concern about these enamels is that the metallic and shimmer effects might only be present on the surface and not permeate the enamel in depth.
The glittering effect of these enamels is not present exclusively on the enamel surface. While most of the glitter does settle on the surface, it is also present within the enamel itself, below the surface, even if in lower quantity. A discerning eye will be able to spot the subtle effects of the glitter below the enamel surface.
Even in scenarios where smoothing with a carborundum stone or sandpaper is necessary, as in the cloisonné or champlevé techniques, traces of glitter persist beneath the surface, although the metallic and shimmer effect may appear significantly reduced based on the color chosen.
Consider, for instance, two metallic effect enamels with a dark undertone, such as enamel No. 15 and No. 9. Left unsanded, they manifest a robust effect on the surface, while, after the smoothing process, they will look like a starry sky. This dynamic shift in appearance, reminiscent of aventurine glass, unveils an intriguing dimension, enriching the possibilities available to enameling enthusiasts. In terms of uniformity and intensity of the result after sanding, my preference leans towards transparent shimmer enamels with a dark undertone.
Exploring further possibilities, those seeking to accentuate the effects can employ a meticulous approach. After stoning the piece, apply an exceedingly thin layer of wet enamel using a brush, and delicately spread it with a needle. This subtle layer serves to disperse the glass component and glitter evenly, preserving the polished surface’s integrity. Importantly, the application is executed with precision, avoiding an overly thick layer and covering the cloisons or metal parts that might compromise the smoothness and result in irregularities. The result of this approach is shown in Figure 17.
This nuanced process not only reinforces the glittering effect but also introduces an element of control over the final aesthetic.
A third method that allows you to preserve the sparkle of metallic effect enamels and obtain a perfectly smooth surface is to apply a layer of flux on them before sanding. It must be acknowledged that the surface outcome may not precisely mirror the application of a final thin layer of metallic effect enamel. Nevertheless, the achieved result remains consistently outstanding and remarkable.
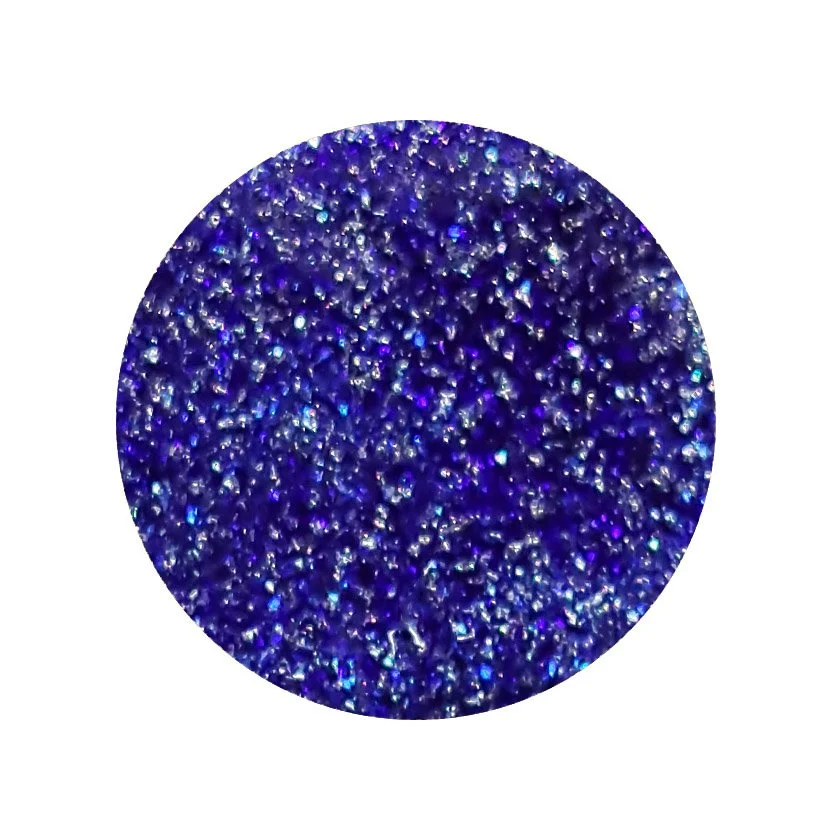
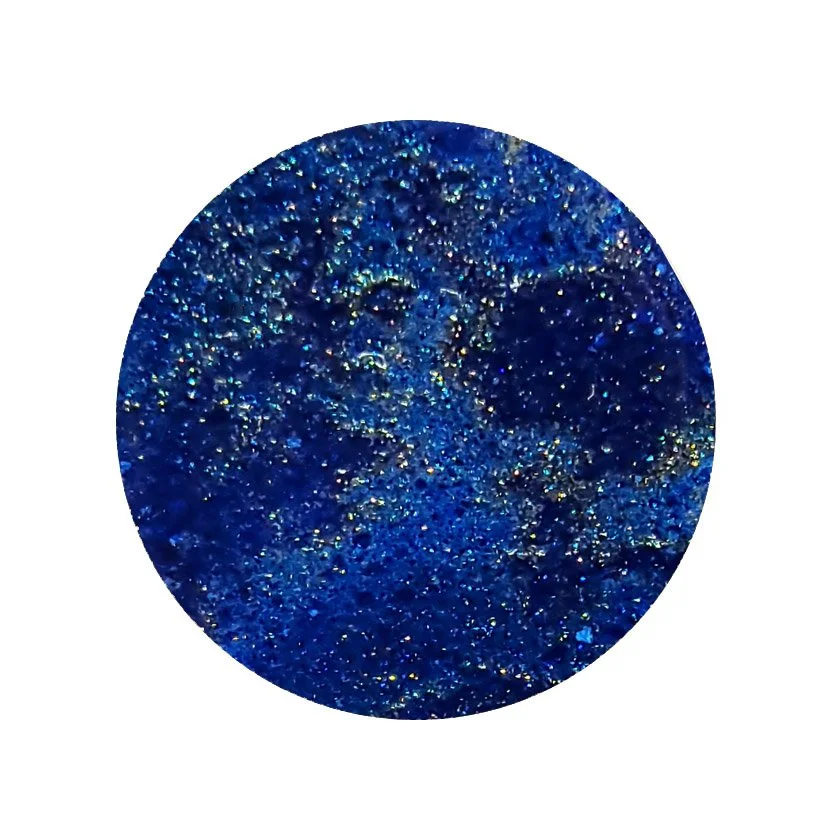
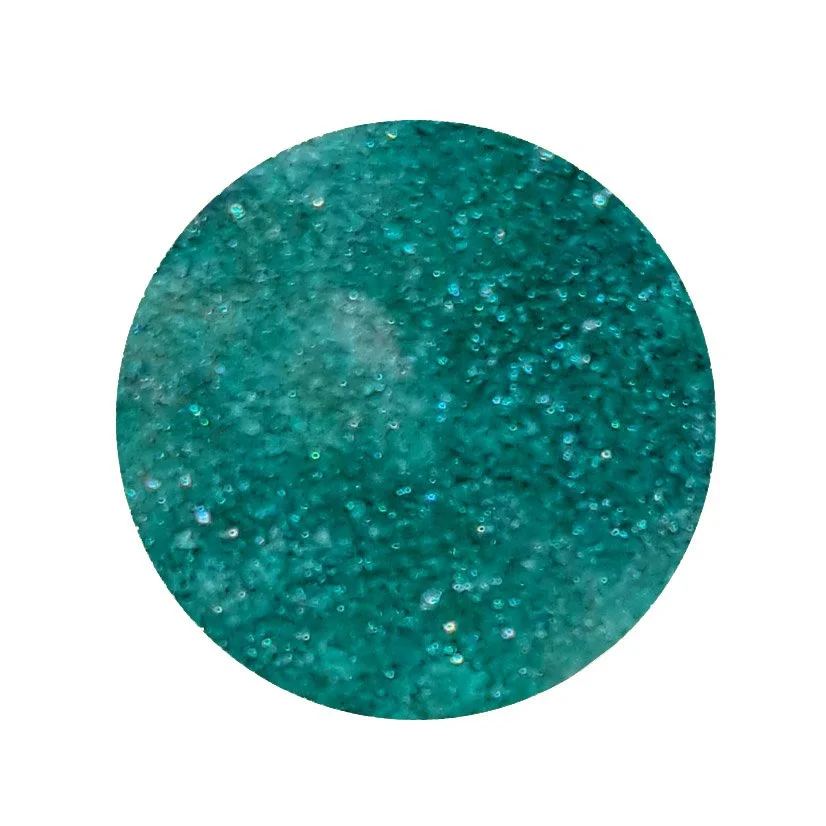
Figure 16: Samples of enamels after sanding. The sanding process is followed by a firing.
Polishing
These enamels demonstrate exceptional resilience to non-aggressive polishing techniques. Employing a polishing wheel paired with a soft cotton pad and a suitable polishing paste allows you to achieve impeccable results on the adjacent metal without unduly impacting the effect of the enamel.
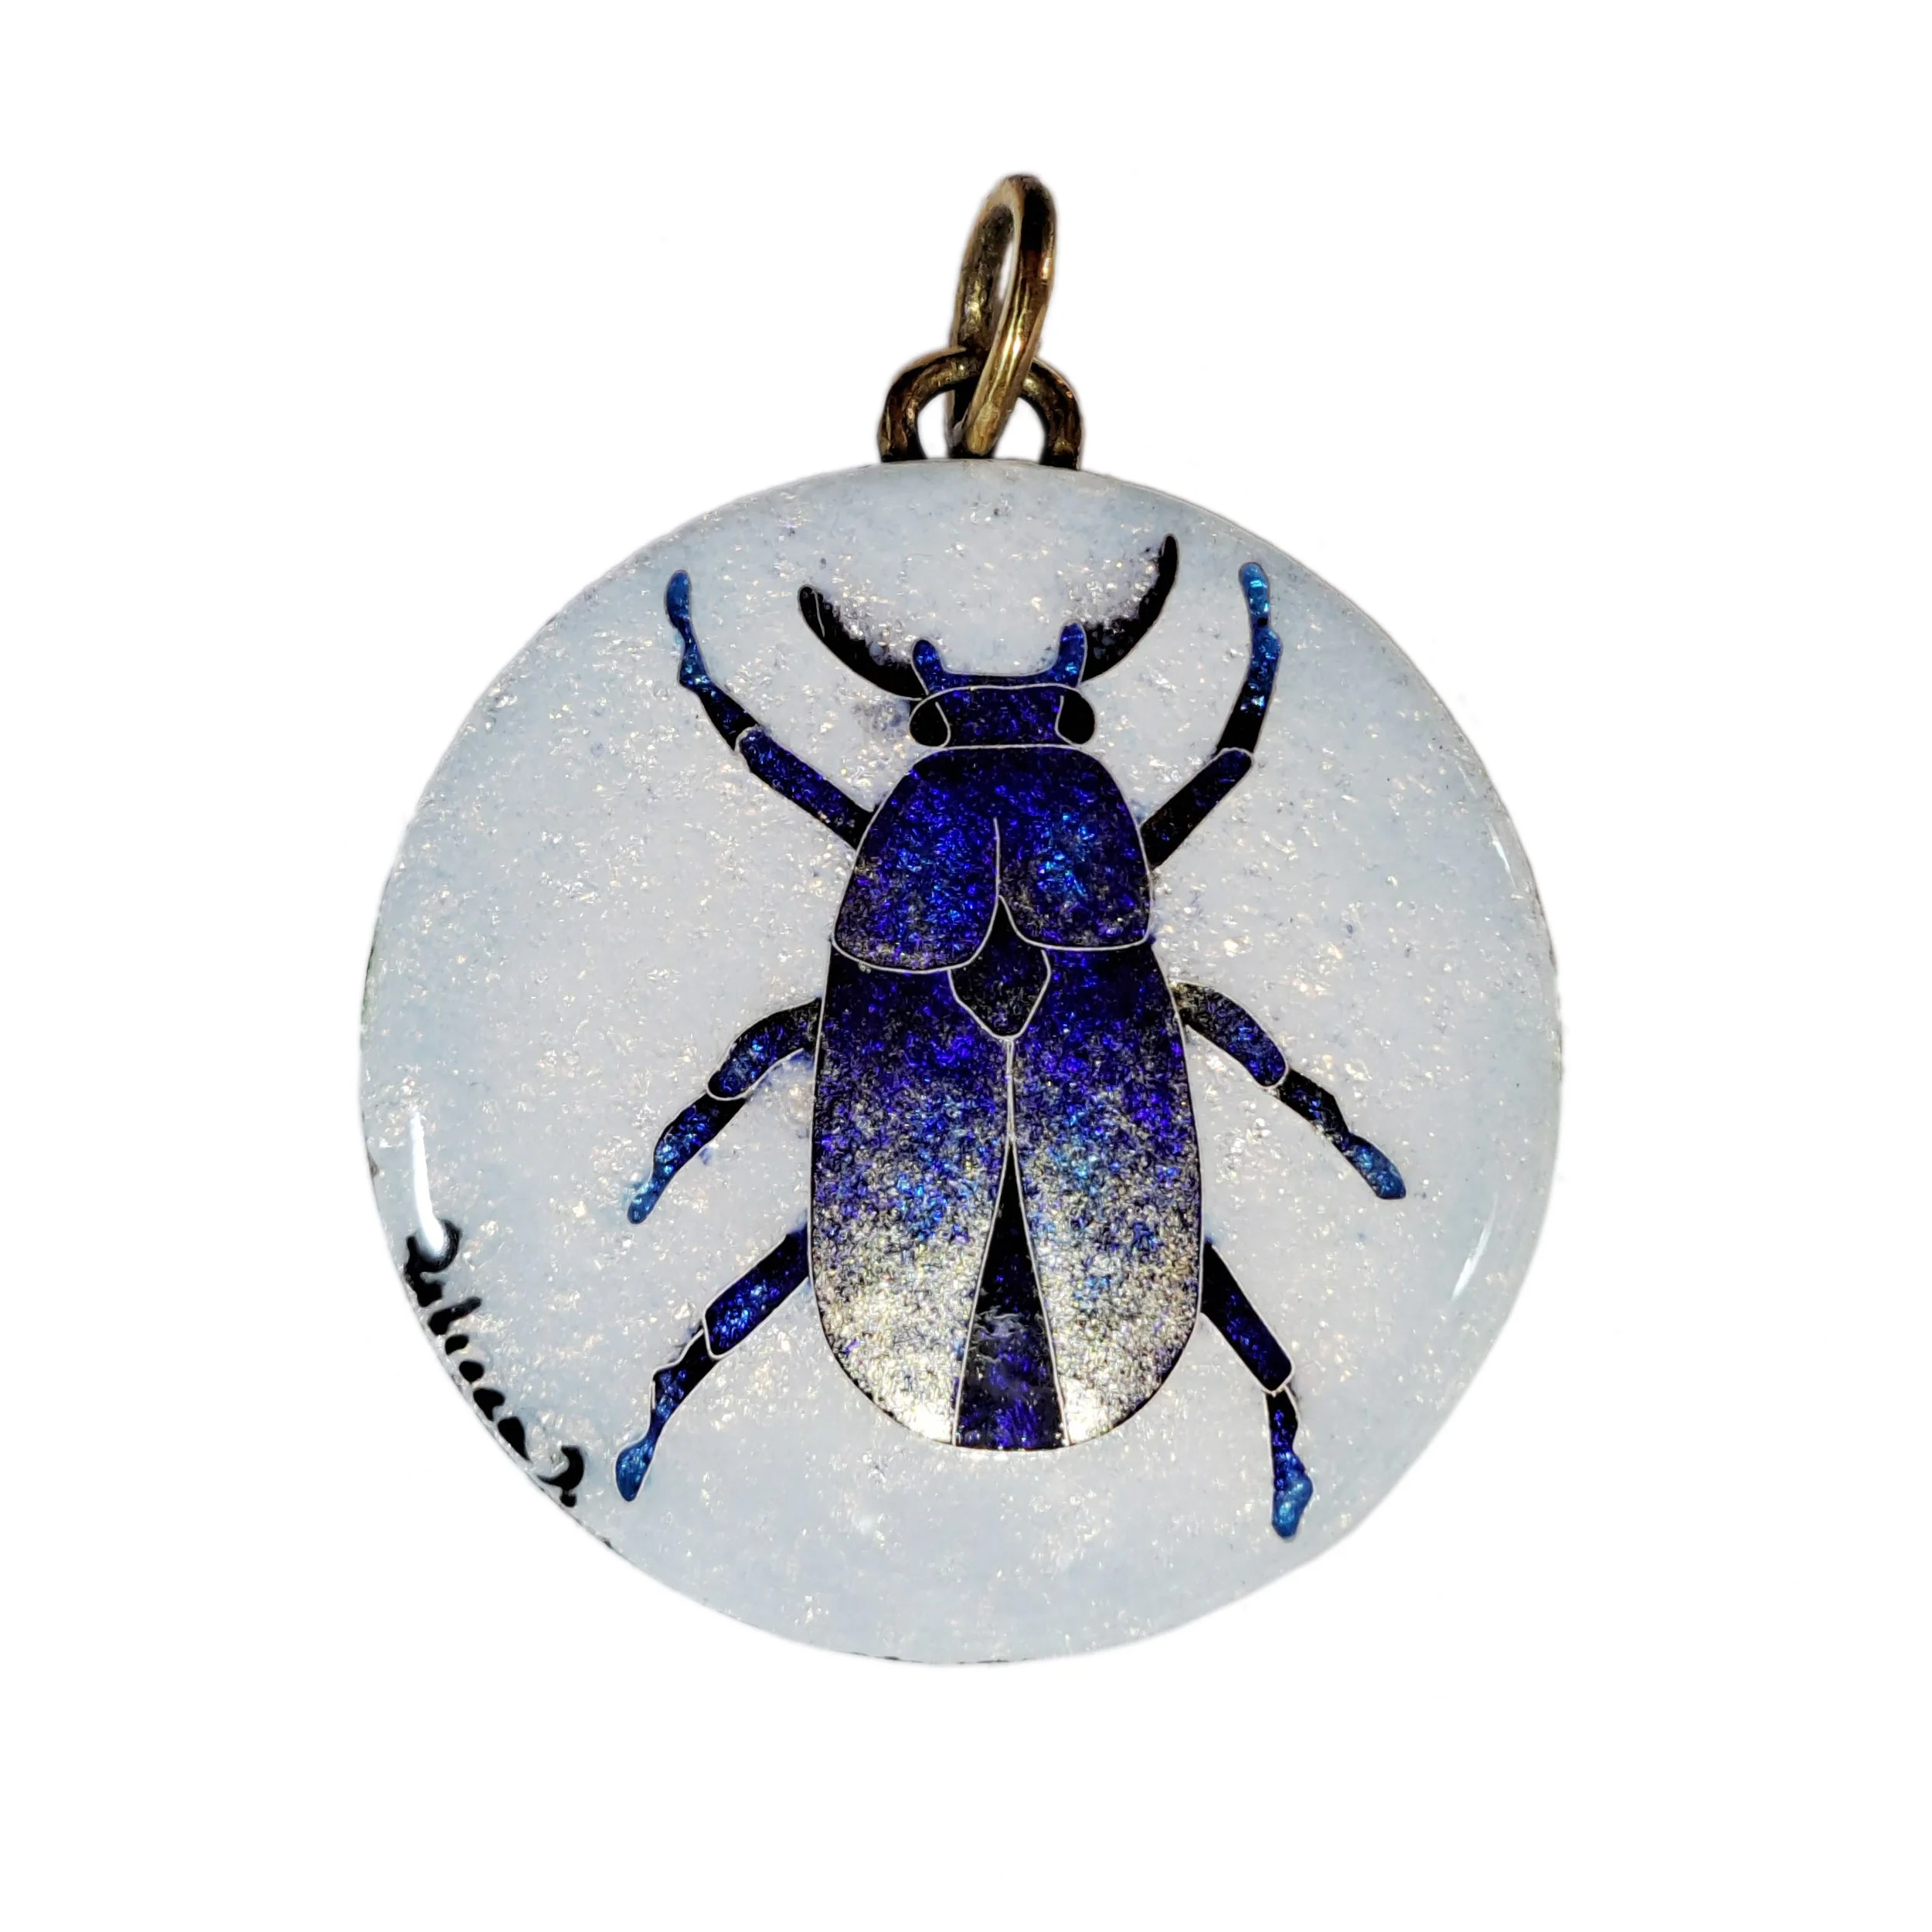
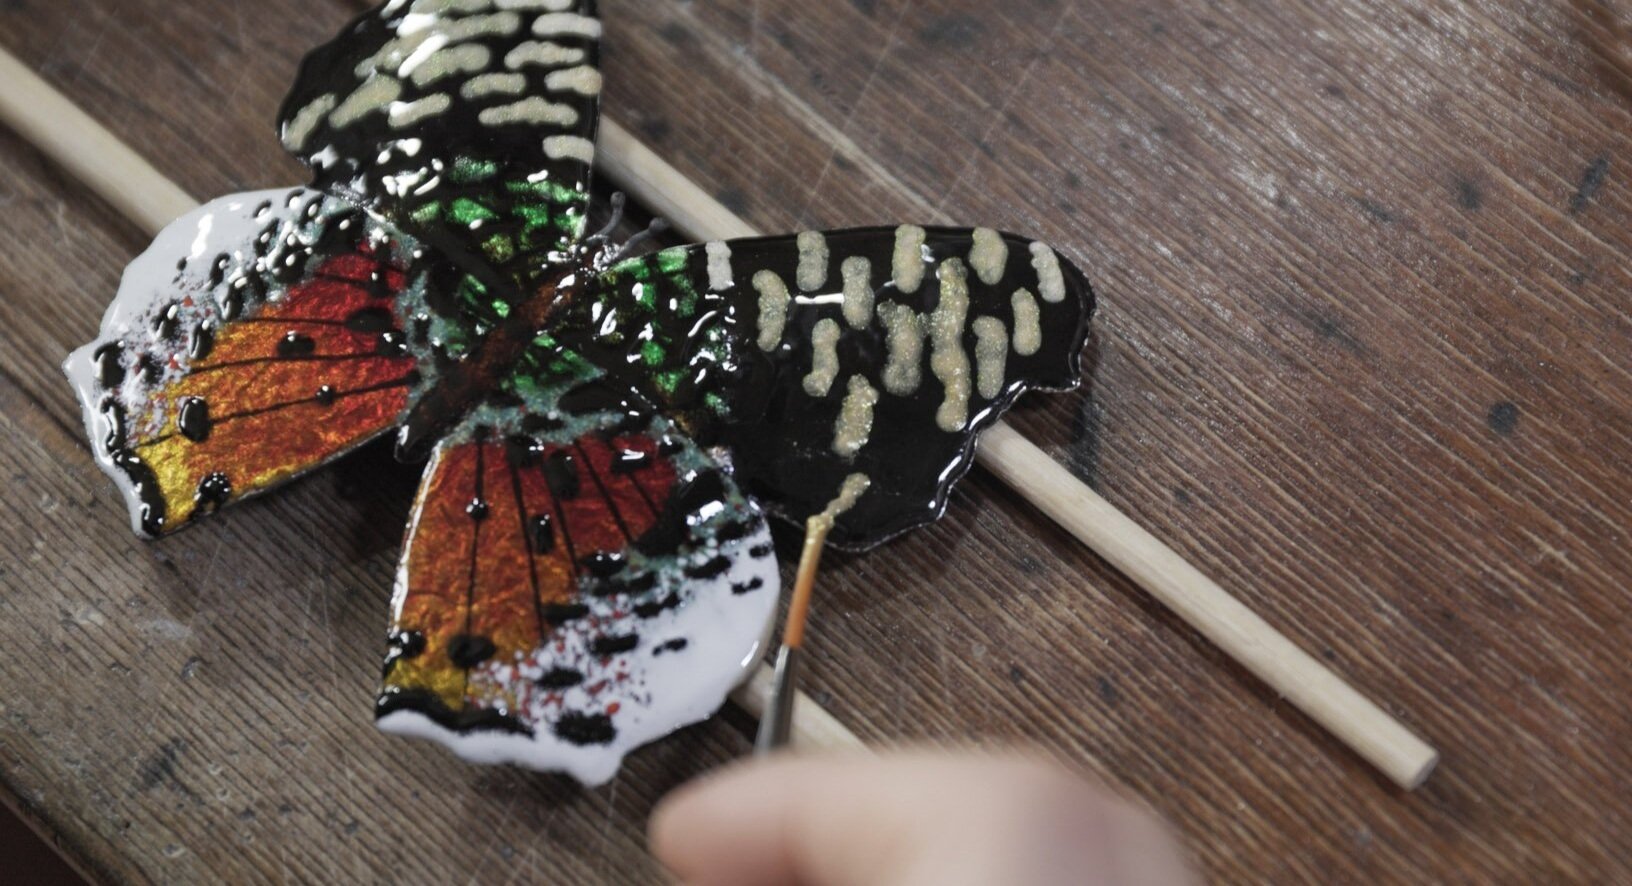
Figure 17: Cloisonné piece made on copper base with silver leaf and silver wire. A thin layer of metallic effect enamel has been applied on the insects' wings after stoning.
Plique à jour
The transparent version of these enamels can be used in plique à jour, showcasing excellent compatibility with both silver and gold. If you plan to use them in plique à jour one crucial factor to bear in mind is the undertone’s darkness, a facet that significantly influences the passage of light. This awareness becomes important when selecting the colors.
The insights previously discussed regarding the sanding of enamel in cloisonné and champlevé extend to plique à jour, especially when contemplating the use of carborundum or sandpaper to achieve a perfectly flat surface. However, it is essential to note that the choice of whether or not to engage in the sanding process remains at the discretion of the artist. This decision becomes especially pertinent in the context of filigree plique à jour, where the omission of sanding is a common practice.
Irrespective of the chosen approach to surface treatment, a personal recommendation emerges. If you want to use these enamels on the entire piece filling all the cells, I recommend selecting the shimmer ones which let more light pass through. While if you want to use metallic ones consider employing these enamels more strategically for accentuating details rather than filling all the cells. I suggest that because they tend to block the passage of light more than shimmer ones even if they have a light undertone. However selectively using them in specific areas, leaving some cells enamelled with classic transparent colors, will help to obtain the visual lightness typical of plique à jour technique with an attractive and innovative aesthetic.

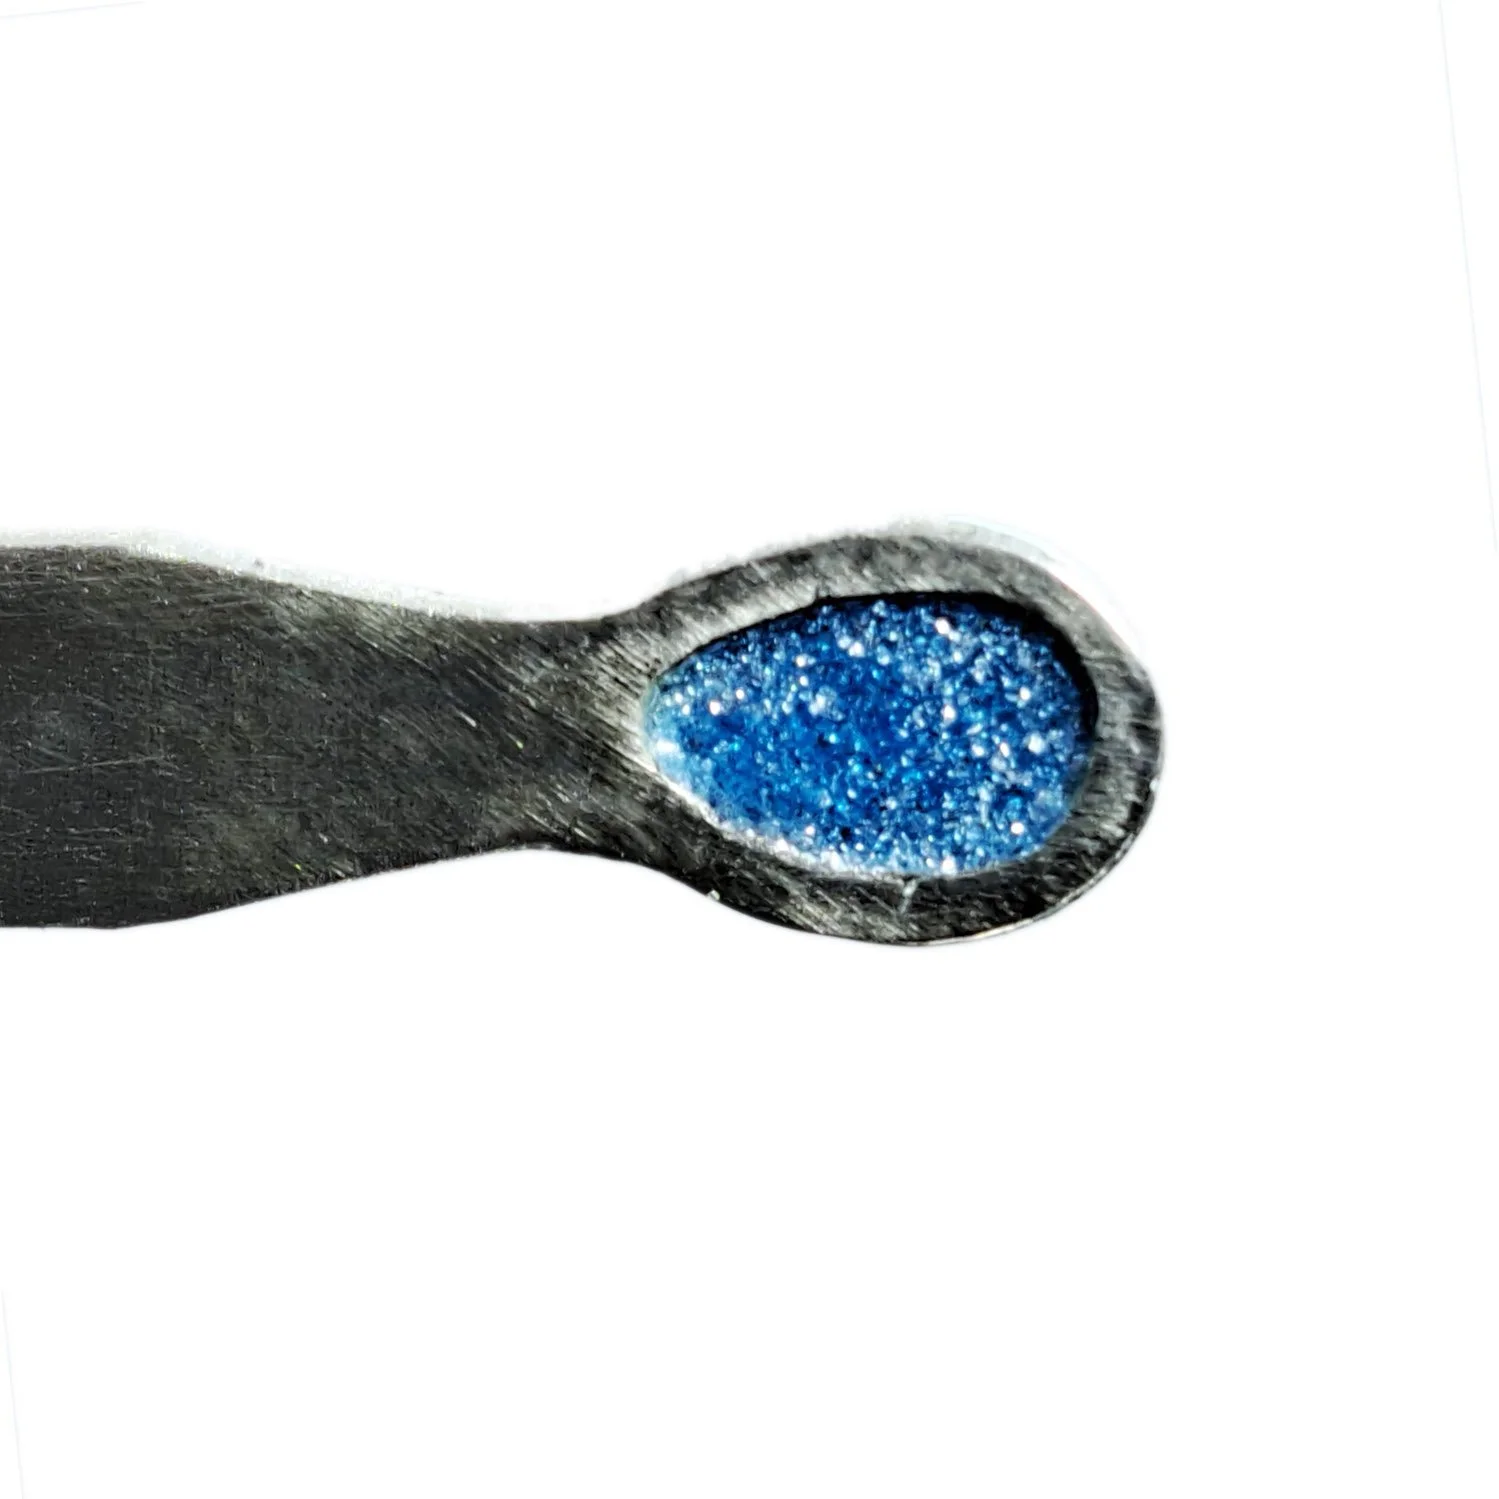
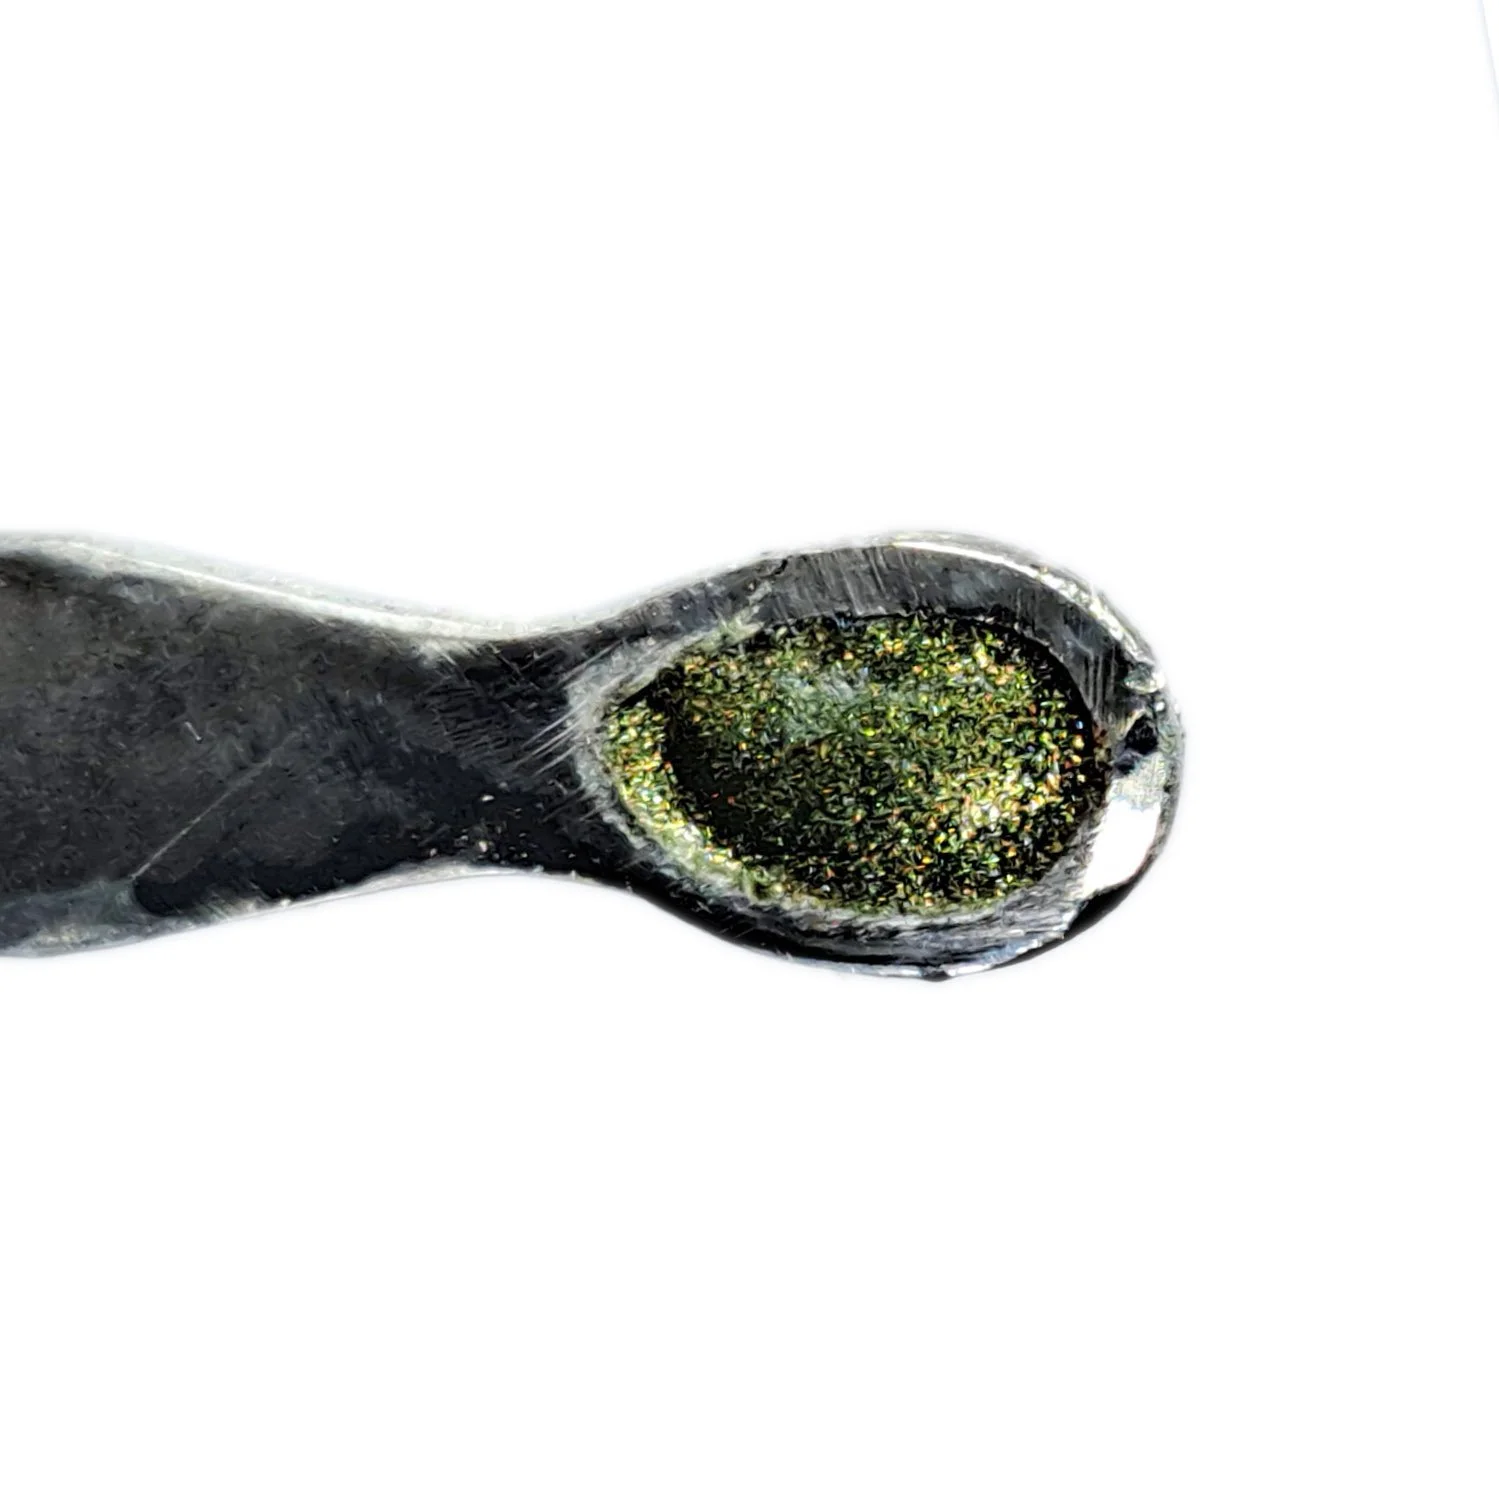
Figure 18: Samples of transparent metallic effect enamel on silver used in plique à jour.
A legitimate doubt
Why opt for the application of metal powder or mica onto the enamel rather than use metallic effect enamels by Milton Bridge? This question naturally comes to the mind of each enameller at a certain point, even to mine, and the answer came after from deep testing process. When metal powder or mica is subjected to firing on the enamel surface, it tends to maintain a superficial presence. It lacks the profound bonding necessary for enduring wear resistance. Furthermore, enamel can attract and adhere a limited quantity of non-glass materials to its surface. Once this limit is reached, nothing else can be added, and if through excessive firing the effect of the mica or metal powder is ruined it can hardly be regained. Beyond this fundamental consideration, the enamels in question made by Milton Bridge are crafted to deliver a distinctive aesthetic experience. Their design revolves around the interplay of captivating colors, where the undertone is harmoniously married to the metallic or shimmer effect. This intricate union not only yields exceptional visual results but also underscores stability. A result of the precise calibration of proportions between the enamel’s components. These calibrated ratios ensure compatibility with various metals and the main enamel brands in the market both leaded and lead-free. On top of that, if excessive firing ruins the effect you want to obtain, another layer of enamel and another firing will be enough to obtain exactly the effect you want. Choosing to mix mica or metal powder independently, without thoughtful consideration, carries inherent risks. Such a haphazard approach may yield a compound lacking stability and cohesion. In such instances, the glass powder might not firmly bond with the non-glassy material, because there is too much of the latter. This leads to an enamel composition that falls short of the desired standard and cannot guarantee a long-lasting product.
An alternative technique
These enamels can be used to create shiny flakes that can be applied on a base of a contrasting color to create a particular aesthetic.
Begin by applying one or two layers of enamel onto a thin copper plate, with an optimal thickness recommendation of 0.4 mm to 0.5 mm, and notably, devoid of any counter enamel. After this, do a sugar firing. Once the piece has cooled down, remove the oxide present on the back by using a damp tissue or, for more effective results, employ a glass brush. Avoid pickling, as it is unnecessary in this context. To ensure your safety, wear gloves and protective glasses, and, with a sheet of paper beneath your workspace, utilize pliers to fold the piece onto itself, thereby breaking the enamel and yielding an array of small, dazzling flakes. Maintaining the protective glasses throughout this process is imperative to guard against potential splinters.
The sheet of paper will contain a blend of flakes and enamel dust. Sift it through an 80- mesh sieve to separate the desired flakes, exclusively designated for the current project, that will remain in the sieve from the residual powder that will pass through and which can find utility as enamel or counter enamel in future artistic ventures.
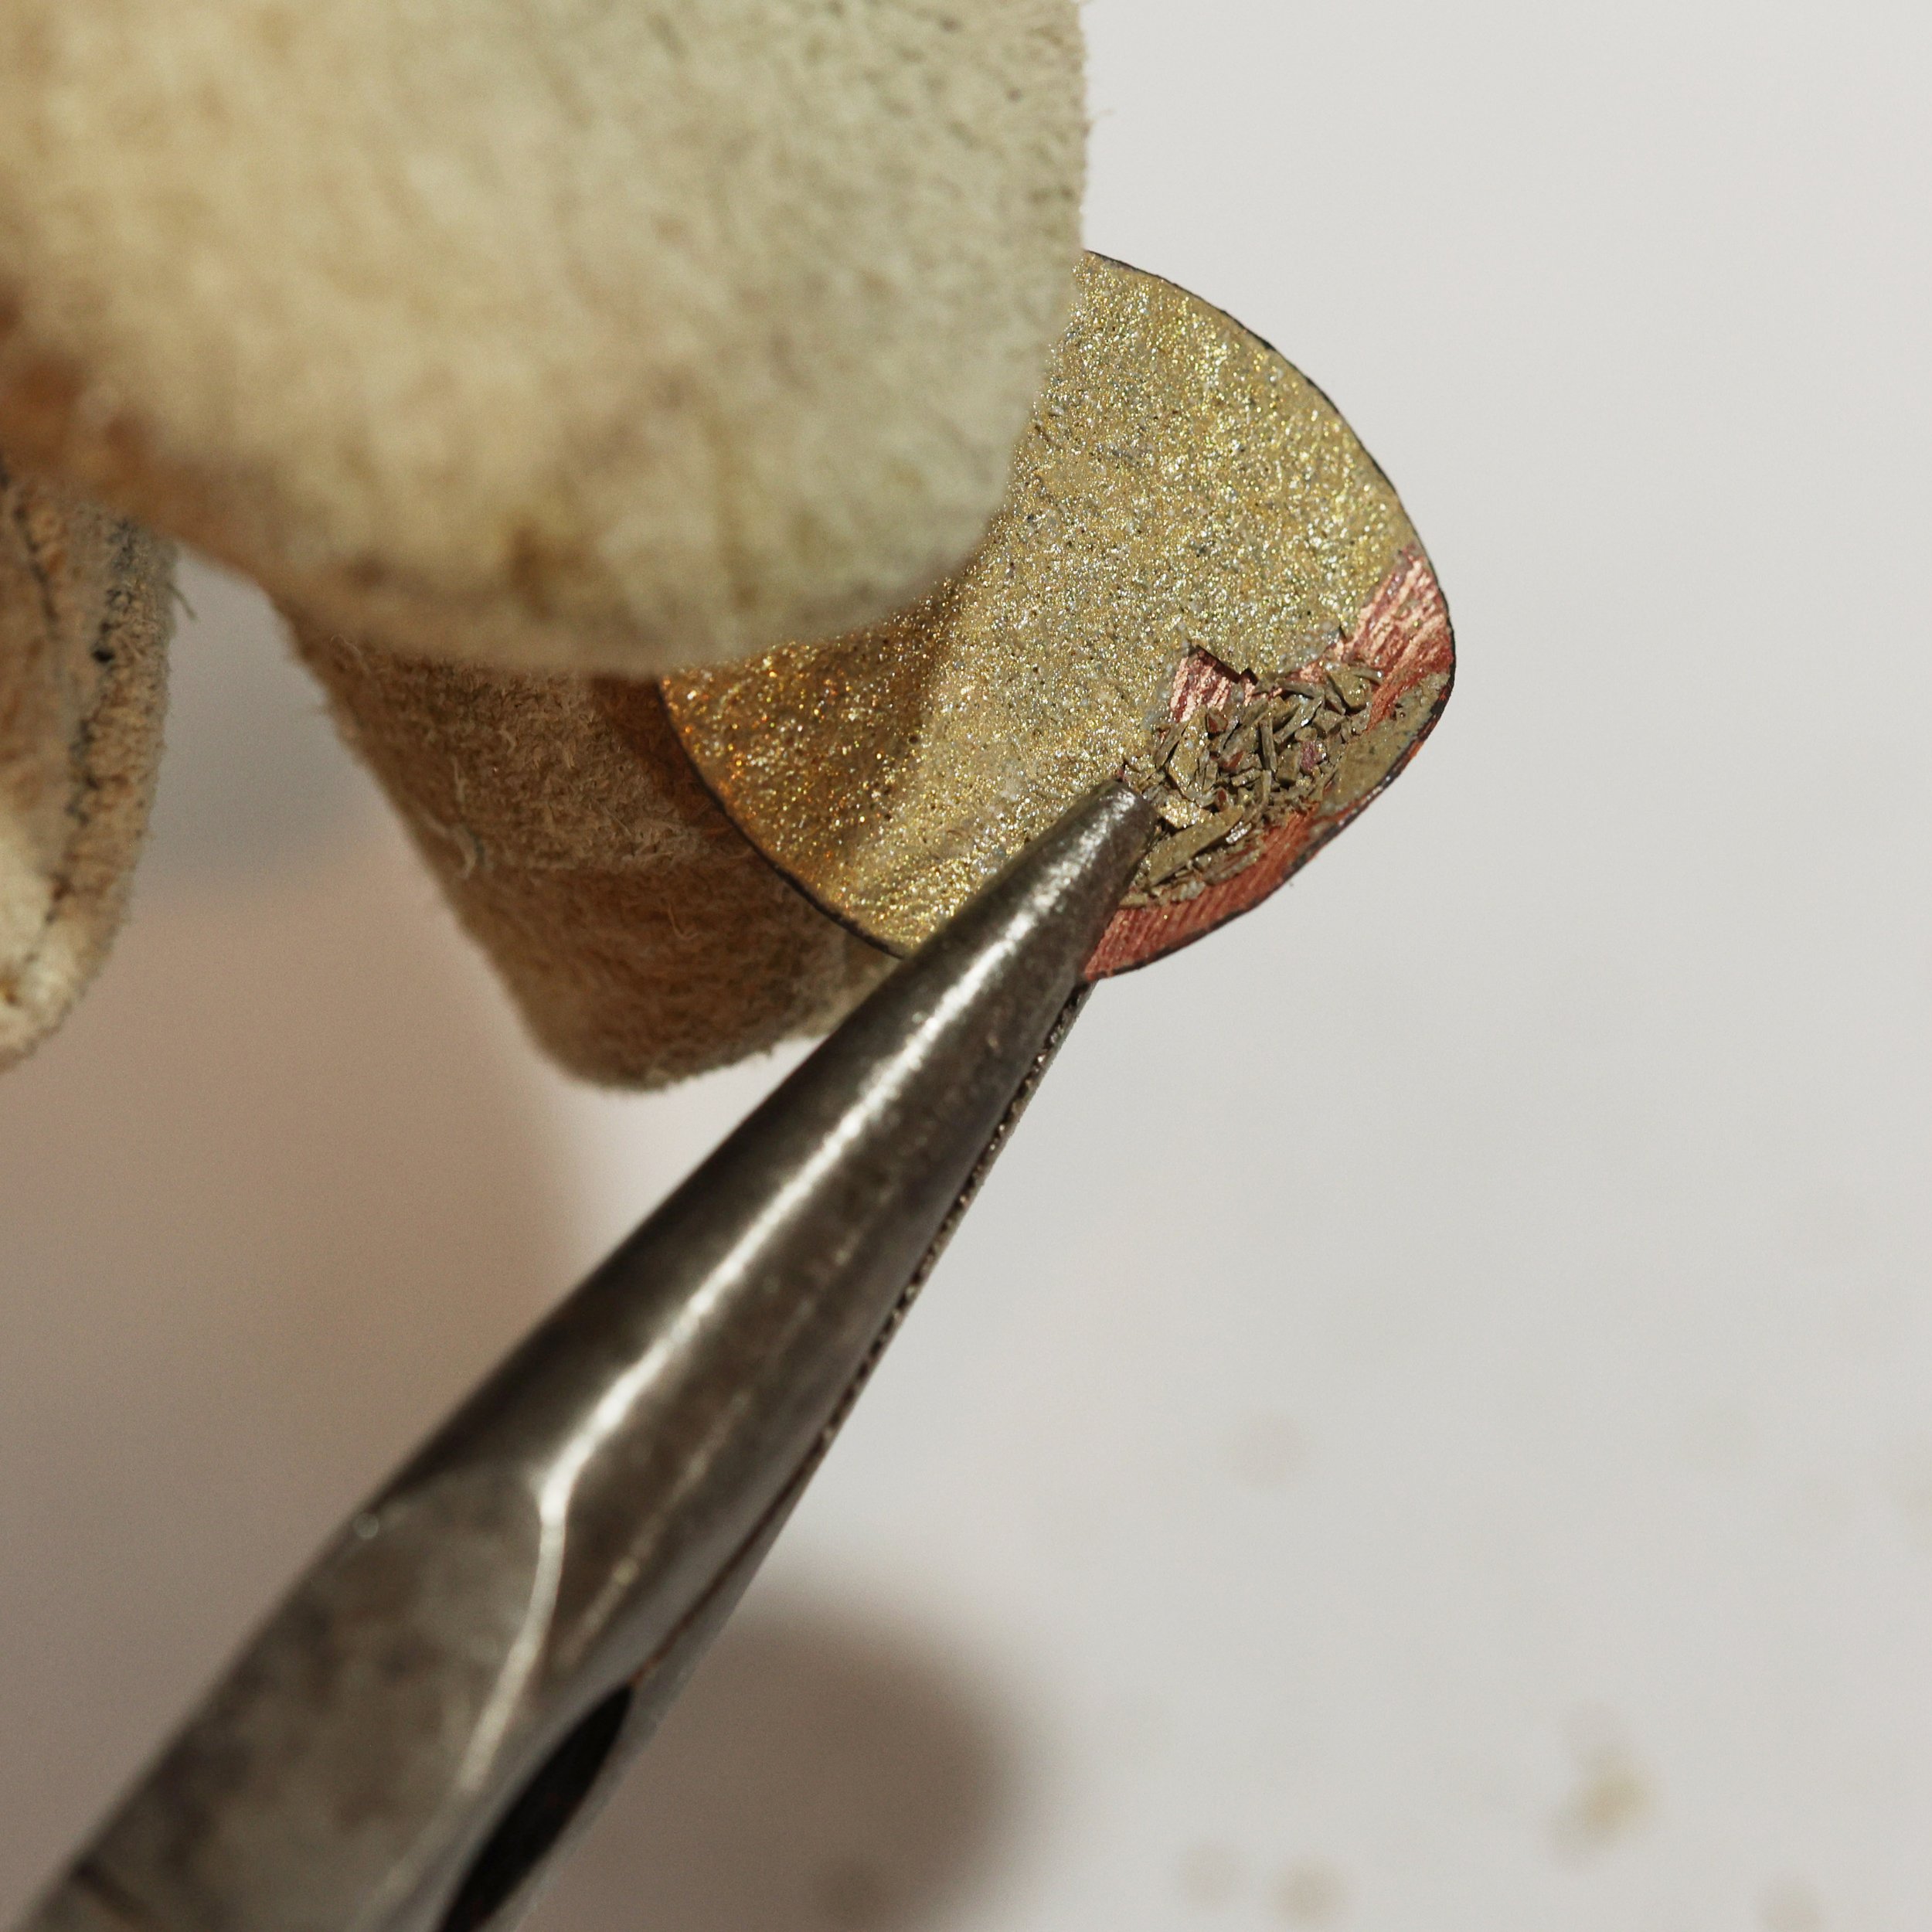
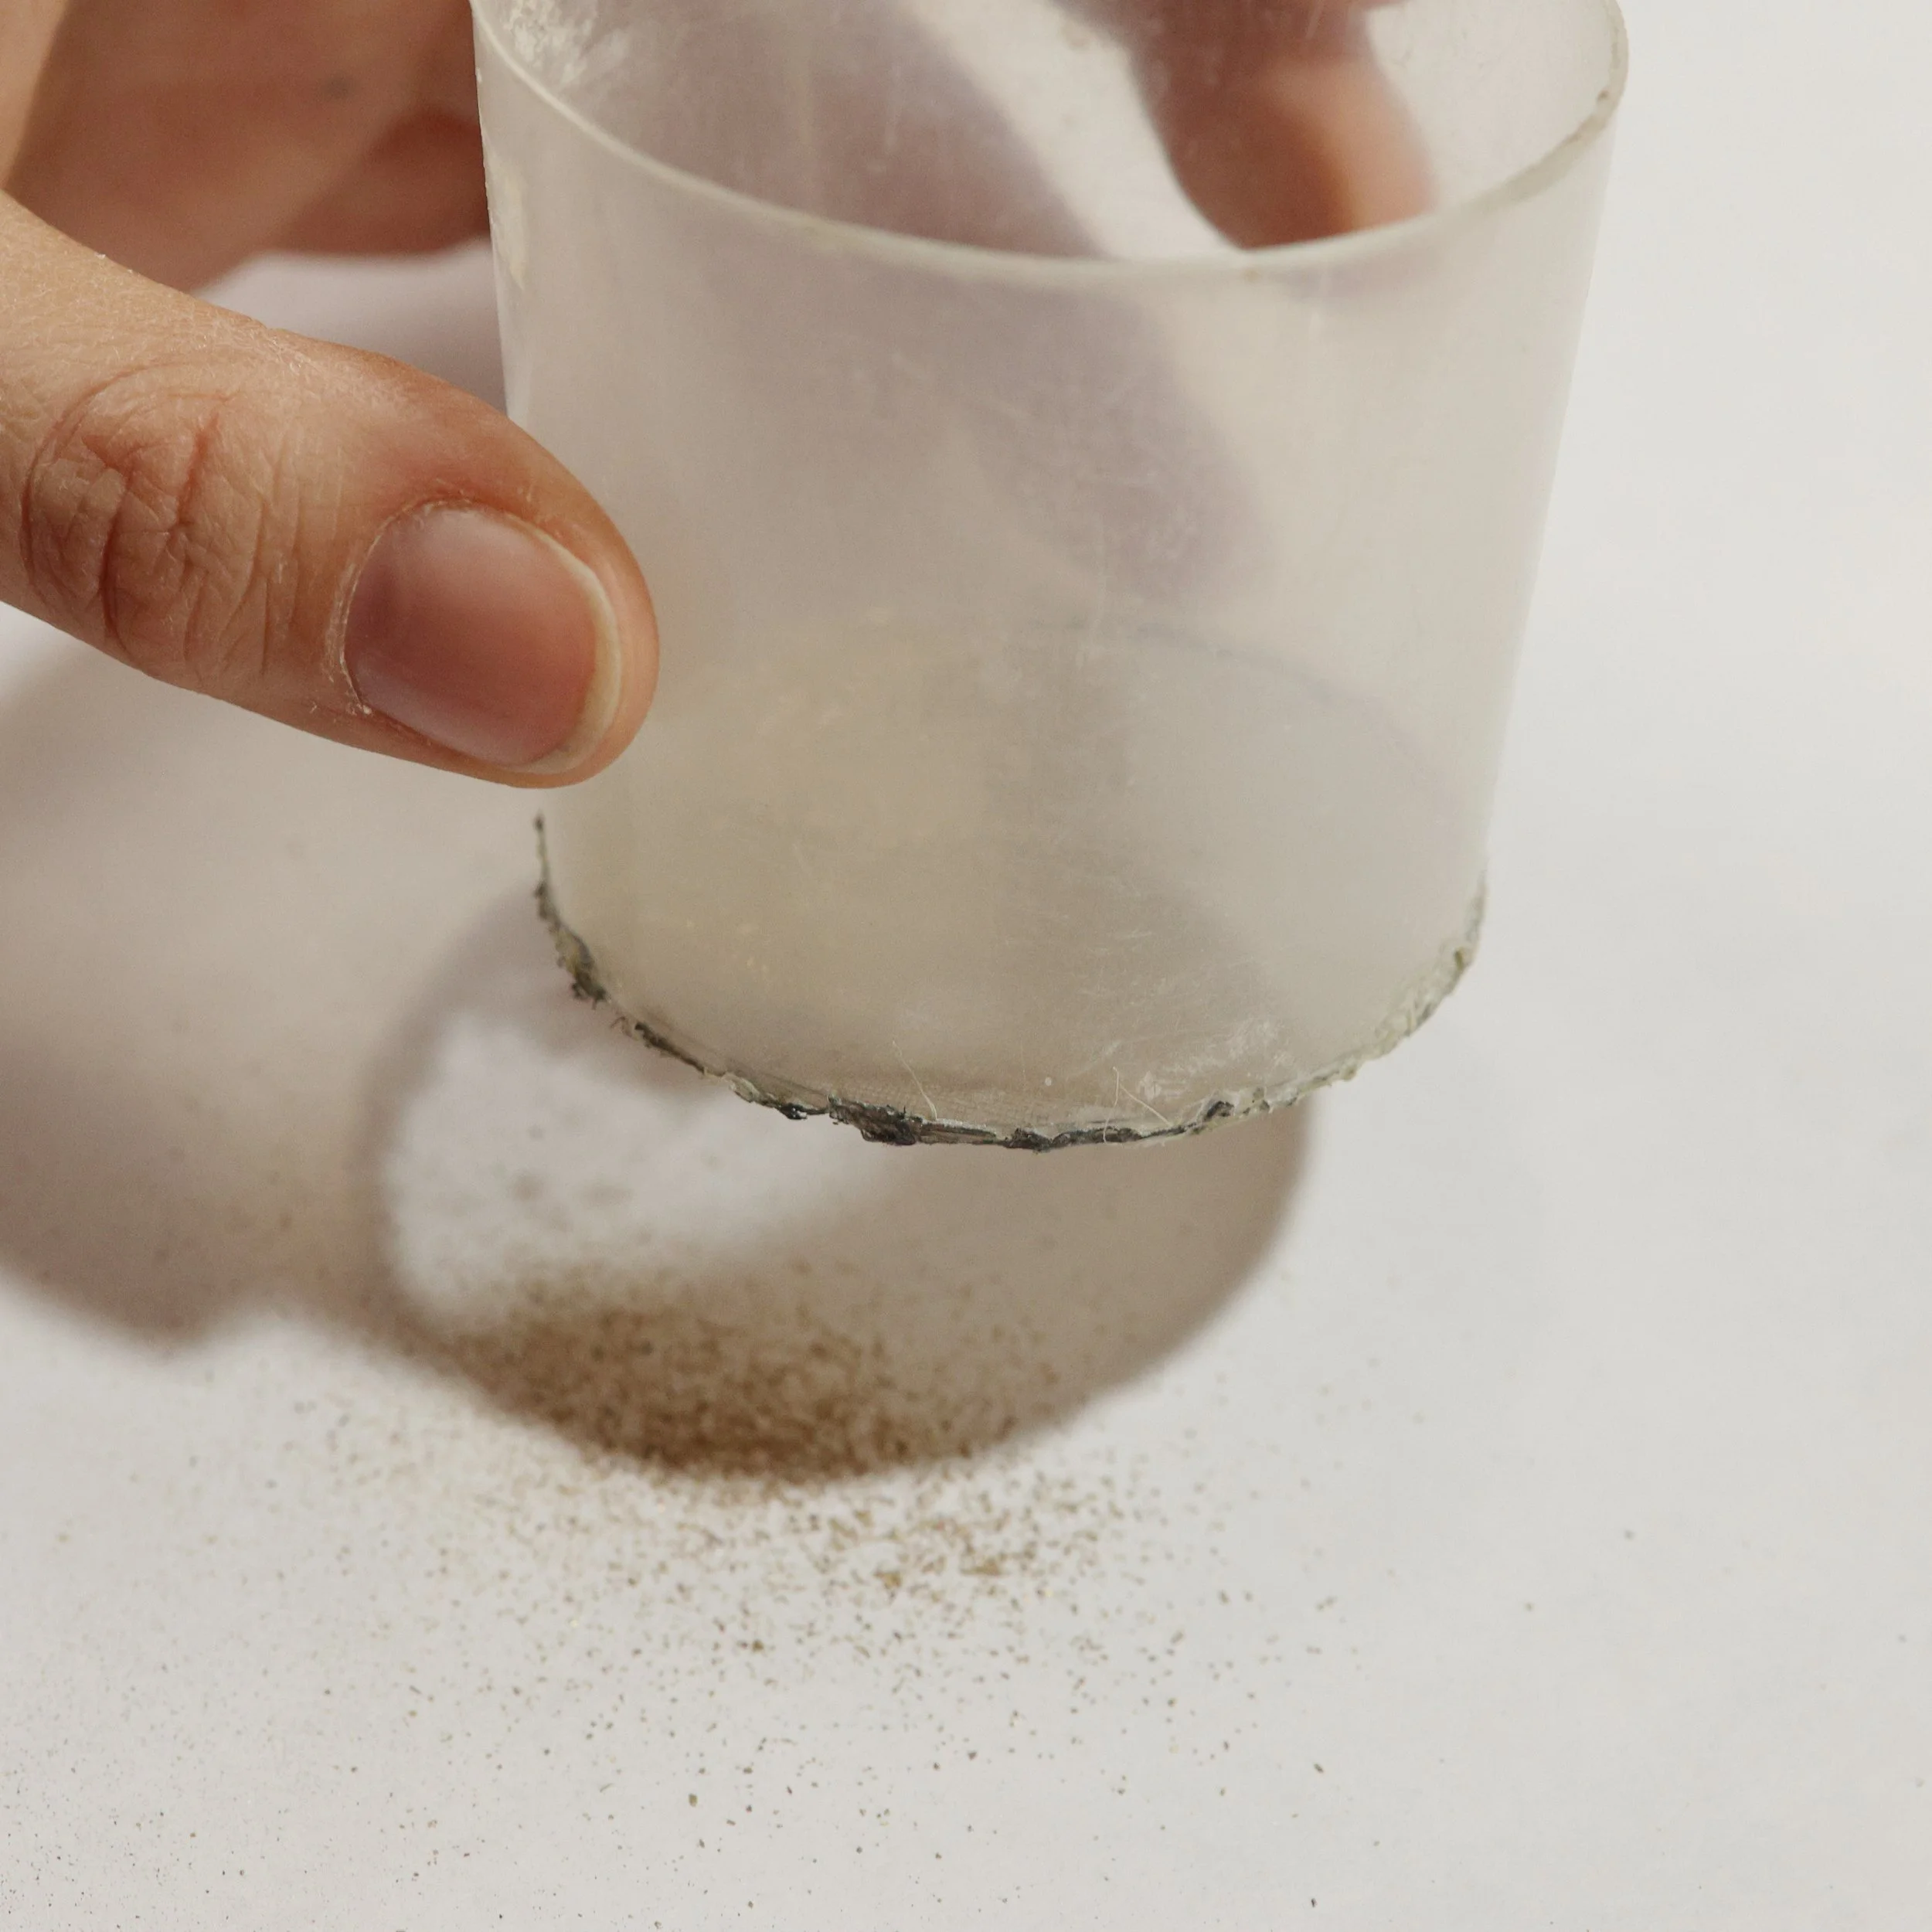
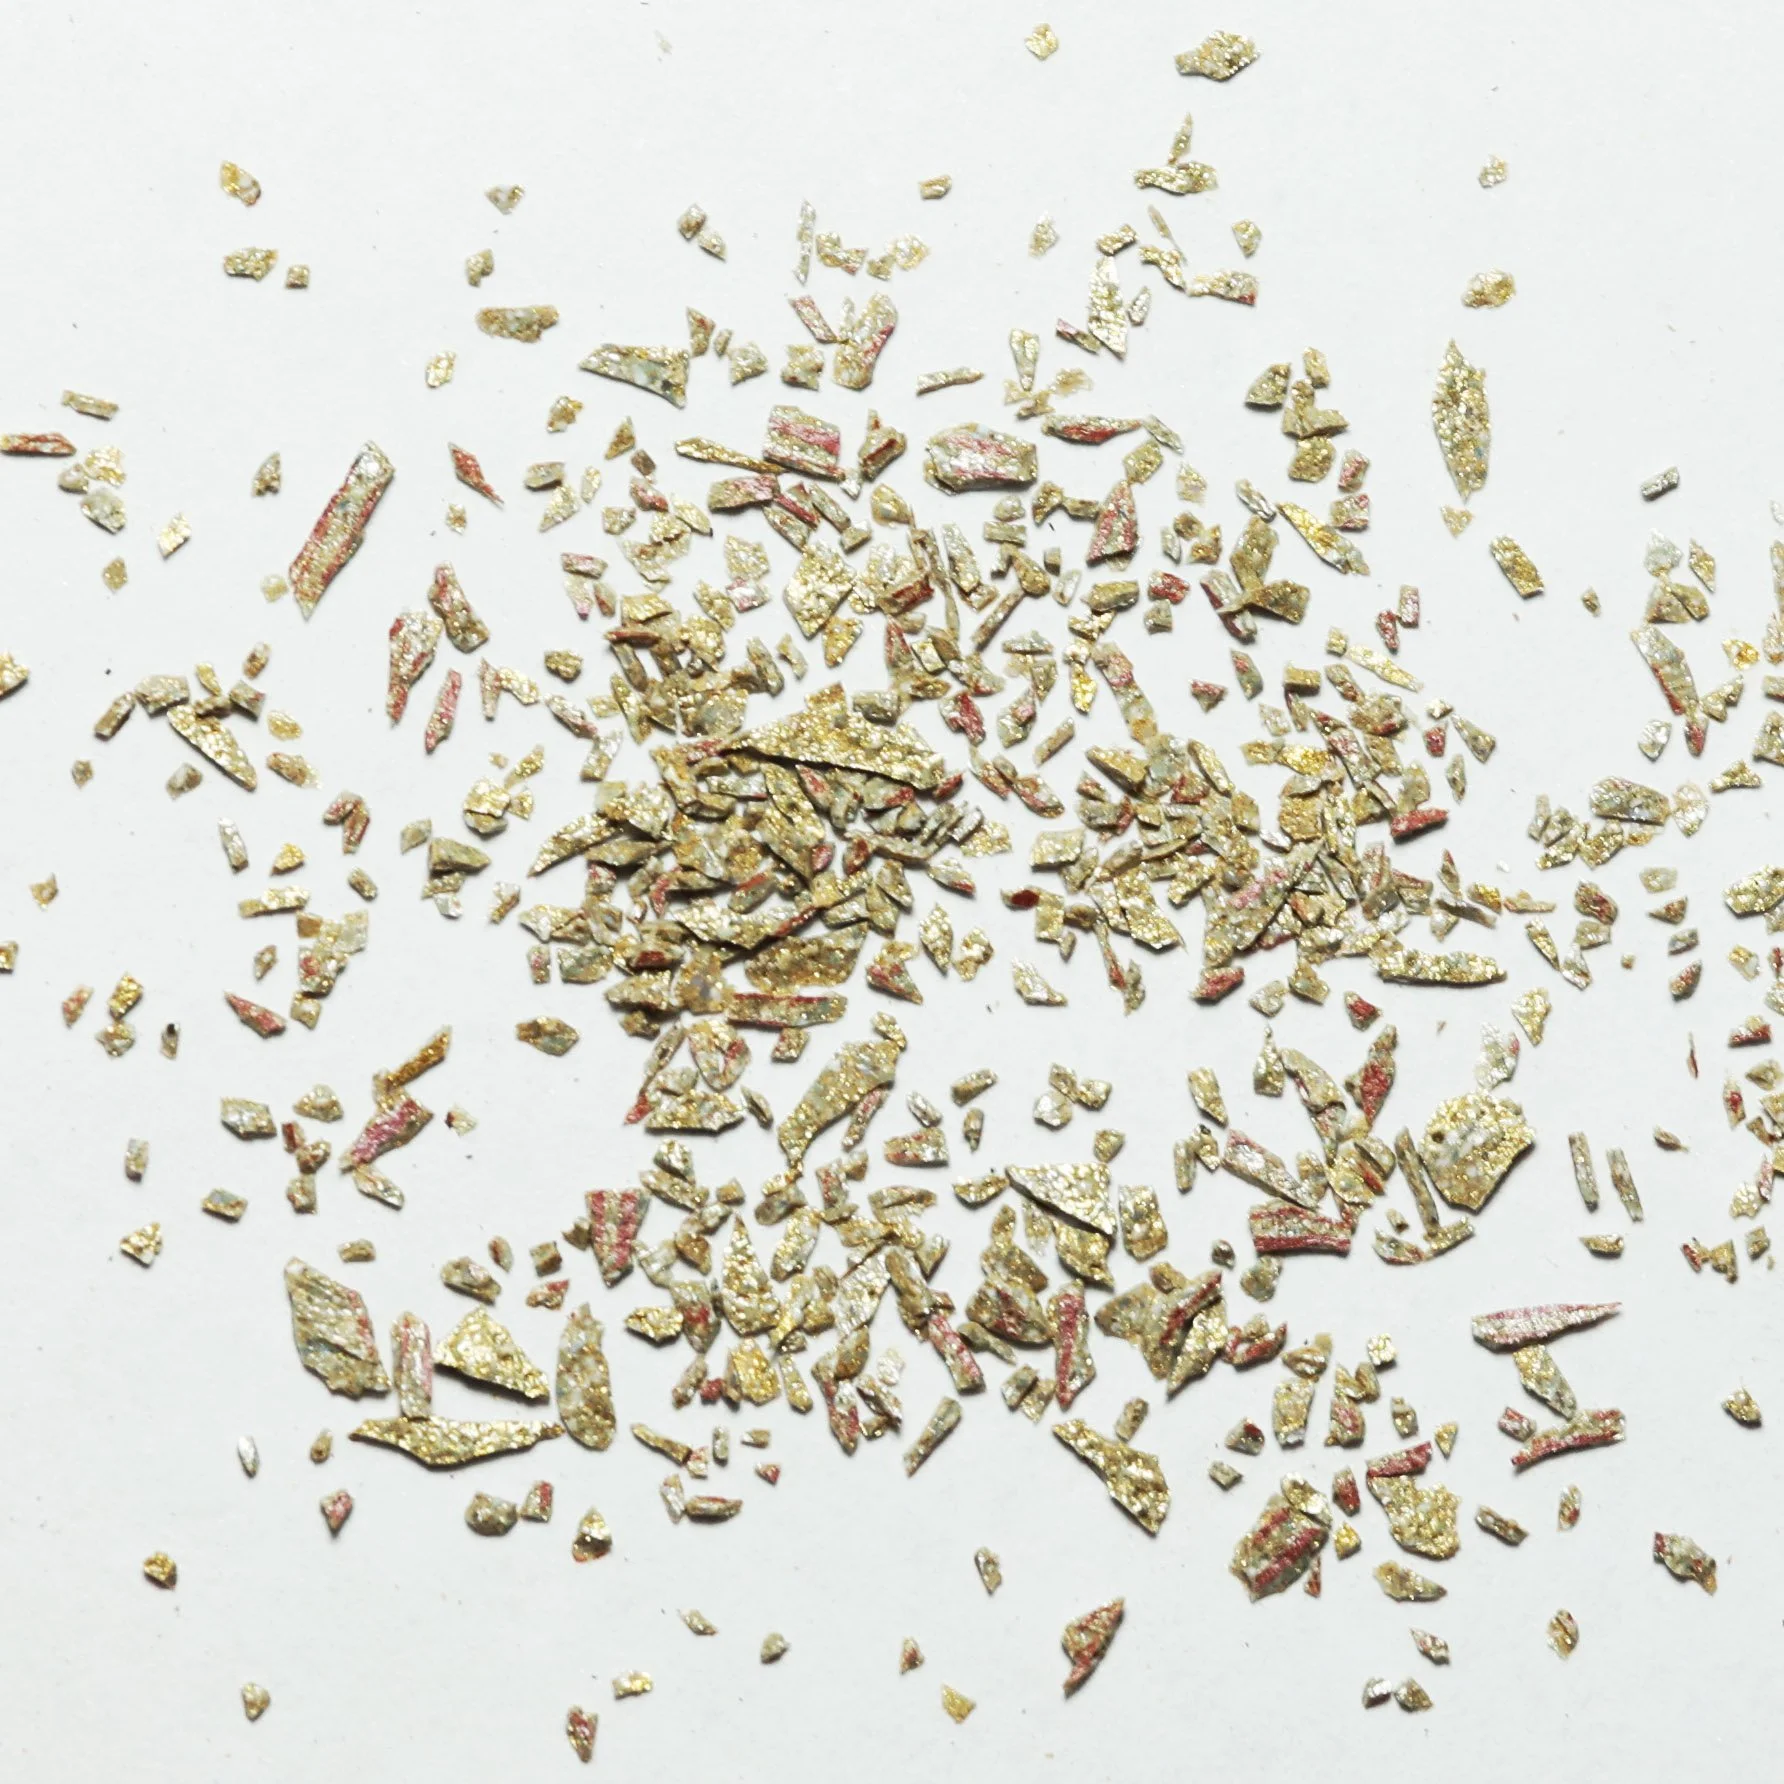
Figure 19: Steps to obtain metallic effect enamel flakes from an enameled copper plaque.
Transitioning to another piece of previously counter-enameled copper, commence by wet packing a layer of either opaque or transparent enamel. A key consideration here is selecting an enamel with a relatively low melting point, avoiding harder enamels. I opted for black enamel, chosen for its aesthetically pleasing contrast with No. 41 used to create the flakes. While the base enamel is still in its wet state, sprinkle the flakes with your fingers over it, akin to the act of seasoning with table salt. Should flakes require adjustment or removal, tweezers prove handy in this process.
The final act involves firing the piece for 45/50 seconds on a 3-point trivet at around 820 °C, a duration sufficient to render the base enamel, in this case the opaque black, glossy. Should a preference lean towards less raised flakes, a more prolonged firing is an option, bearing in mind that this might slightly temper the strength of the metallic effect, in this case, or shimmer.
Importantly, this creative approach is not confined to specific enamels; it extends seamlessly to both classic and Metallic effects enamel by Milton Bridge. With the freedom to experiment with various enamels, firing times, and color combinations, the artistic possibilities are virtually boundless.
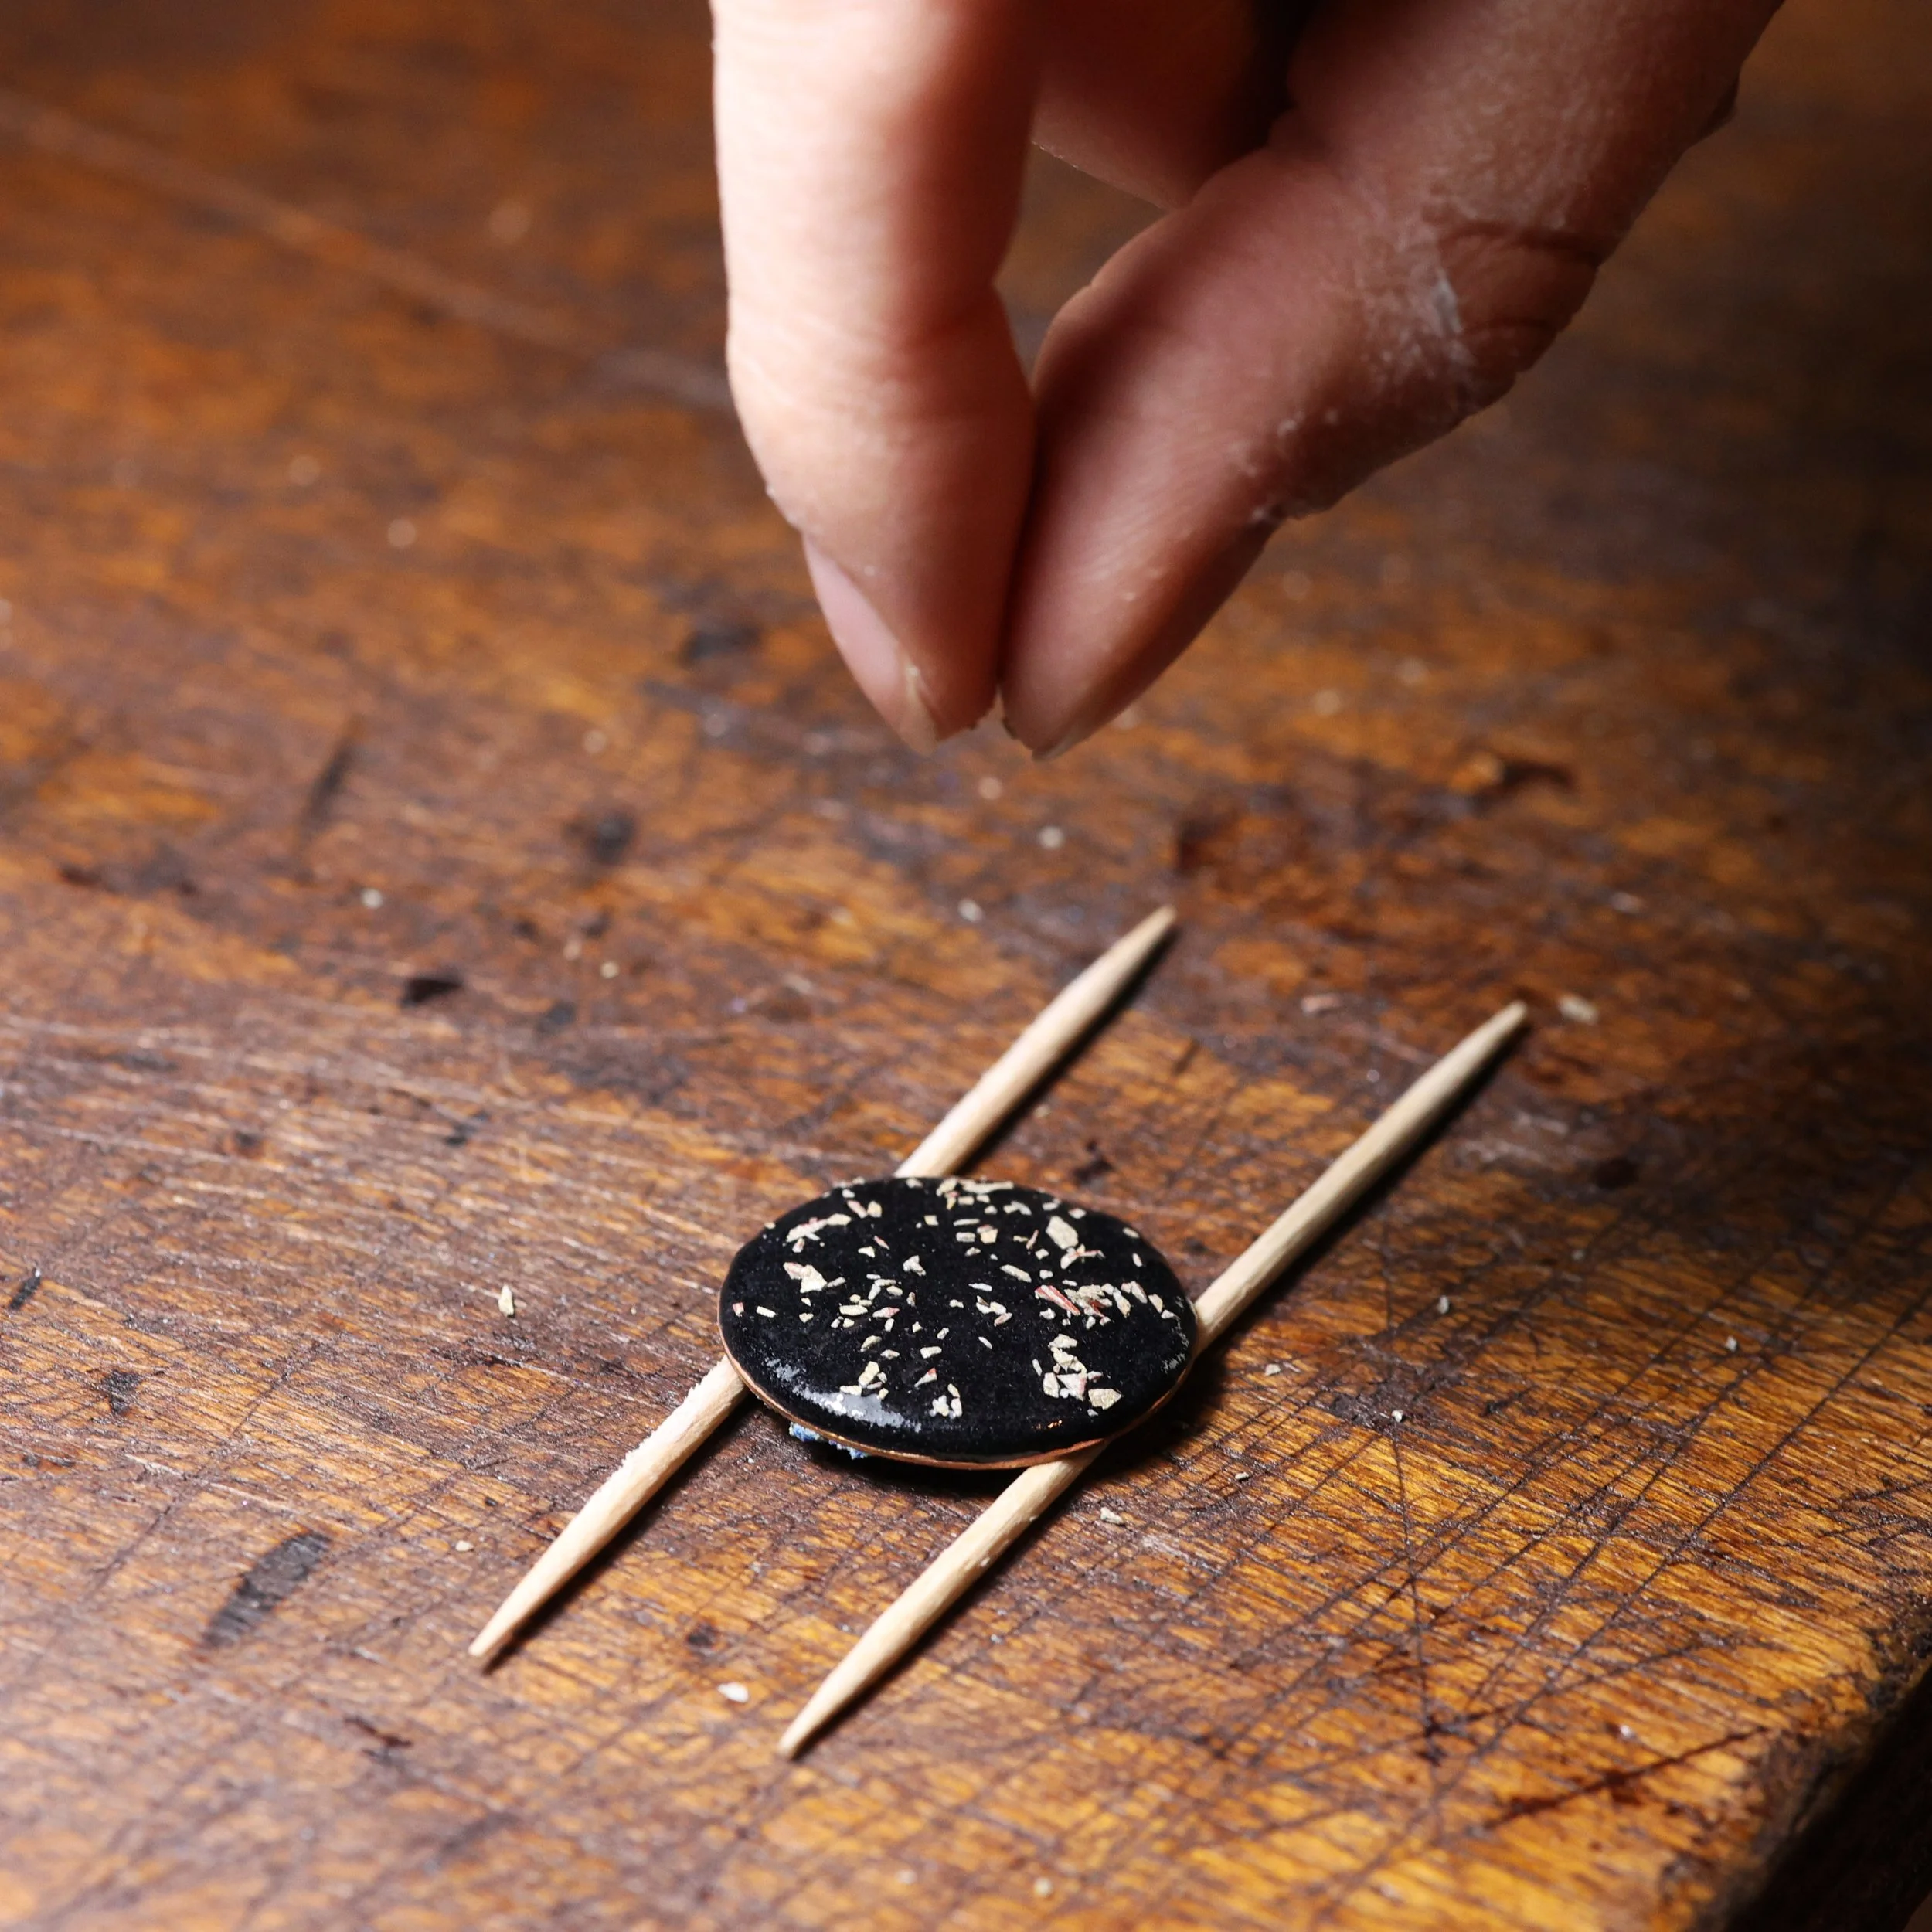
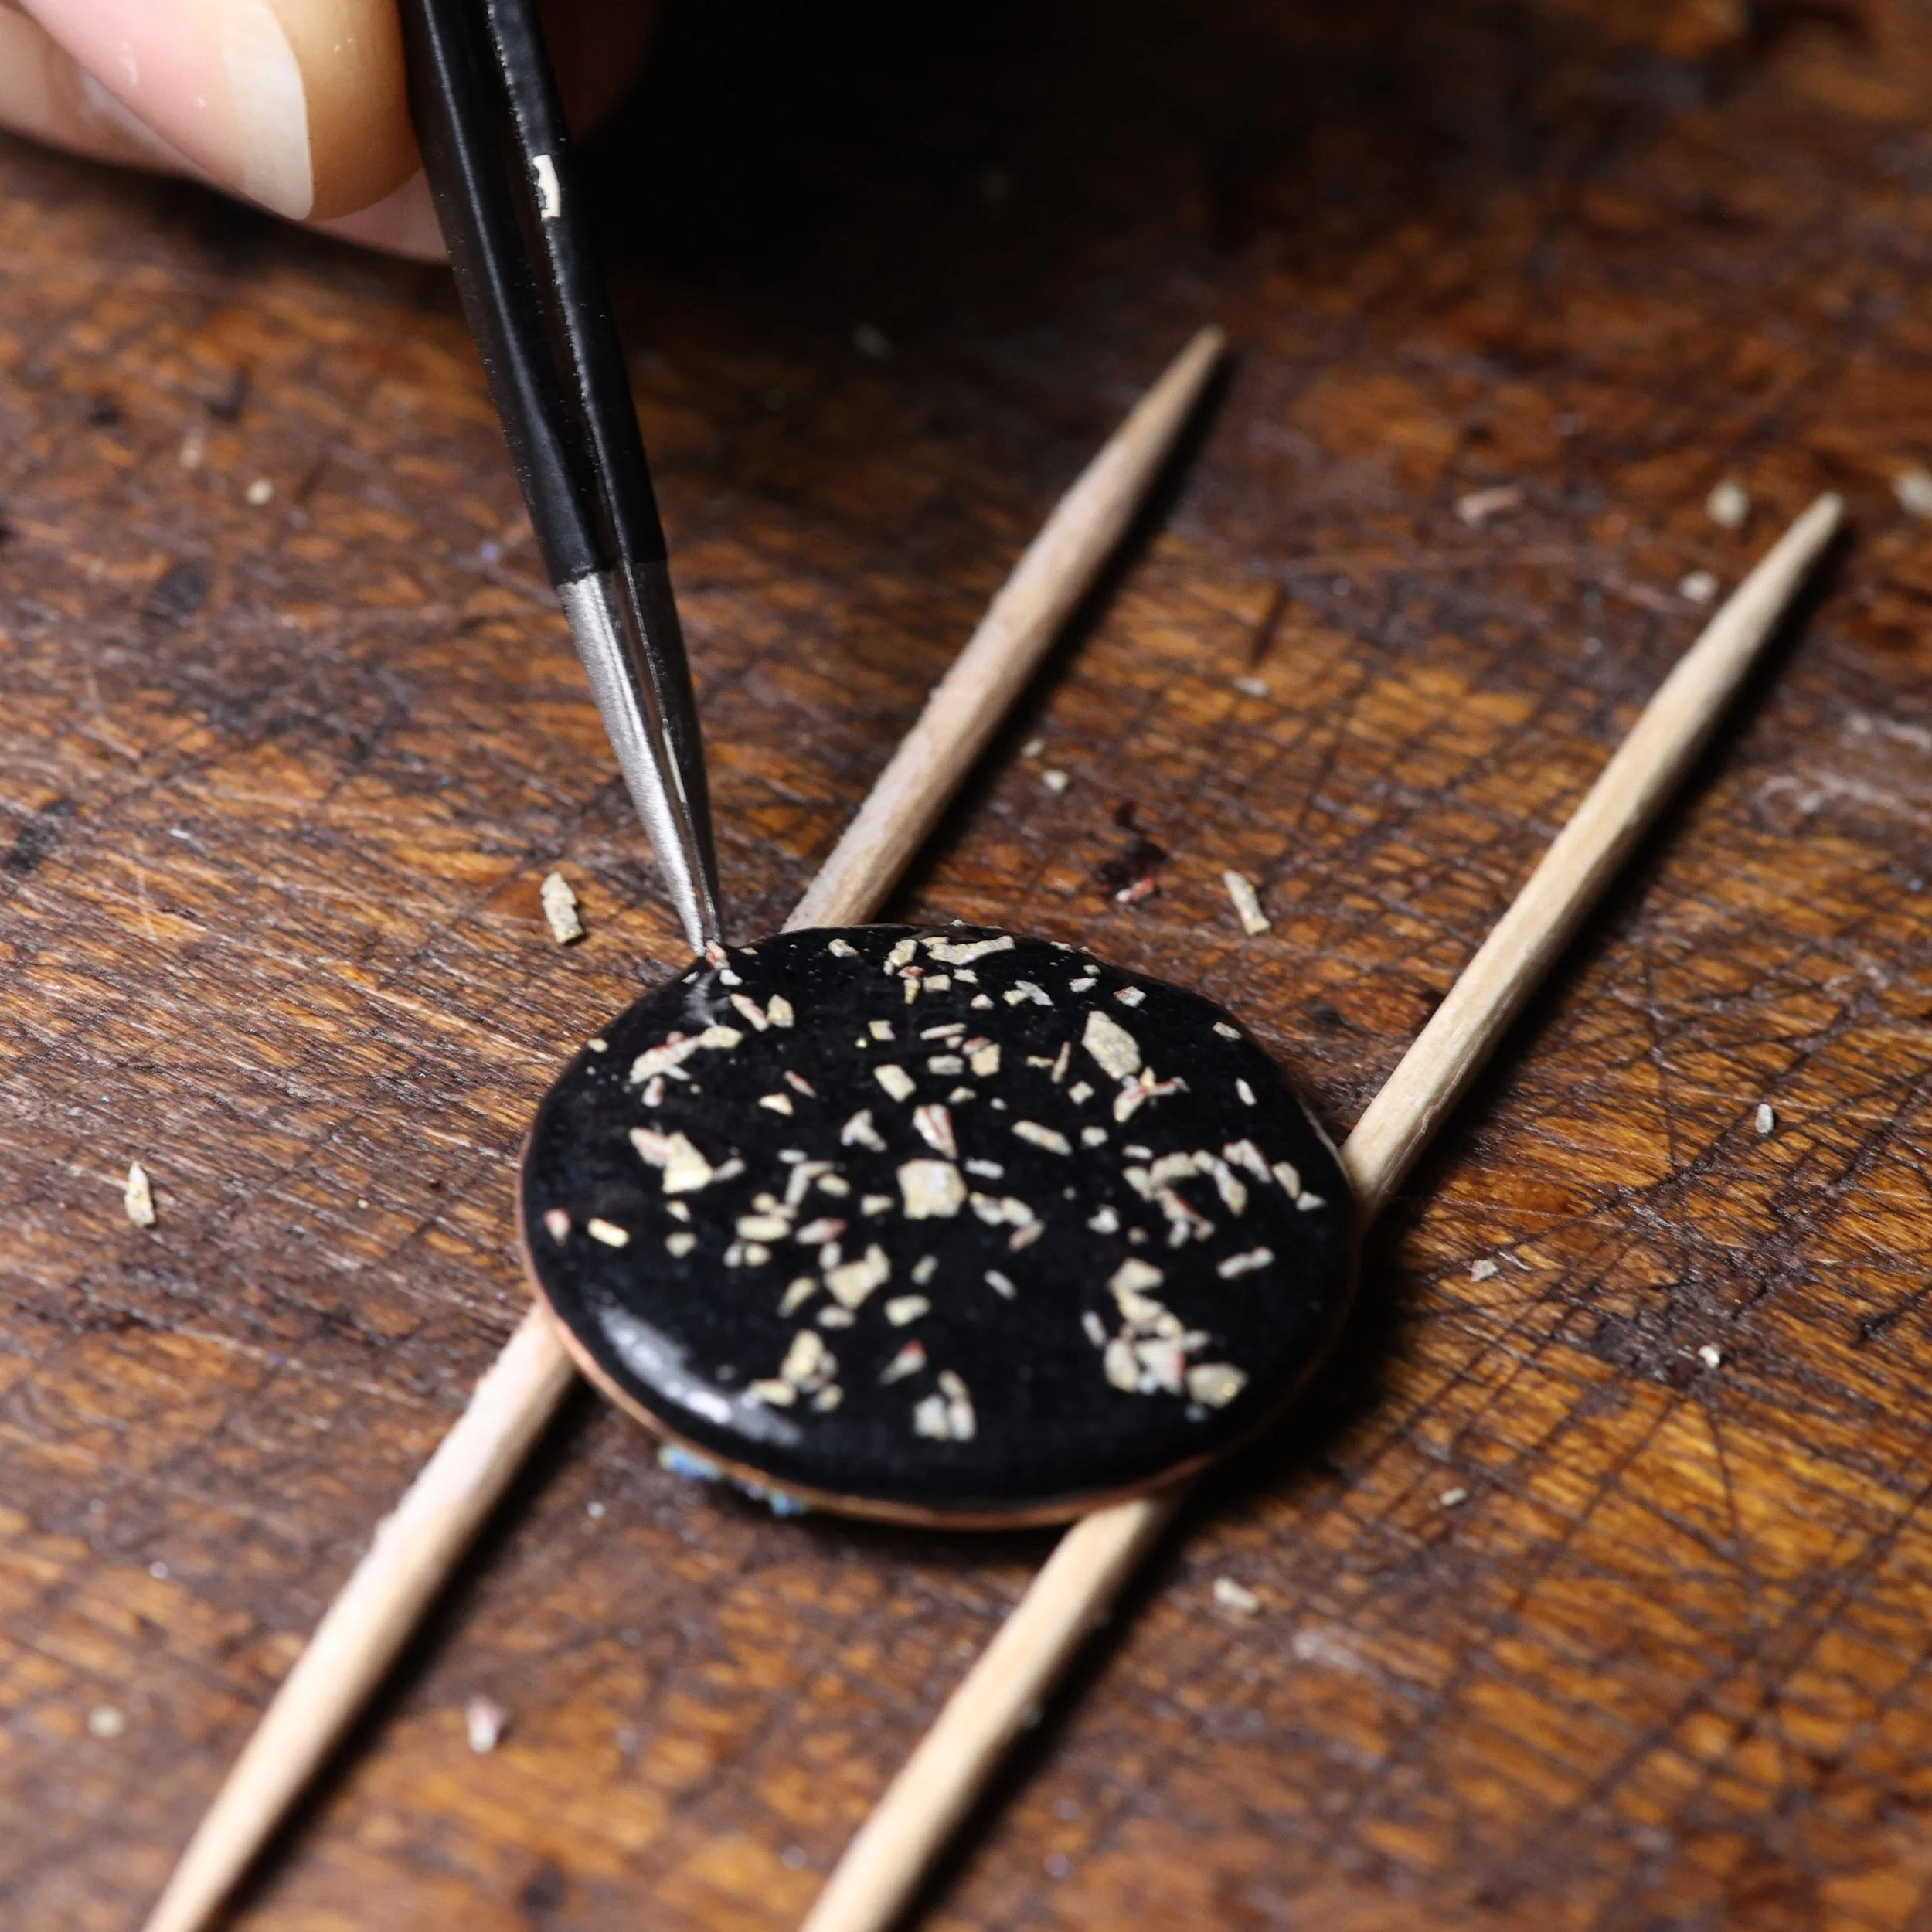
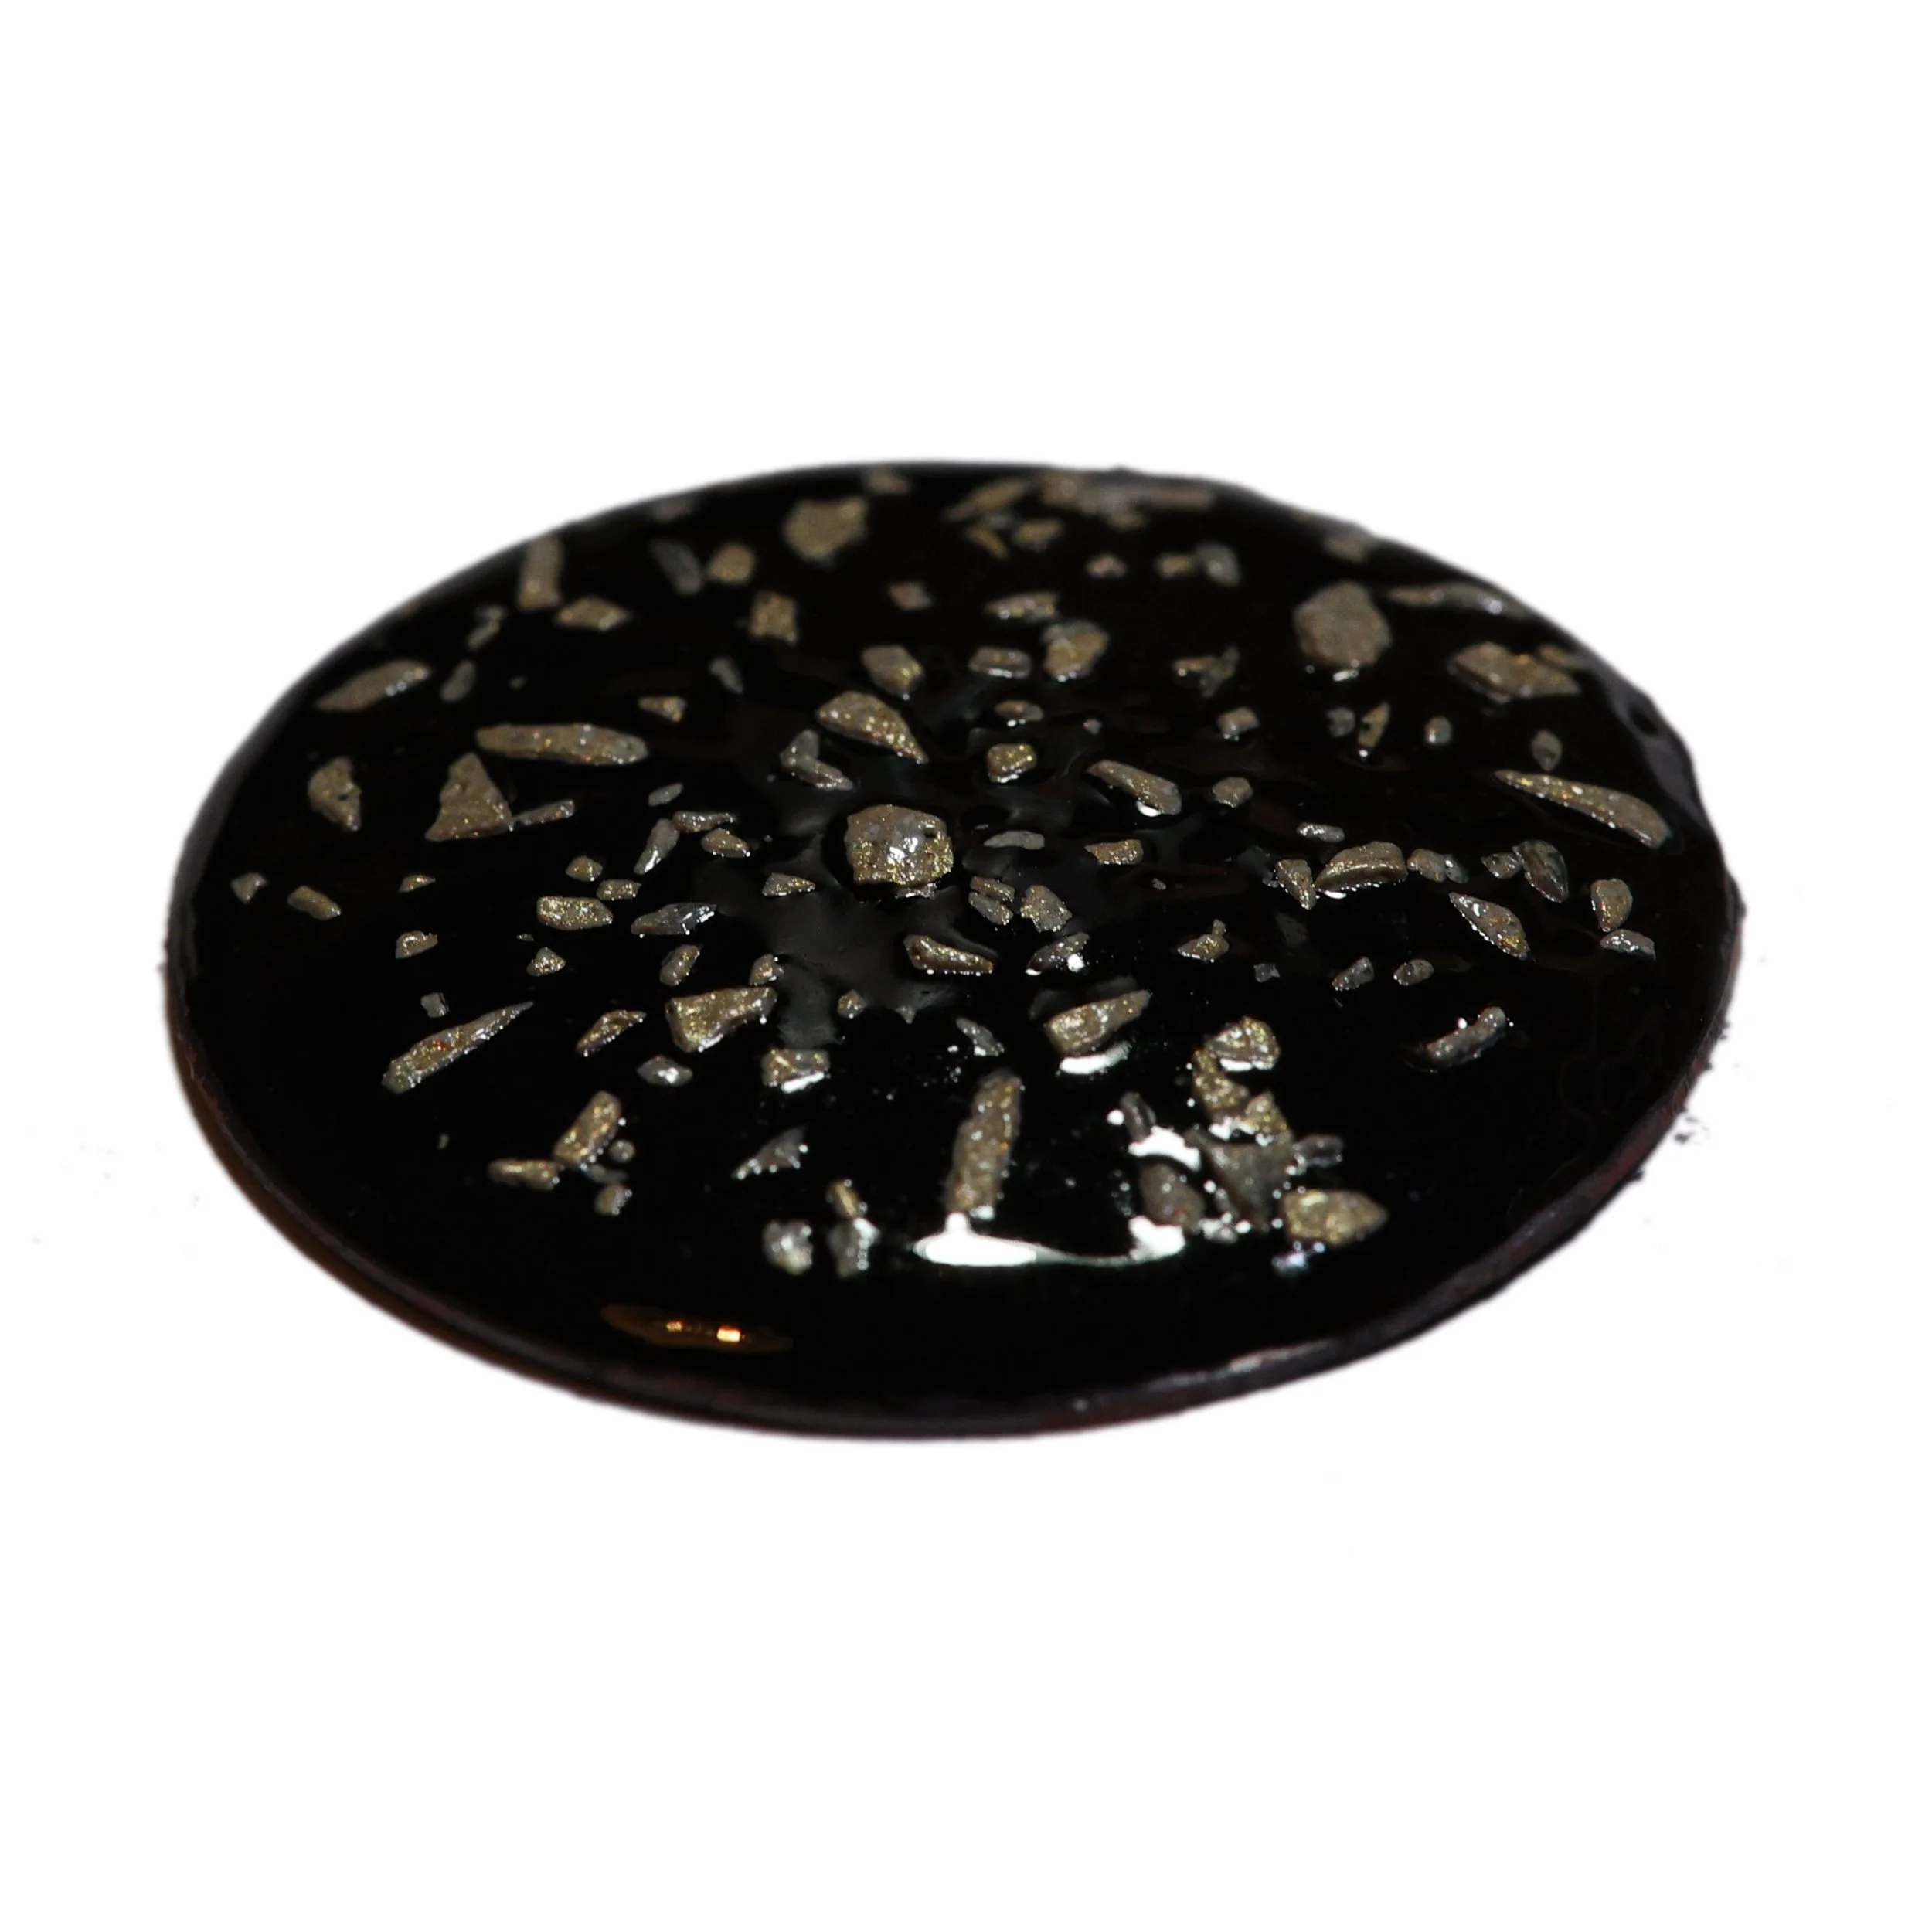

Figure 20: Steps to create a piece covered with metallic enamel flakes.
Conclusion
These enamels give many possibilities through layering, mixing them or simply firing them in different ways to give many different shades. Therefore, it becomes easy to create something unique that stands out from what anyone else can create, even if they are using the same enamels. In summary, these enamels offer something very different from the ordinary.
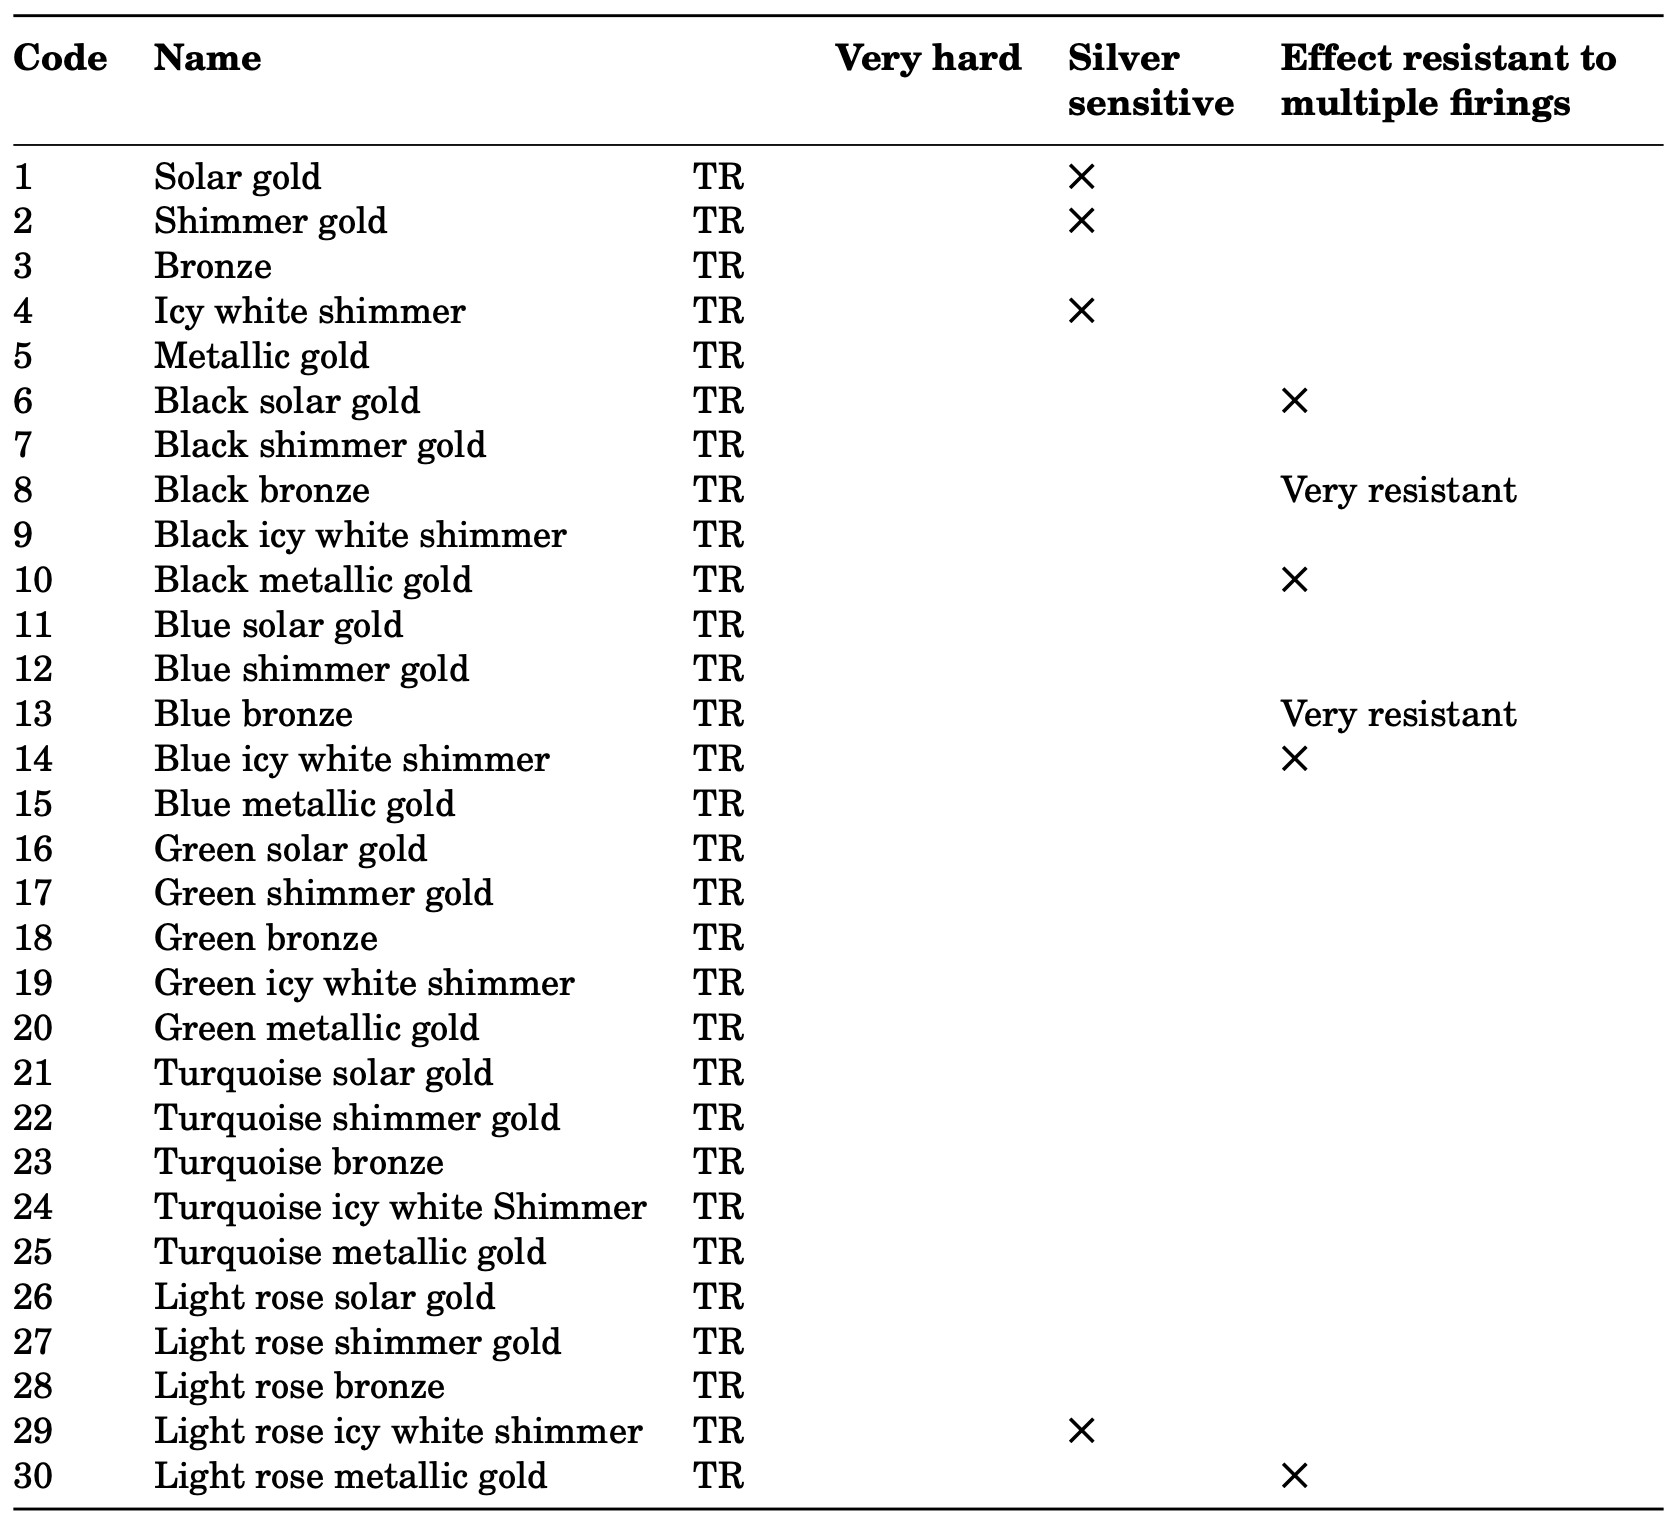
Table 1: Table of transparent metallic effect enamels. Silver-sensitive enamels show only a very light reactivity to silver.

Table 2: Table of opaque metallic effect enamels. Silver-sensitive enamels show only a very light reactivity to silver.
-
Milton Bridge Metallic Effect enamels are a range of 45 vitreous enamels (15 opaque and 30 transparent) that produce metallic and shimmer effects on glass enamel surfaces. They combine a vitreous enamel base with a component that creates a metallic or glittery look. They can be applied on copper, silver, gold, and their alloys, and are compatible with both leaded and lead-free enamels.
-
Shimmer enamels have a more glittery, sparkling effect, while metallic enamels produce a surface that closely resembles actual metal, even though they are made of glass. Shimmer enamels tend to let more light pass through, making them better suited for techniques like plique à jour, whereas metallic enamels are more opaque and work well as accent details.
-
These enamels can be applied both wet and dry. For wet application, use a synthetic brush with long bristles and avoid washing the enamel, as this removes the glitter. Wet only the amount you need with distilled water. For dry sifting, use a 100-mesh sieve and pre-wet the surface with a brush or spray. Apply in thin layers and avoid excess water, which can cause the glitter to separate from the glass.
-
Milton Bridge recommends a firing temperature range of 780 °C to 830 °C. Firing times significantly affect the result: a short firing (around 35–45 seconds at 810 °C) preserves a strong metallic or shimmer effect, while longer firings (60–90 seconds) transform the surface, bringing out the undertone color. Sugar firing can further intensify the glittery effect on shimmer and opaque enamels.
-
Yes. You can apply one or two layers of transparent enamel on top of a fired metallic effect enamel. A soft flux such as Milton Bridge's T600 is ideal because it alters the original effect the least. Colored transparent enamels can also be layered on top for unique results. Lighter enamel colors generally keep the sparkle more visible, but darker transparents can yield surprising combinations.
-
Yes, they work in cloisonné and champlevé. The glitter is present not just on the surface but also within the enamel, so traces remain even after stoning with a carborundum stone or sandpaper. Transparent shimmer enamels with dark undertones give the best results. After stoning, you can apply an extra thin layer of metallic enamel with a brush to restore and enhance the sparkle.
-
Unlike mica or metal powder, which sit only on the enamel surface and lack deep bonding for lasting wear resistance, Milton Bridge metallic effect enamels are formulated for stability and durability. The metallic component is calibrated within the glass to ensure compatibility with various metals and enamel brands. If the effect is lost through overfiring, simply adding another layer restores it (something very difficult with mica or metal powder).
-
Yes, these enamels have excellent compatibility and can be intermixed. For best results, mix the dry powders (not wet) in a sealed container and shake thoroughly to ensure even distribution of glass and glitter. Aim for a 40–60% or 50–50% ratio. Two or even three enamels can be combined, but always test first to confirm the mixture meets both aesthetic and structural requirements.